Ouvvi Deployment Manager
To provide a simpler way to install Ouvvi we have developed the Ouvvi Deployment Manager which is included in the Data Synchronisation Studio Installer. You can use this to create new Ouvvi Instances, manage those instances, upgrade and deploy.
System Requirements
- .NET Framework v4.7.2
- Windows 10, Windows Server 2016 or Higher
- IIS 7.5+
- Microsoft SQL Server Express, Standard, Web, Enterprise 2017 or Higher
- 2 GB RAM
- 1 CPU Core
- 50 GB Disk Space
Install Data Synchronisation Studio
To begin installing Ouvvi, start by downloading and installing the latest version of Data Synchronisation Studio from the Simego website.
The Deployment Manager is available in Data Synchronisation Studio version 3.0.1158 and higher.
Open Ouvvi Deployment Manager
Open the Ouvvi Deployment Manager to begin setting up your Ouvvi Tenant.
If you have just installed Data Sync you will be presented with a window asking if you would like to install or update your Ouvvi instances.
Click on the Open Ouvvi Deployment Manager button to open the Deployment Manager.
Otherwise you can open the Deployment Manager through Data Sync by going to Tools -> Ouvvi Deployment Manager.
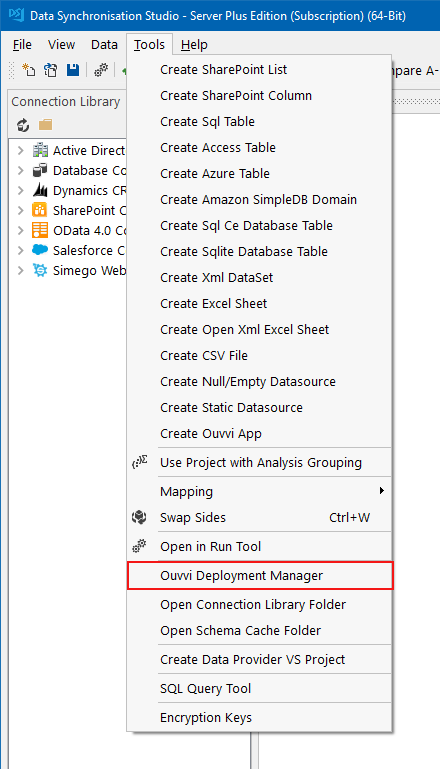
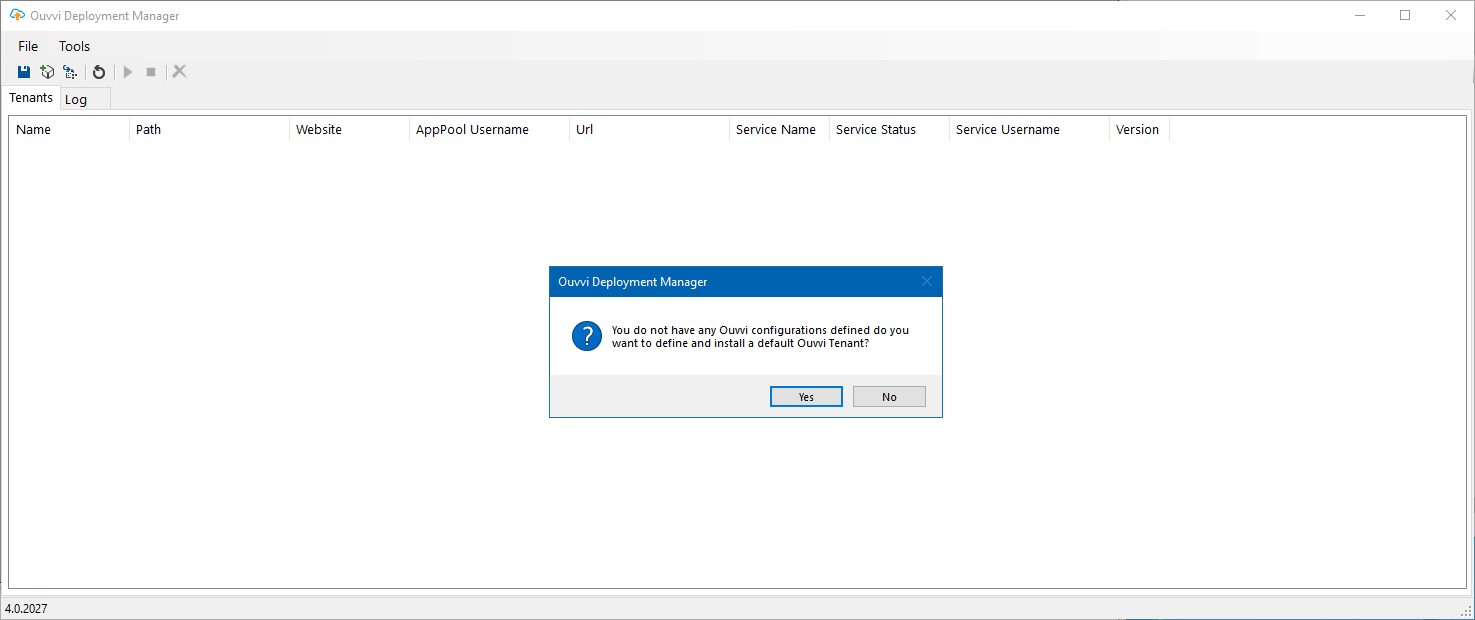
When you first open the Deployment Manager you will be given the option to define a default Ouvvi Tenant. If you would like to use the default configuration click Yes to create this.
Your Deployment Manager should now show an initial default Ouvvi Tenant if you choose to create the default Tenant. Otherwise you will need to define a new Ouvvi Tenant, please see our Add Tenant page on how to do this.

Install IIS components
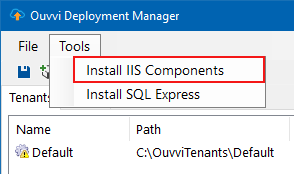
Before installing Ouvvi you will first need to ensure that the default IIS configuration is installed. To do this go to Tools -> Install IIS Components.
This will run a PowerShell Script to install the required IIS Components.
Install SQL Server
Ouvvi requires a SQL Server to run and store all of the necessary project files. It can be run on all editions of Microsoft SQL Server, from SQL Express through to Enterprise Edition.
SQL Express is typically used to deploy Ouvvi unless you have an existing SQL Server.
To download SQL Server Express edition go to Tools -> Download SQL Express which will begin the download of the SQL installer.
Please note that this will open a command window whilst it downloads.
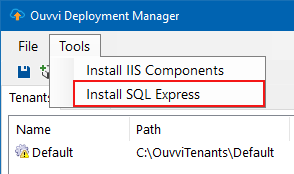
Once this has downloaded the SQL Server setup window will open. Run through this changing any of the settings if you need to, otherwise you can keep clicking next until the installation is complete.
Edit Ouvvi Tenant Settings
To edit your Ouvvi tenant settings from the default configuration, double click on your Tenant to open the configuration window. Then change any of your configuration settings as required.
Please see Add Tenant for configuration details.
If you are editing the configuration of your Ouvvi Tenant after installation, please uninstall your Tenant before making any configuration changes. Re-installation after the changes have been made will not affect your projects, unless you have changed the SQL Server.
Install Ouvvi Tenant
You now need to install your tenant, right click onto your tenant and choose Install.

Then check the Log tab for confirmation of success, or to see any errors that may have occurred before proceeding.

To begin using Ouvvi browse to your site by right clicking and choosing Browse.

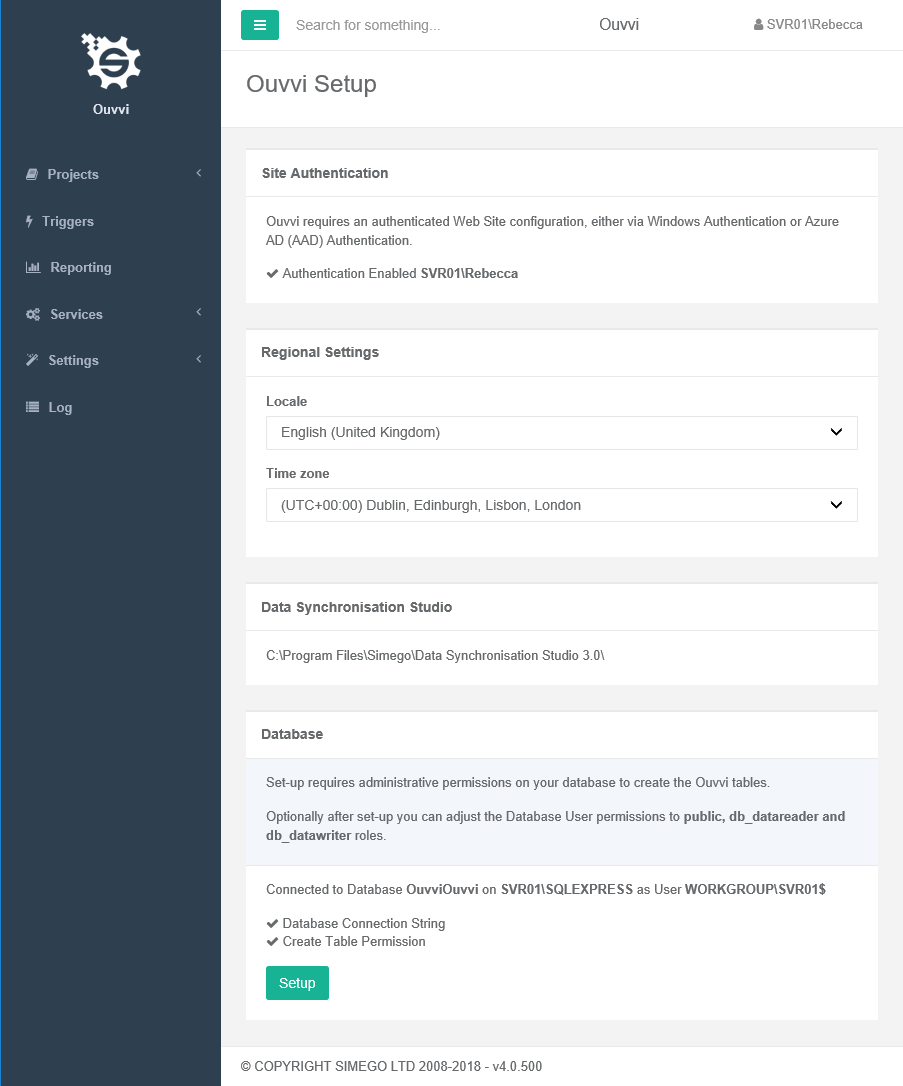
Check all of your settings are correct and then click Setup.
Install Ouvvi License Key
Ouvvi uses the same Data Synchronisation Studio Server license key as Data Synchronisation Studio.
Ouvvi will not run any projects and steps without a valid license key installed.
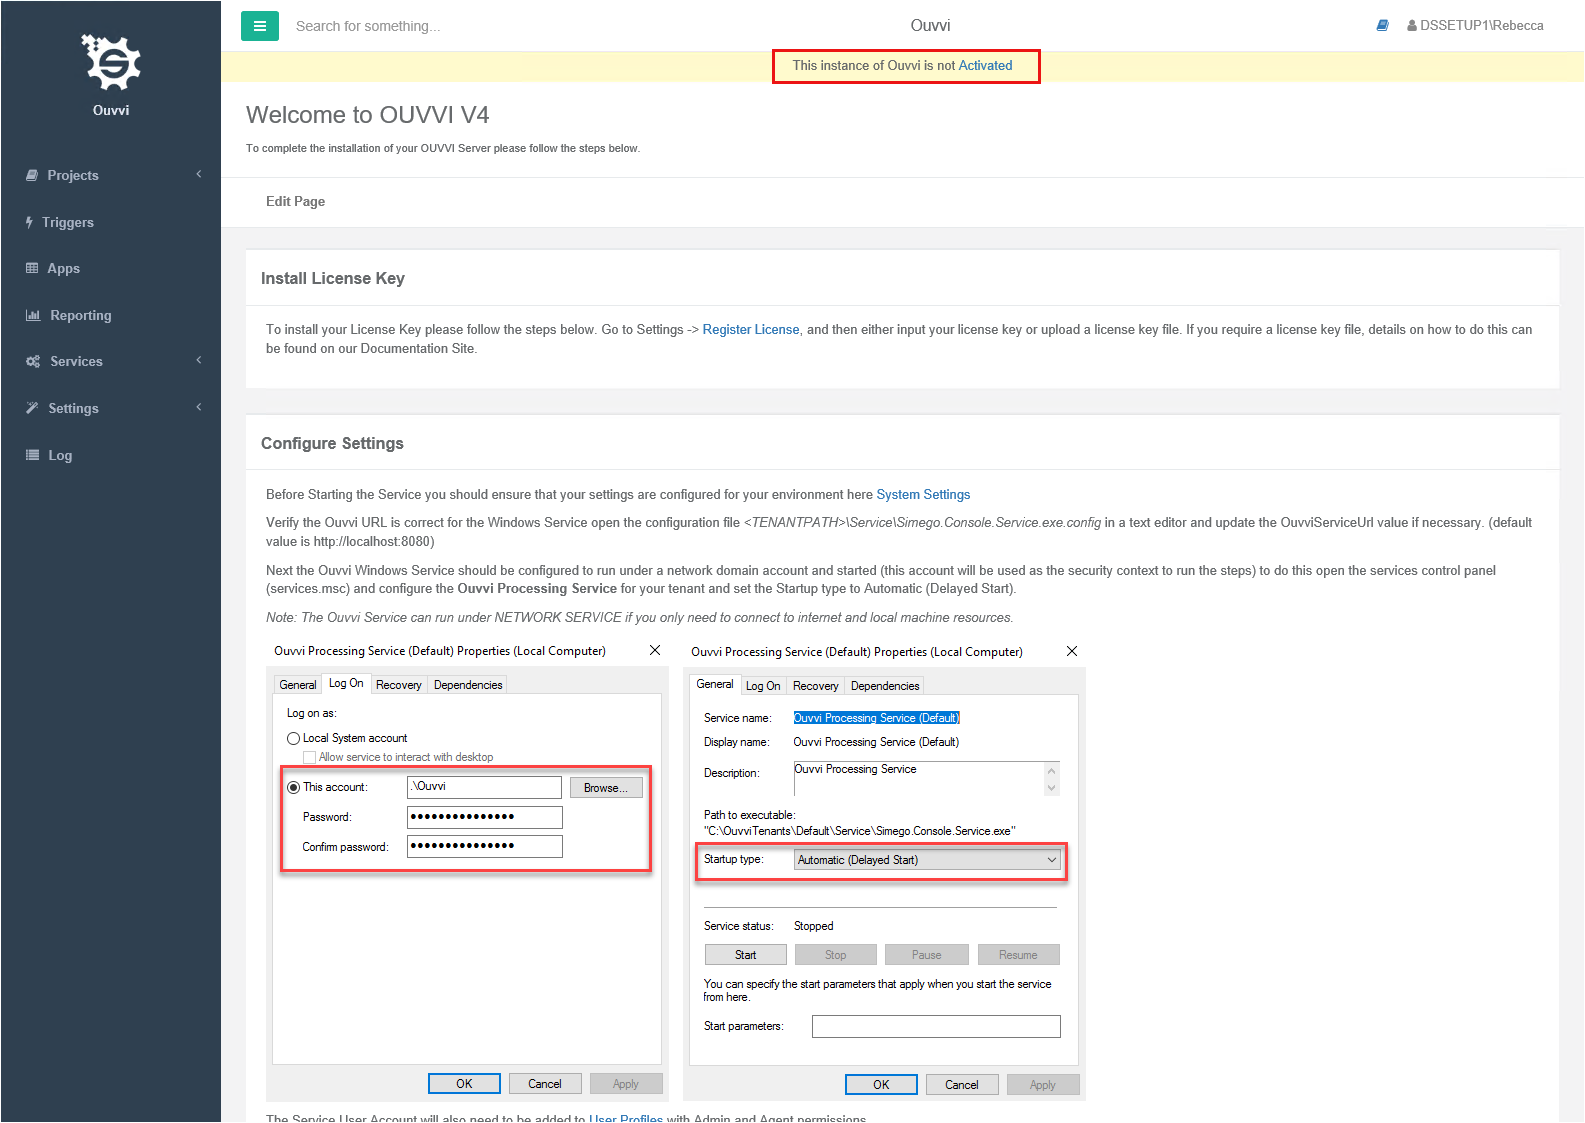
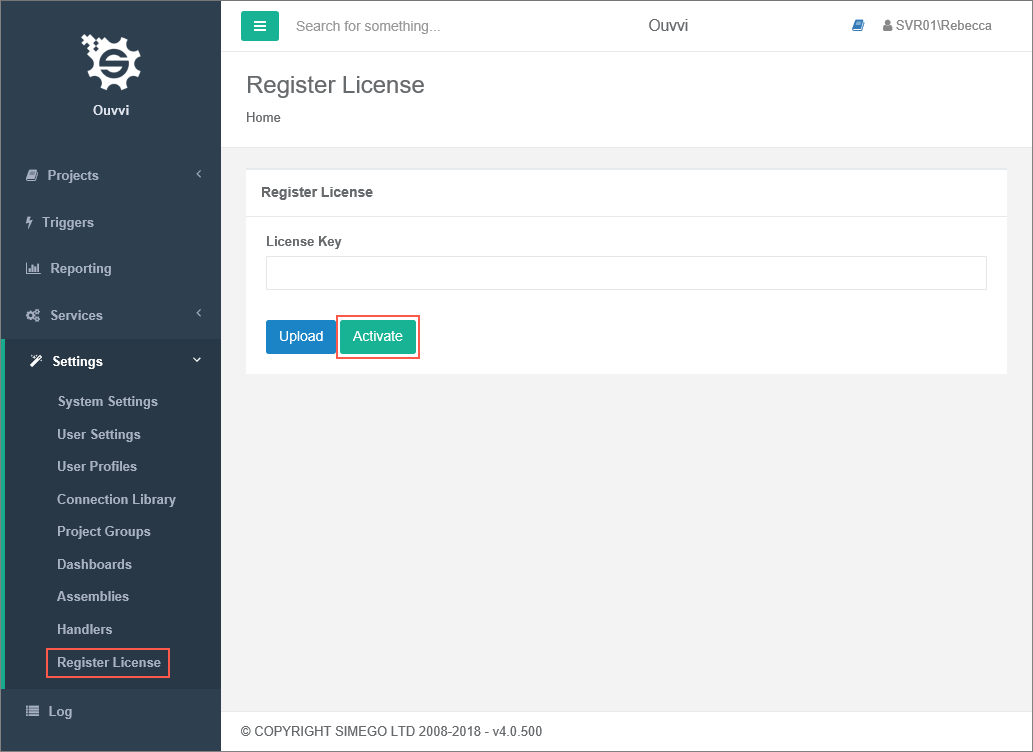
To register your license key either click on the Activate hyperlink or go to Settings -> Register License and then enter your license key into the specified box and click 'Activate'.
If you do not have an internet connection and need to activate your key, please see our page on Manual License Key Activation.
Check Service User Permissions
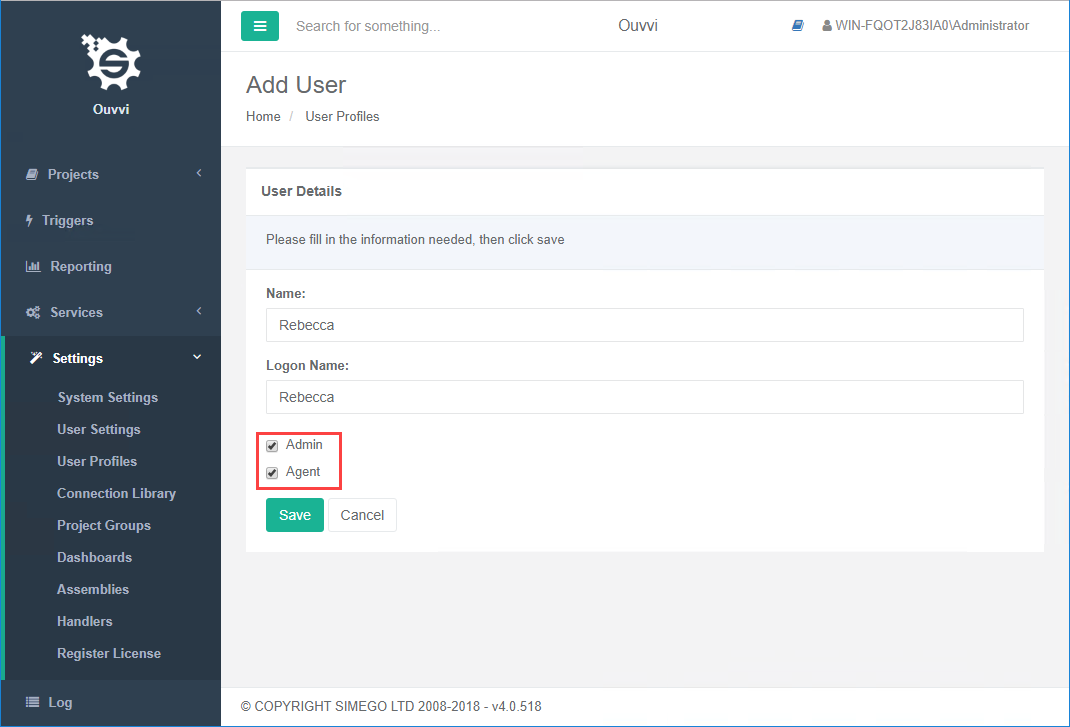
If you have changed the Service account user, you will need to ensure that the User has been added to Ouvvi with Admin+Agent permission.
If the service account is not listed under Settings -> User Profiles then you will need to add the service account. If the service account is listed you need to ensure that agent and admin permissions are applied.
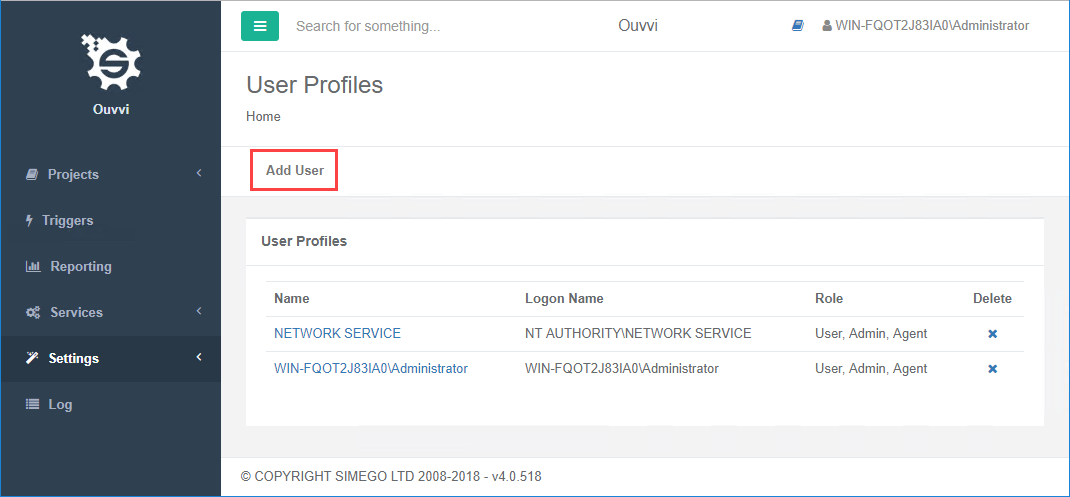
To apply Agent & Admin permissions either create a new user, or click on the user you wish to add permission to and check the checkboxes for Agent+Admin and then press Save.
Start Ouvvi Services
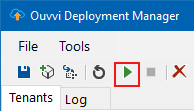
Now go back to the deployment manager and start your services. You can do this either by clicking the green play button in the menu or by right clicking on your instance and selecting Start Service from the list.

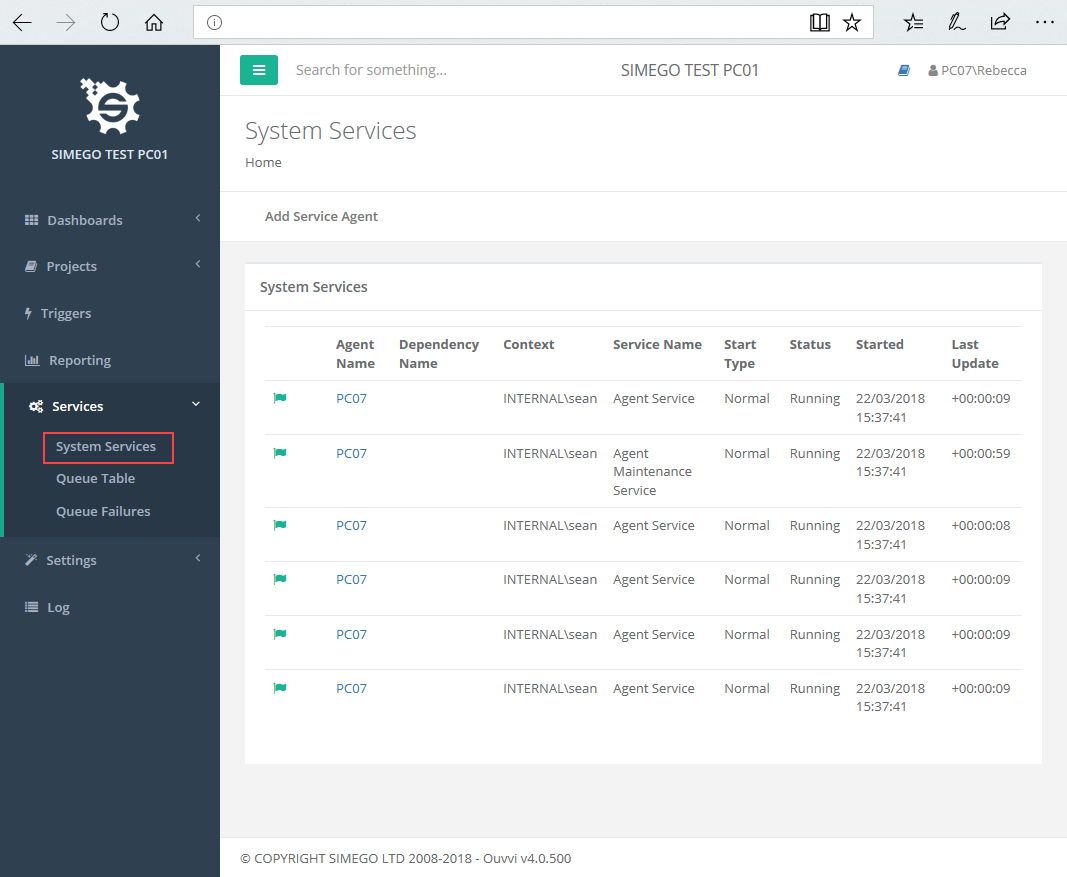
Now if we browse back to our Ouvvi site and go to Services > System Services we can see that all of the flags are green and the services are running.
Edit the Service
If you need to edit the service at any point, such as changing the account the service uses to run, you can open the services window by right clicking onto your instance and selecting Open Service Control Manager.

However you can edit the majority of the settings you will need to by double clicking on your tenant to open the configuration window.
Open the Tenant Folder
If you need to access the tenant folder for your Ouvvi instance you can right click onto your instance and select Show in Windows Explorer.

Troubleshoot - Services not Starting
If you are logging into Ouvvi from the same machine it is being run from and you are finding the services do not start you most likely are getting a Windows Authentication Error due to Loopback Protection.
You may get an error message in the log of 401.
Loopback Protection is enabled on the Server OS by default, and disables authenticating against local Windows accounts through HTTP and a Web browser.
To fix this issue you can disable Loopback check through any of the following methods:
Through Powershell
Run the following script from Powershell
New-ItemProperty HKLM:\System\CurrentControlSet\Control\Lsa -Name "DisableLoopbackCheck" -Value "1" -PropertyType dword
Through the Registry
Find the following key in the registry on the server
HKEY_LOCAL_MACHINE\SYSTEM\CurrentControlSet\Control\Lsa
and edit or add a new key
DisableLoopbackCheck (DWORD)
then set the value to 1 to disable the looback check (local auth works), or to 0 (local auth is not allowed)
