Steps
Steps are what Projects will process when they run, each Step is an individual unit of work with a success or failure outcome. As each step is processed the project will automatically move to the next step.
Internally Ouvvi processes Steps via a Queue in the Ouvvi Database this guarantees that the steps get processed and the process can survive system failures and restarts.
Step Types
To view all of the Step types available in Ouvvi, please visit our steps documentation pages.
Creating New Steps
To add a new Step to a project, select the Add Step menu from the Project page. After you start using Steps the most recent types will be listed automatically however initially choose More... to view all the Step Types.
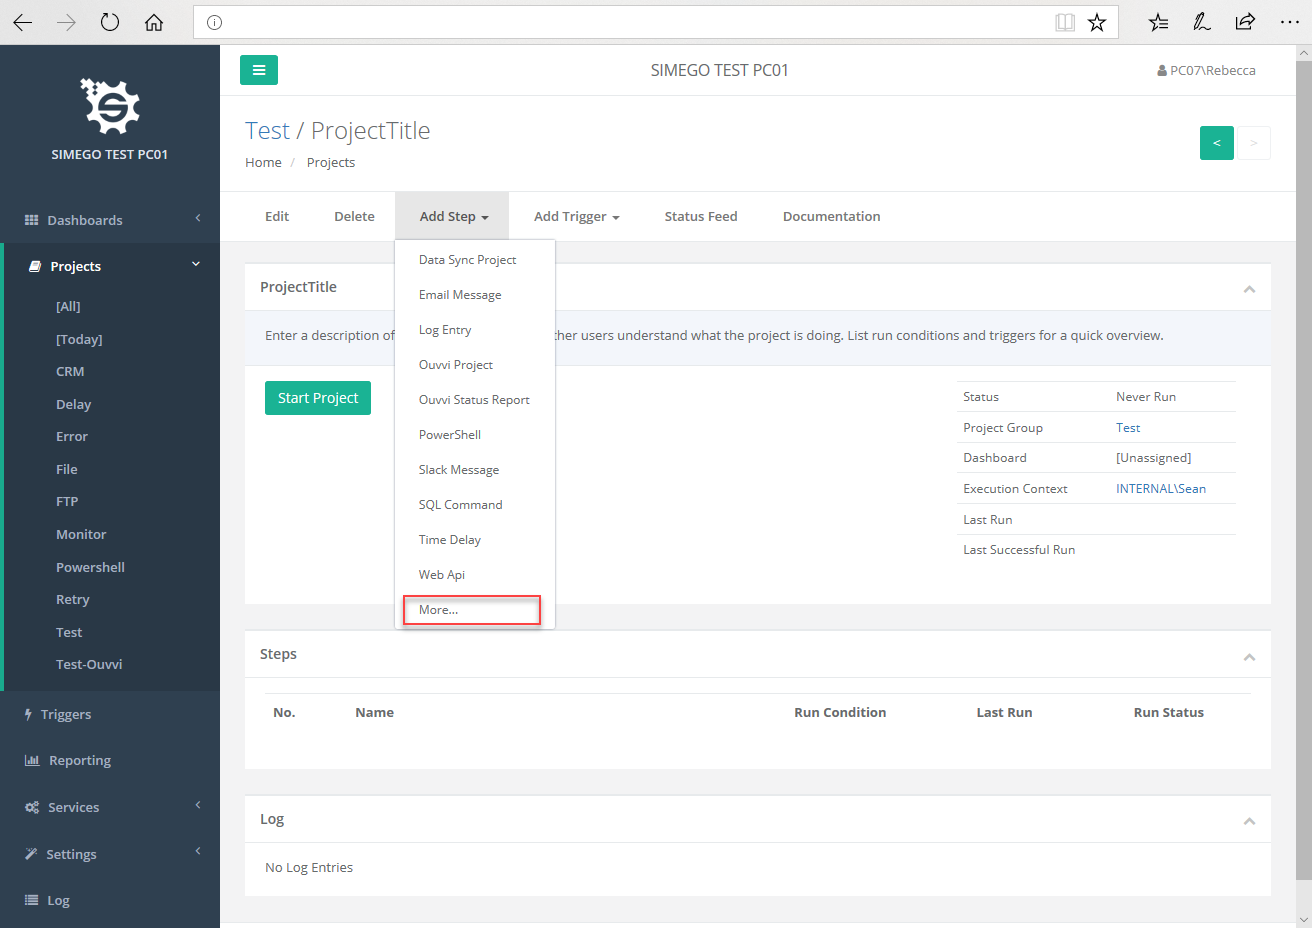
The most important Step type in this list is the Data Sync Project step type. This is the one that you use to run Data Sync project files.

The next step is to configure the Step, provide a Name for the Step and with Data Sync steps you can either upload an existing *.dsprj file or if you just save the step it will create an empty Data Sync project you can open.
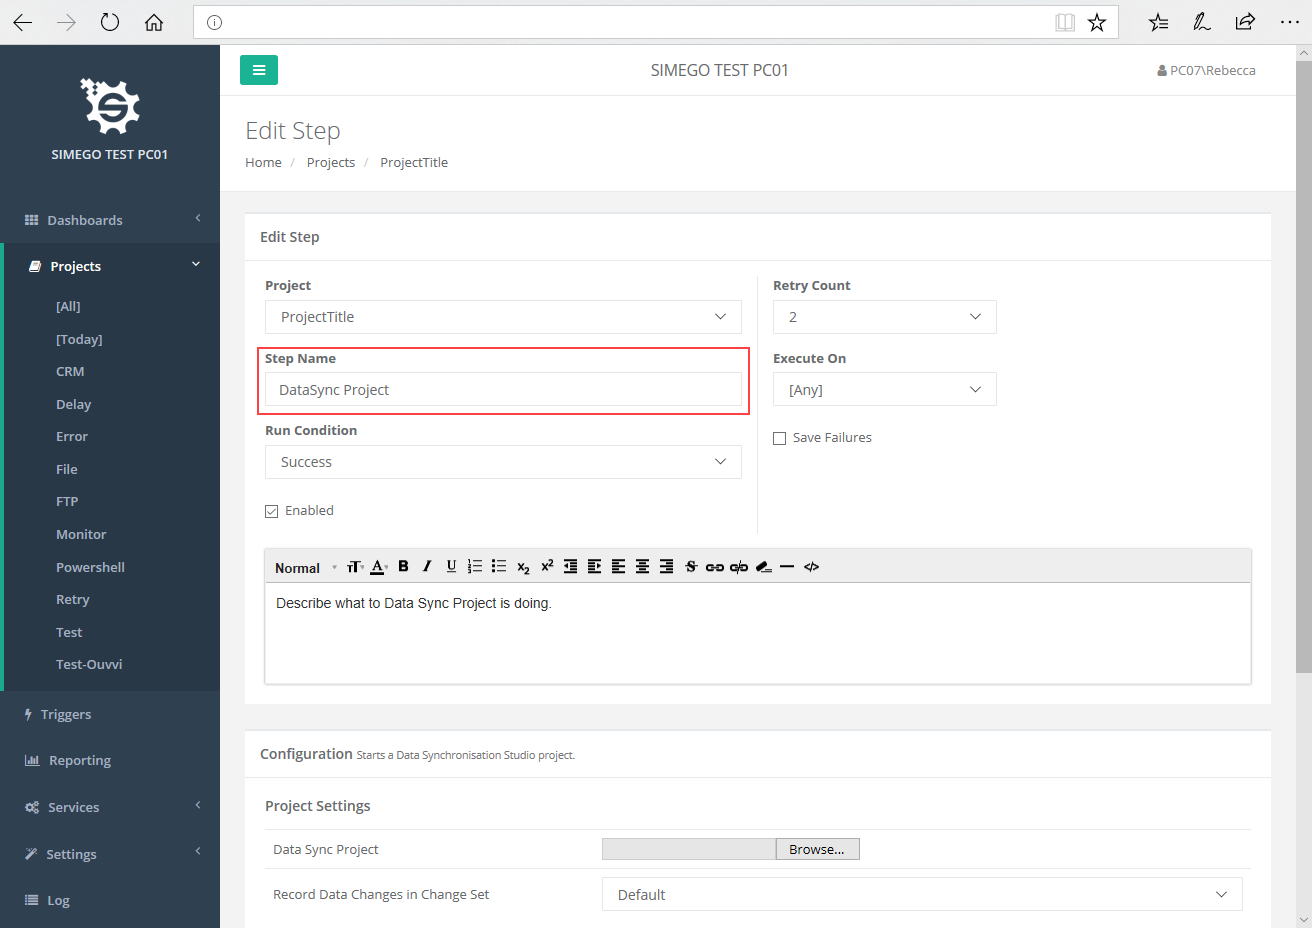
Step Configuration Options
Each Step has a set of common configuration options that control how the step is processed.
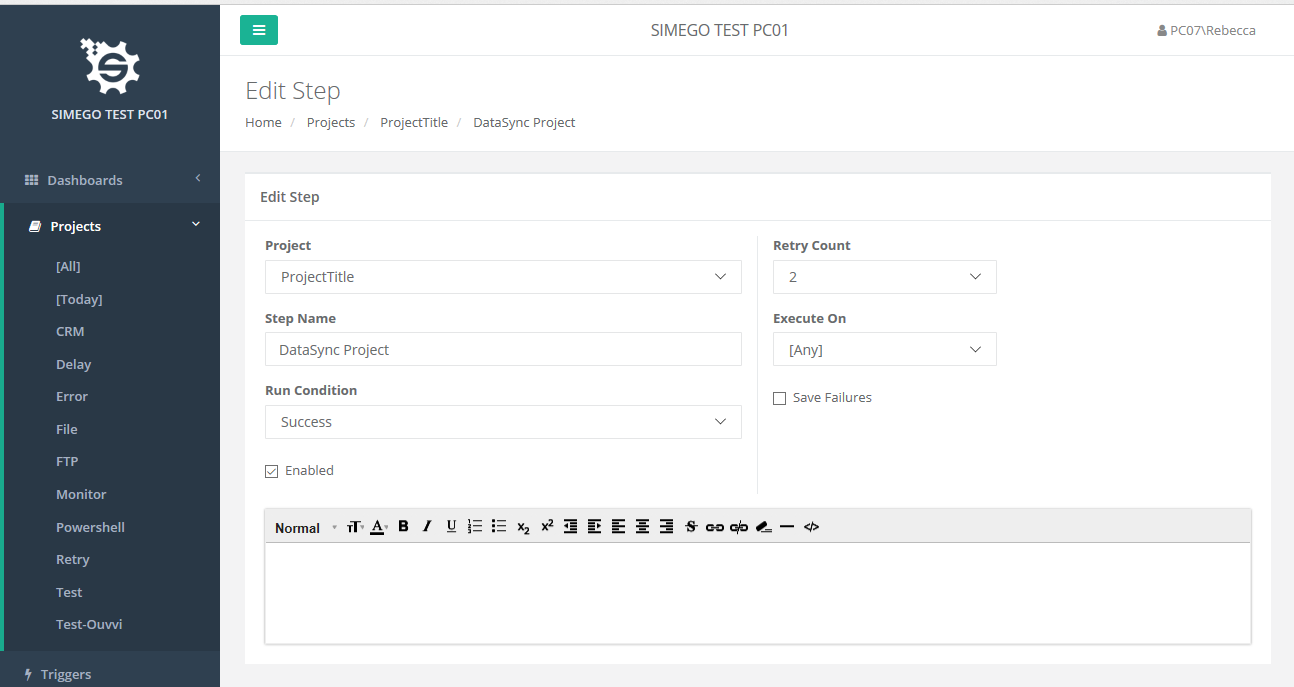
Project
The project that this step is assigned to, you can move this step to another project by changing this value.
Run Condition
The Run Condition provides flow control, if a step completes successfully the Run Status is Success therefore if the next step Run Condition is either Any or Success this step will run. However if the Run Condition is Failure then this step will only run if any of the preceding step(s) returned an error and the Run Status is Failure.
Retry Count
This is the number of times this step is restarted before it is considered a failure. The default value here comes from System Settings.
Enabled
Marks the Step and enabled in Ouvvi, if the step is disabled it does not run in the sequence.
Execute On
If you have multiple Service Agents on multiple machines you can mark this step to only run on the specified Agent. This is useful if you have a dependency on certain resources like a Step that must run OnPremise vs in the Cloud.
Save Failures
This will cause any failure to be written to the Failure Queue, where they can then be re-submitted. This is really only applicable in a messaging type project when the project has a stateful context value. Normal Data Sync type projects can simply be started again so this is normally disabled.
Copying Steps
You can create a copy of an existing step by pressing Copy in the mini-toolbar of the step you wish to copy.

Changing Step Sequence
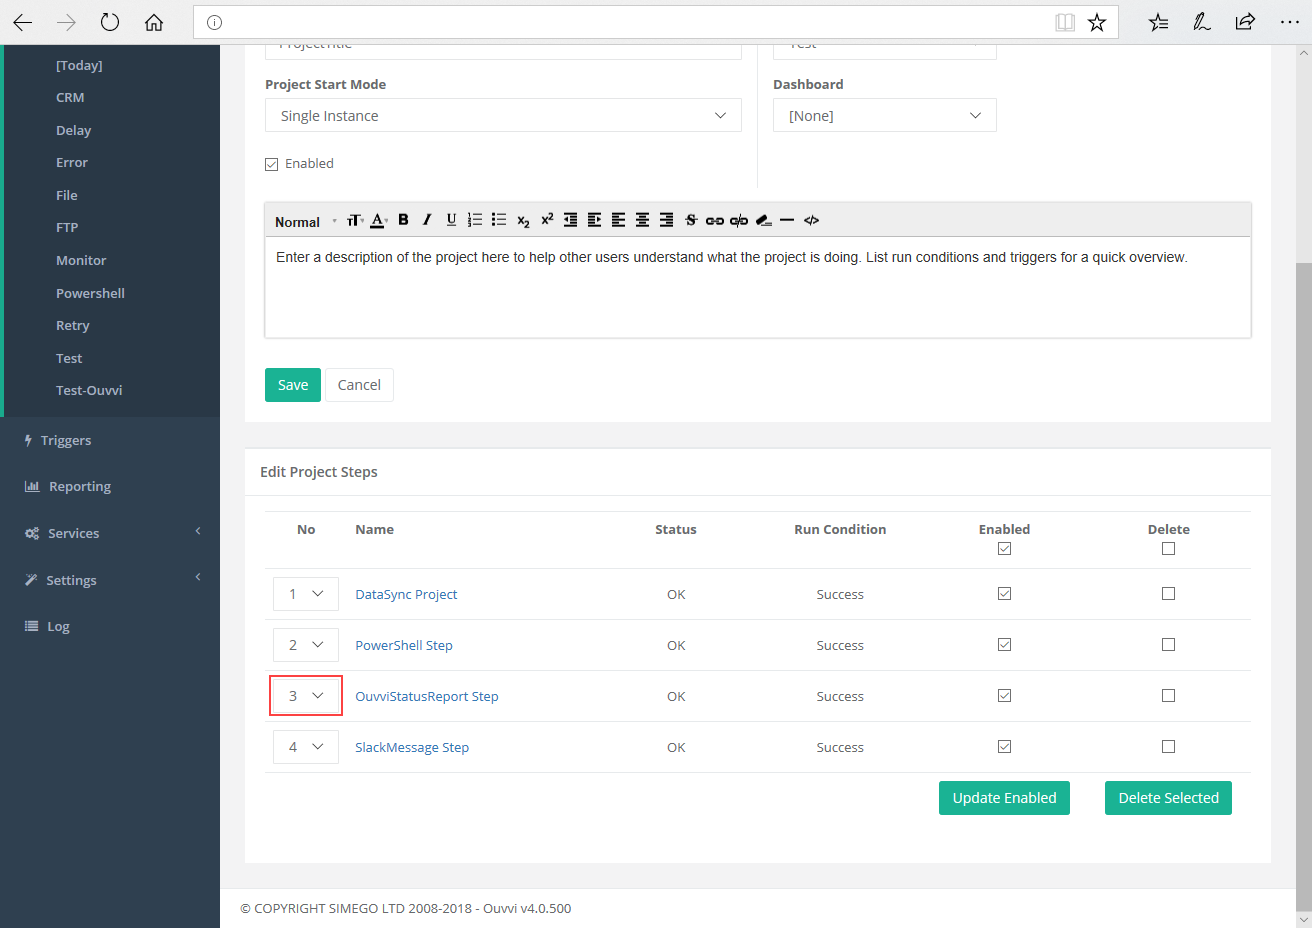
To change the order of the steps Edit the project and then change the order sequence number to move the steps up and down.
Enabling and Disabling Steps
To disable a step from your project Edit the project and then uncheck the checkboxes of the steps you wish to disable and press 'Update Enabled'.
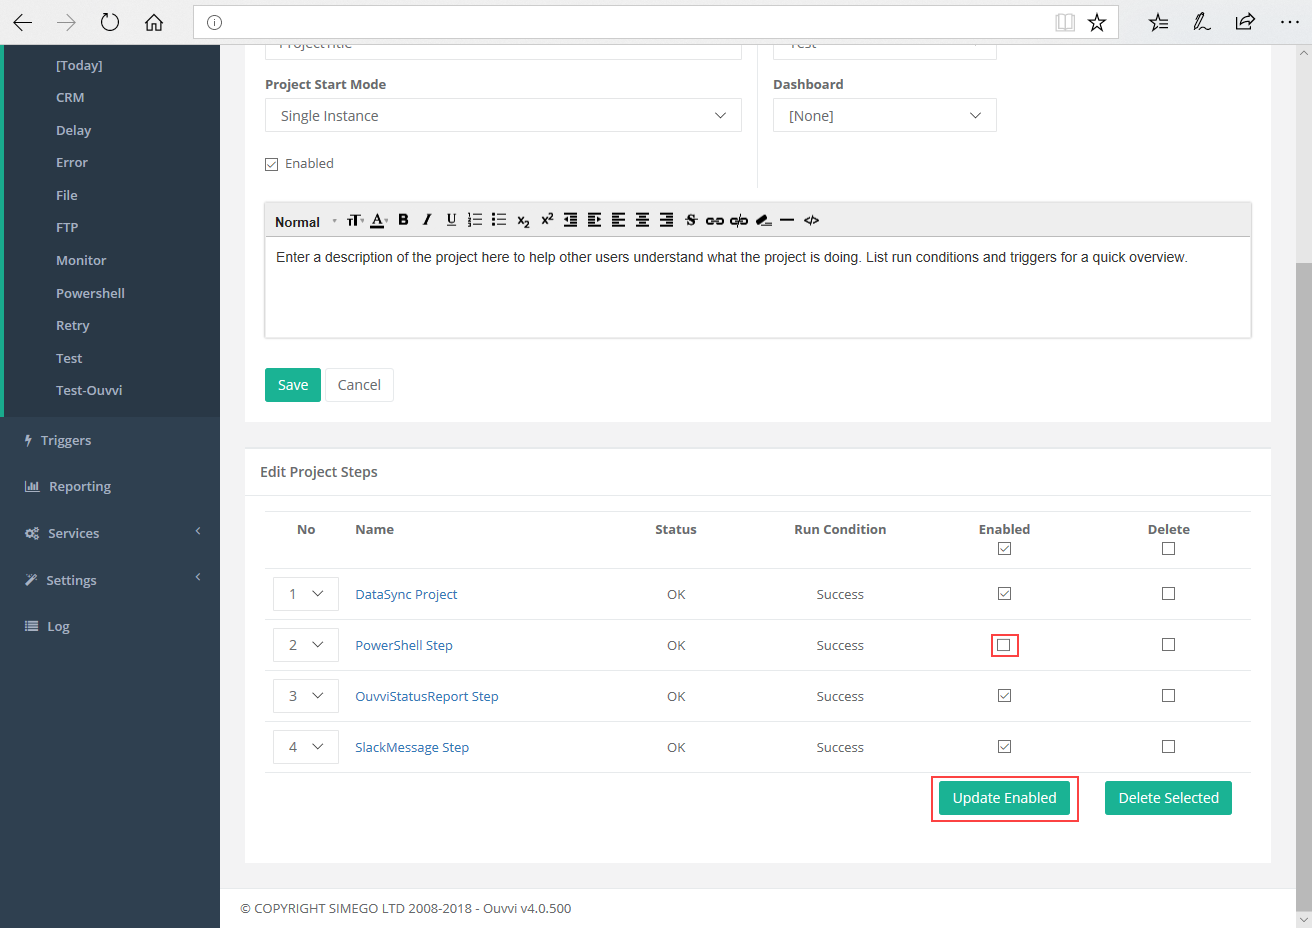
This will keep the step within the project but will not run when the project starts, until it is enabled again.
To enable steps, please repeat the previous steps but check the checkboxes.
Deleting Steps
To delete a step from your project Edit the project and then check the checkbox of the step you wish to delete and press 'Delete Selected'.
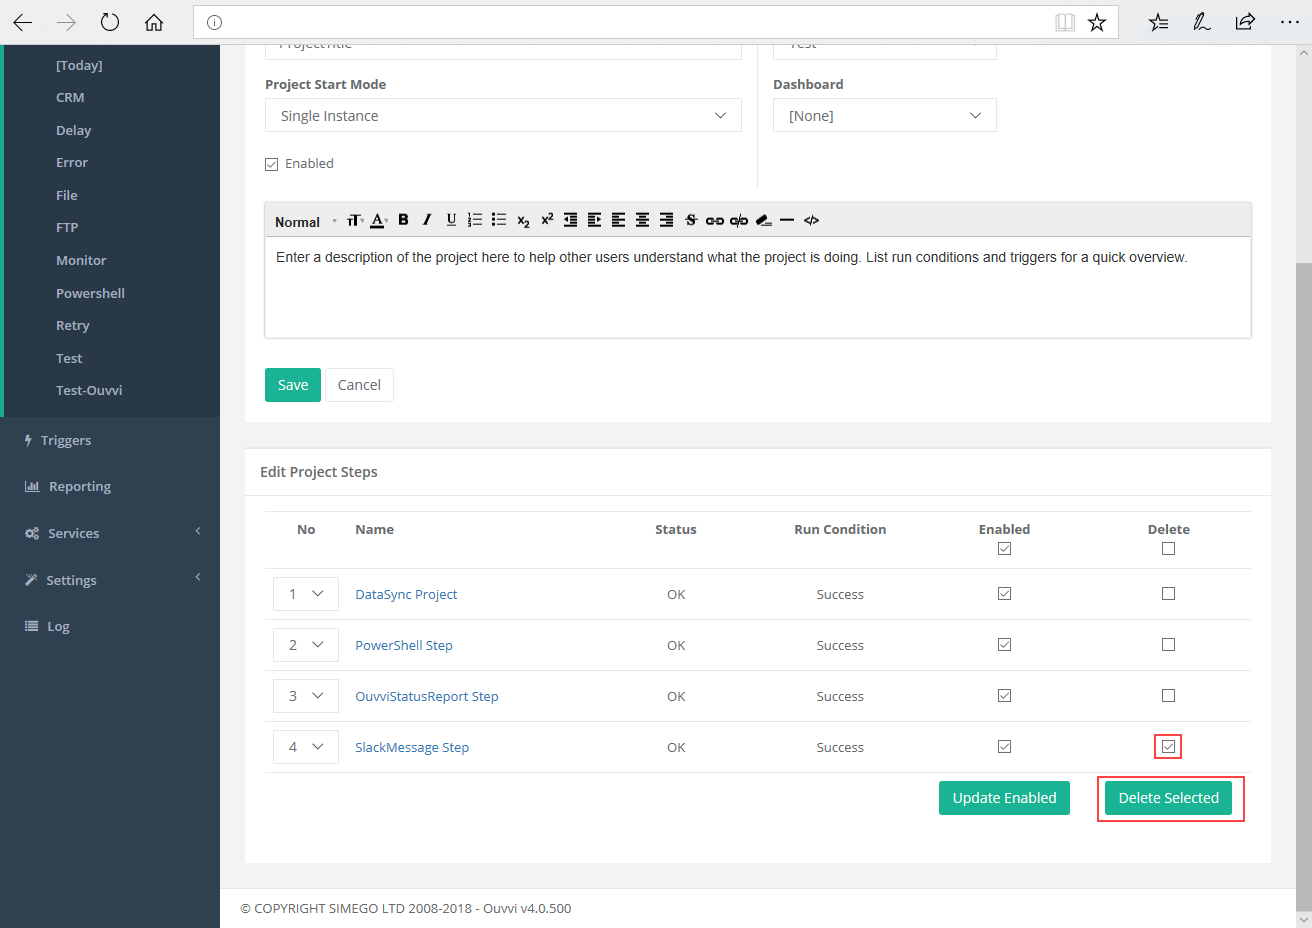
One you have pressed this a confirmation screen will appear to make sure you wish to delete that step. Press 'Delete' to delete the step.
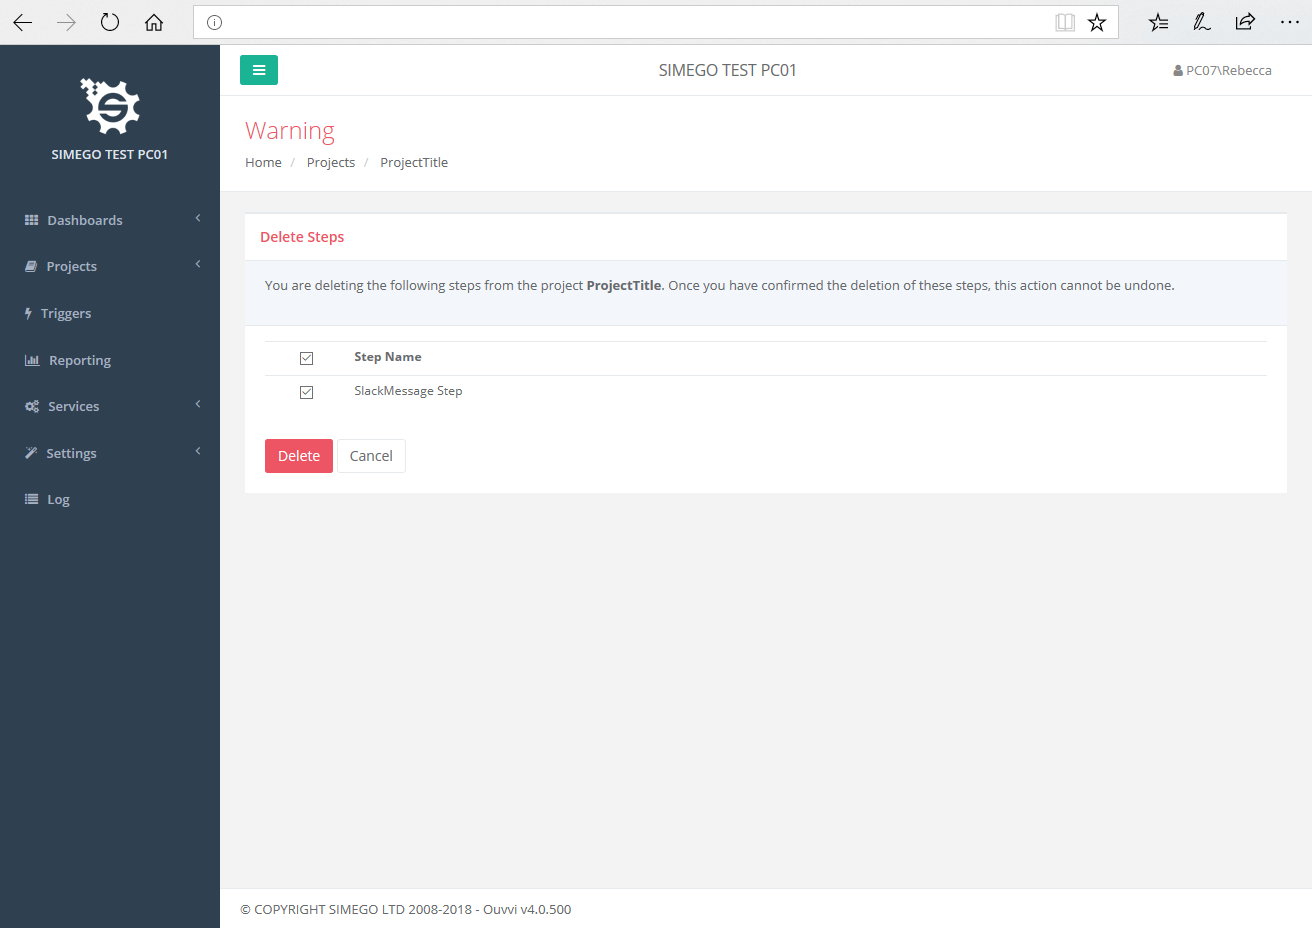
Note: Steps cannot be recovered once they have been deleted.
Modified Details
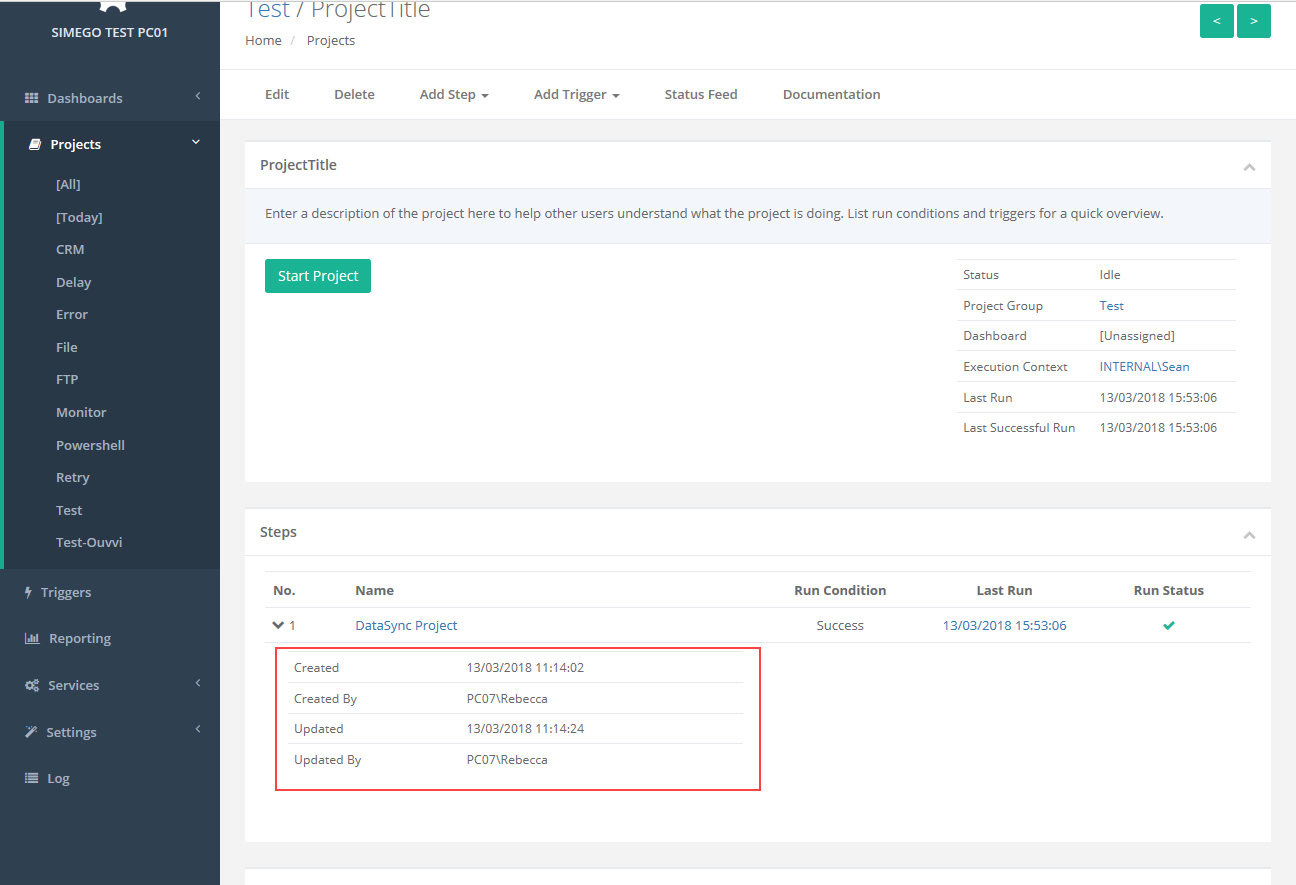
You can see who created and who modified the steps within a project, including the date and time the step was created/modified by clicking on the arrow next to the step number.
Version History
Ouvvi will keep a copy of the step configuration each time it's saved so you can browse the changes that have been made and restore an old version if required.
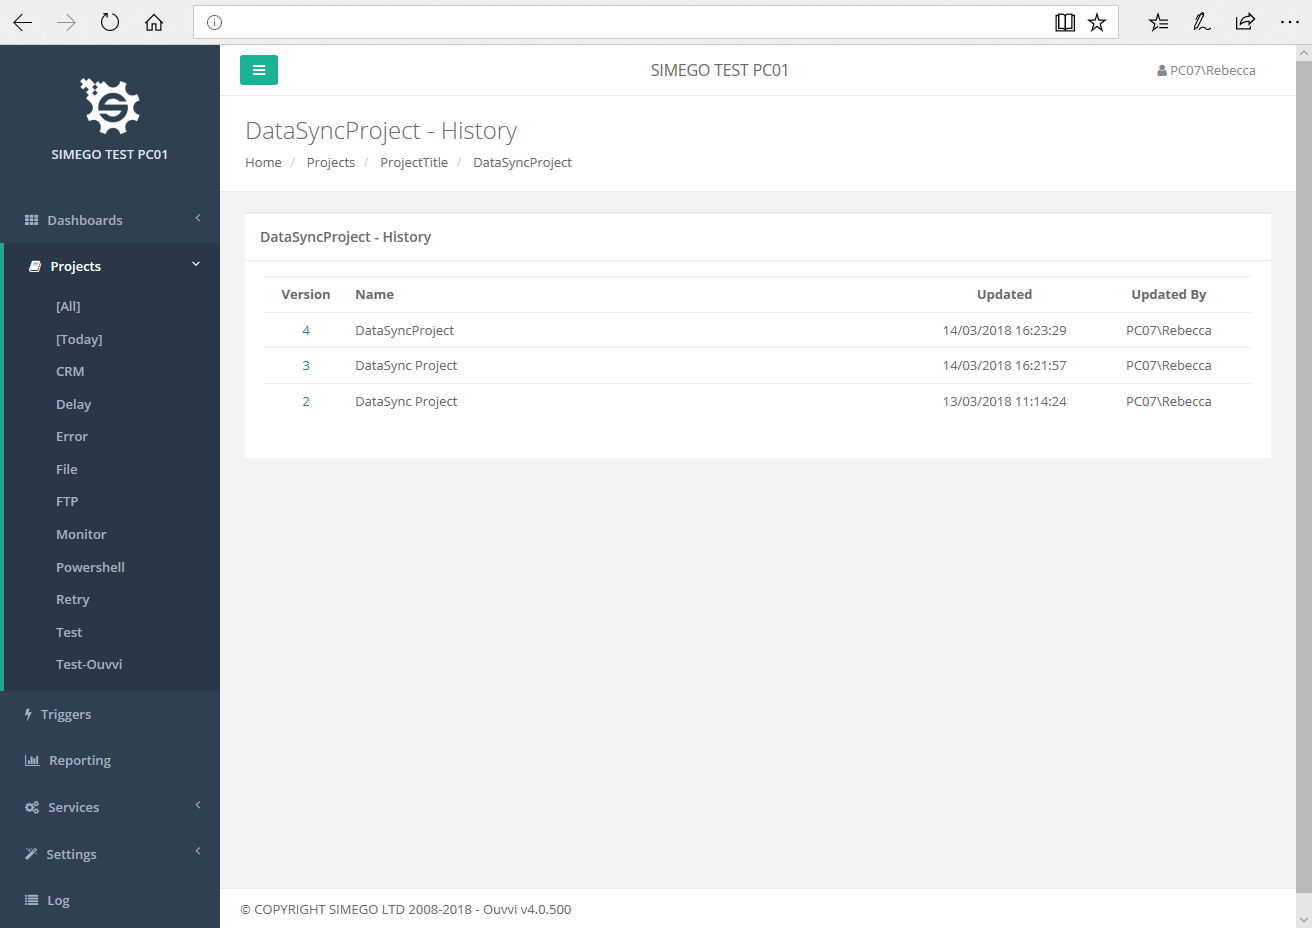
Note: Deleting the Project and or Step will also DELETE the version history, Importing a project will also DELETE the version history.
