Dashboard
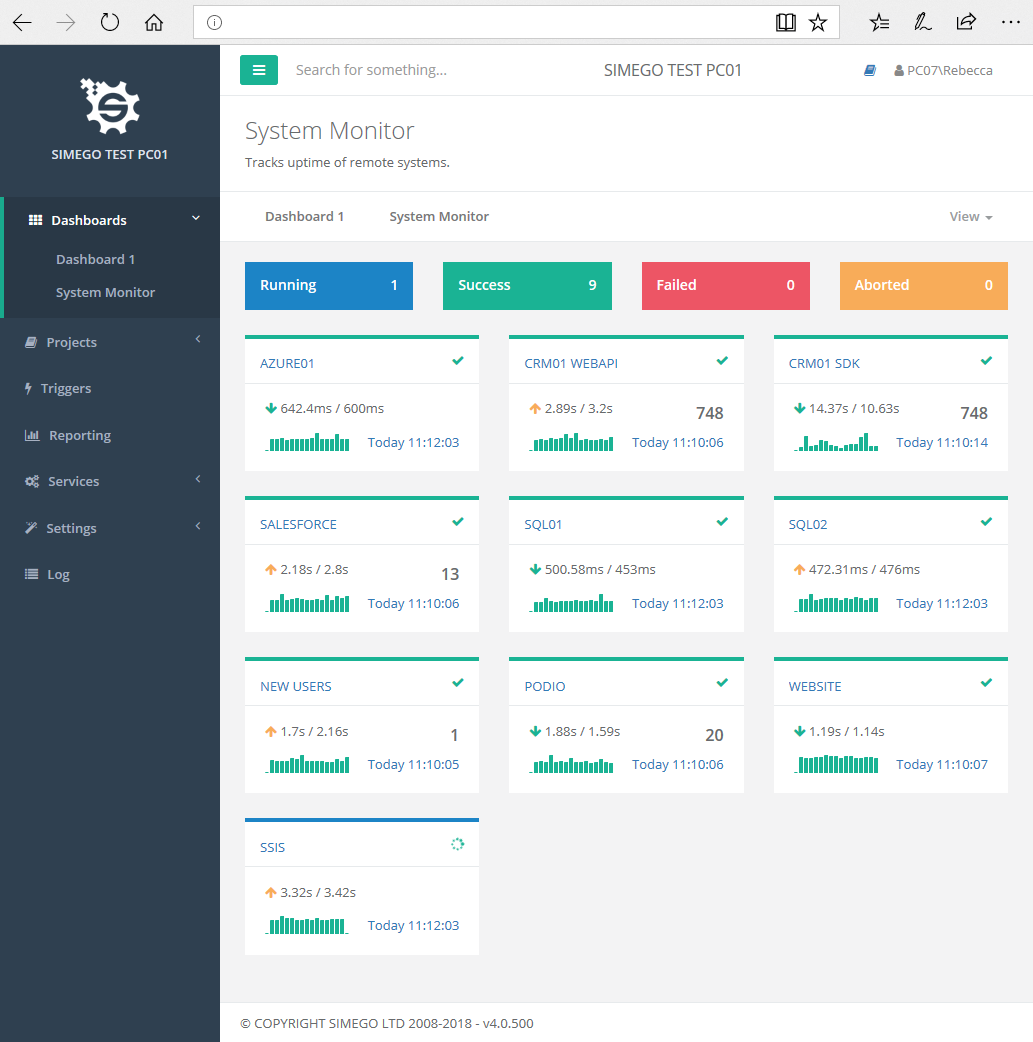
You can now add projects of importance to a Dashboard, so then status, run time and amount of data affected can be seen at a quick glance.
Dashboards can be used to create a monitoring system of various systems. For example you may wish to monitor your SQL Servers, Azure, Websites and so on. At a quick glance you can clearly see the status of the project by the colour.
Below you will find a video showing what Ouvvi project dashboards are and how to create, edit and delete them.
Create a Dashboard
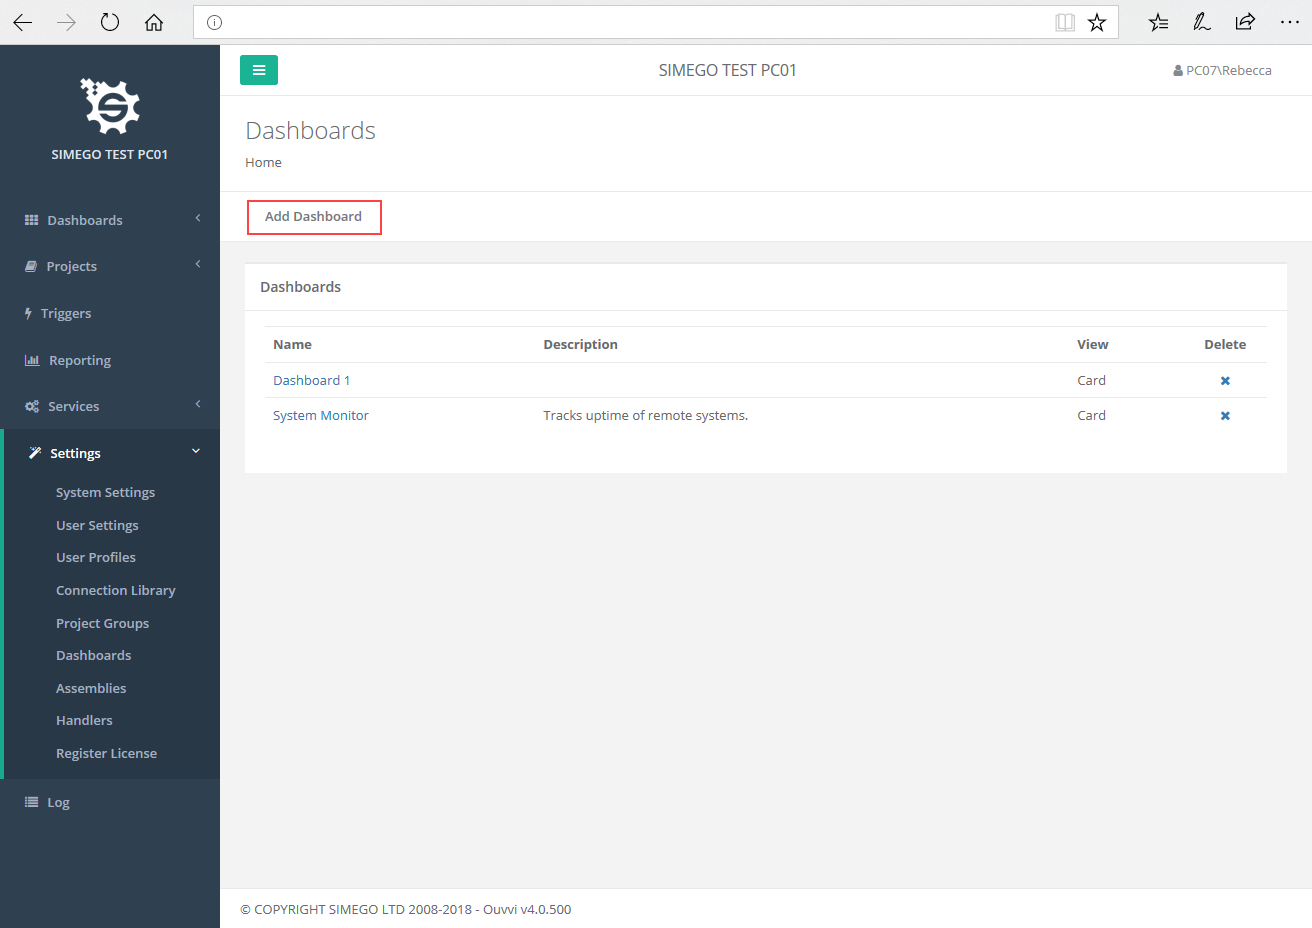
Under settings go to 'Dashboard' and select 'Add Project Group'.
Enter in a name and description for the group and press 'Save'.
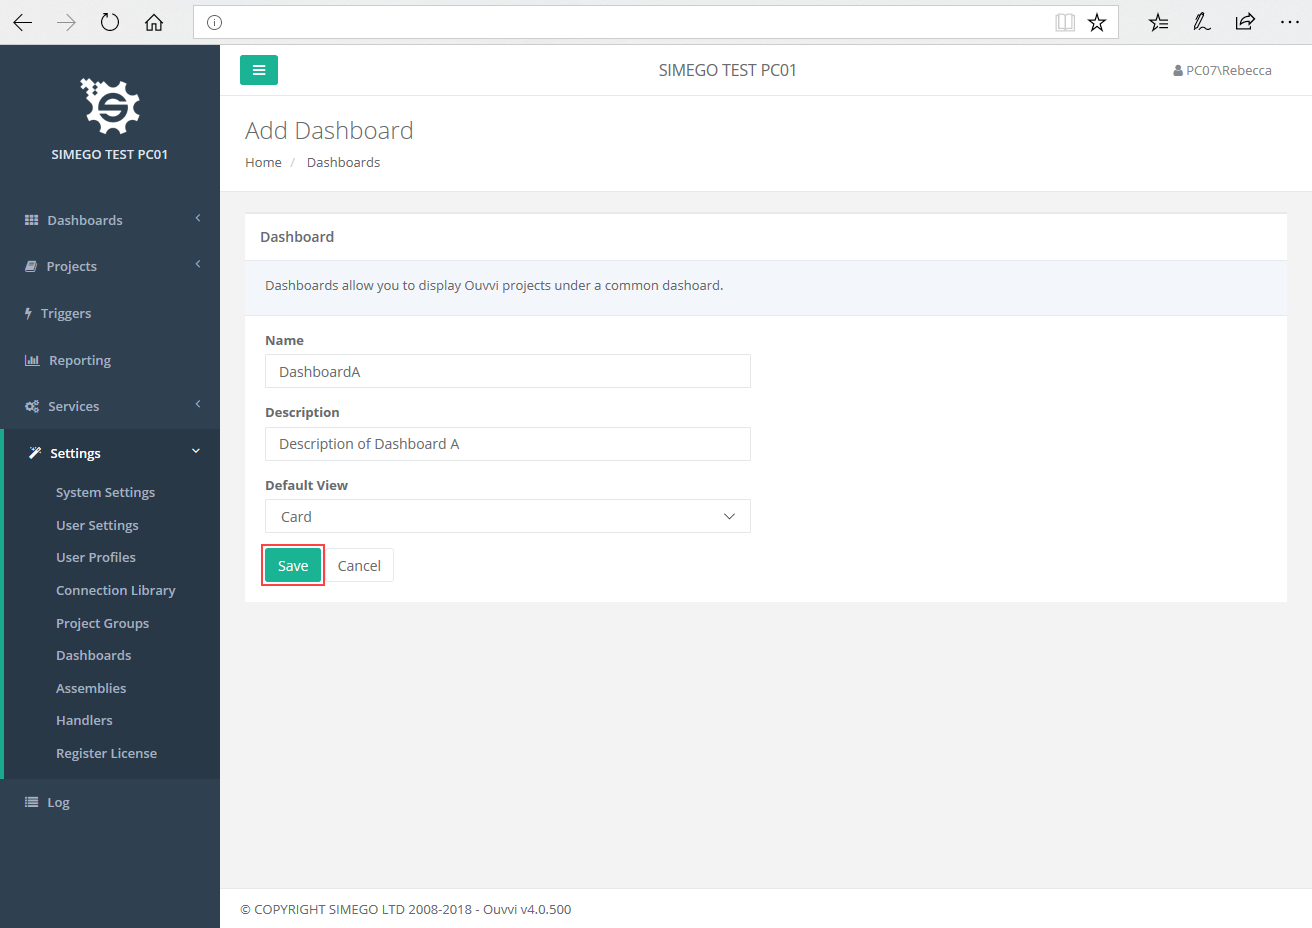
This dashboard is now ready to have projects added to it. This group will also appear in the side menu under 'Projects' for quick navigation.
Adding a Project to a Dashboard
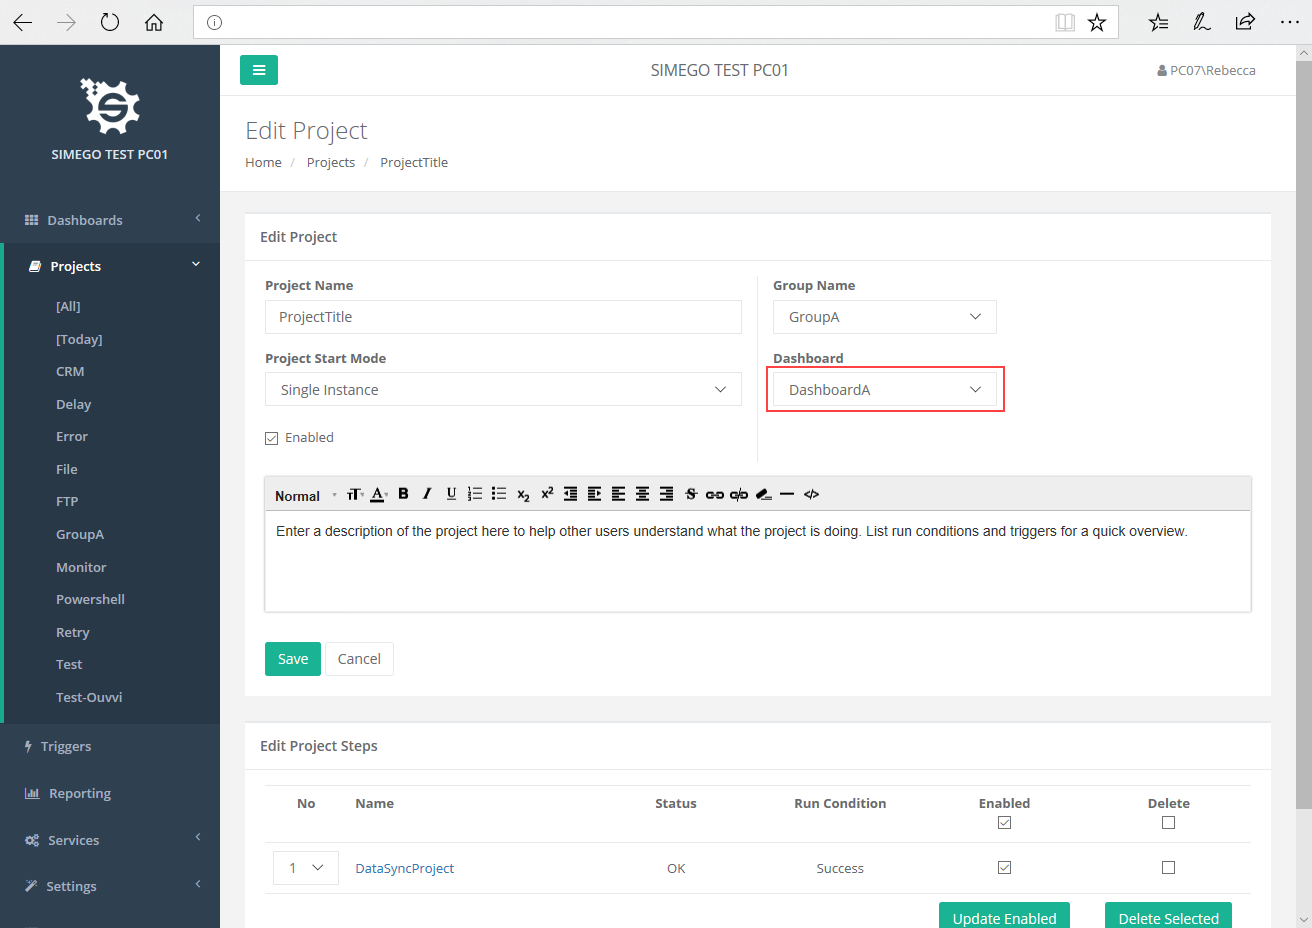
To add a project to a dashboard open your project in Ouvvi and choose 'Edit' from navigation menu. In the edit screen there is an option titled 'Dashboard', select the dashboard from the drop down list. Once you are finished press save and your project will now be available on the specified dashboard.
Delete a Dashboard
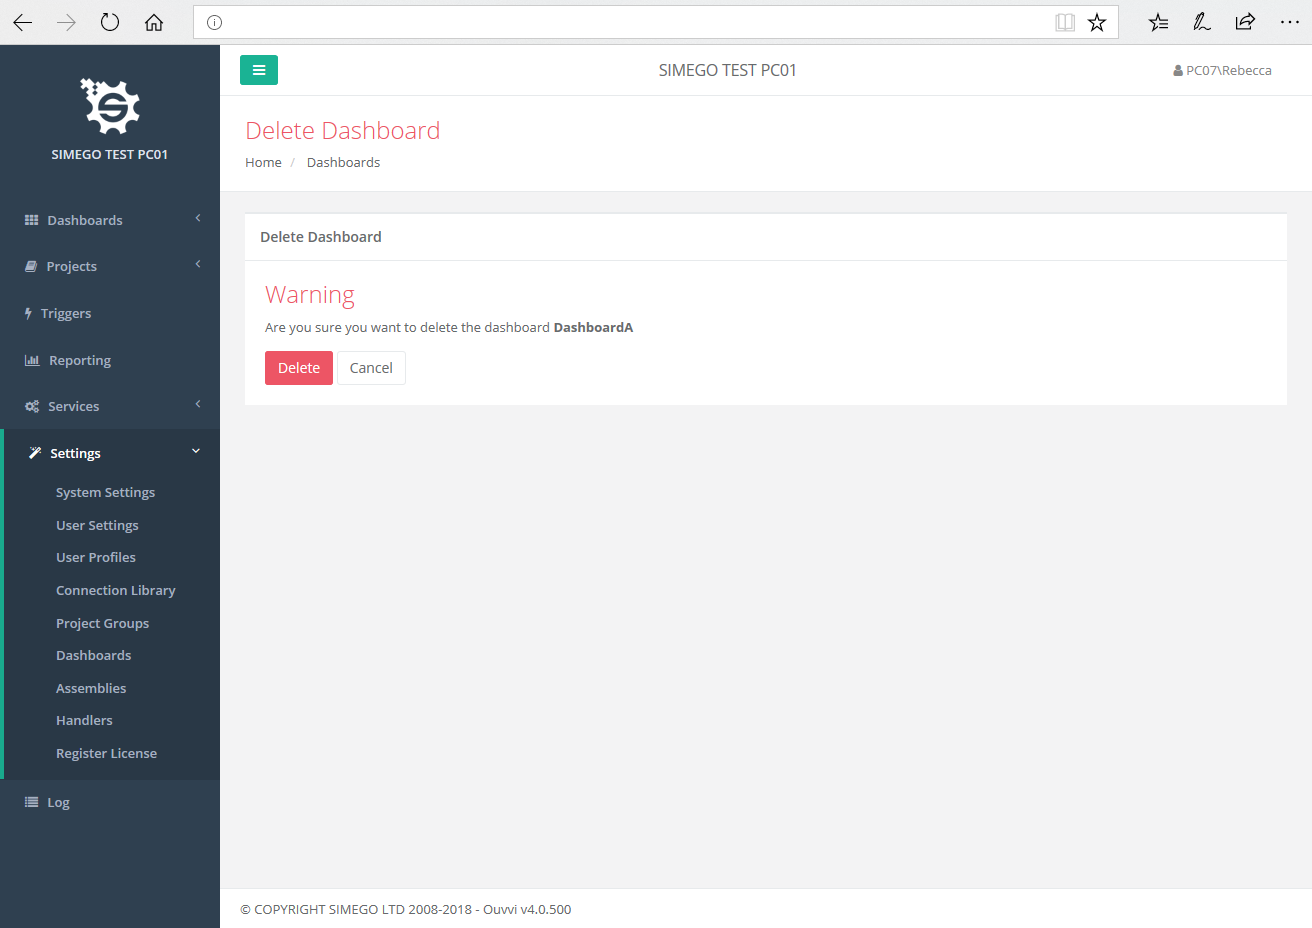
To delete a dashboard go to 'Dashboard' under settings and click the x next to the dashboard you wish to delete.
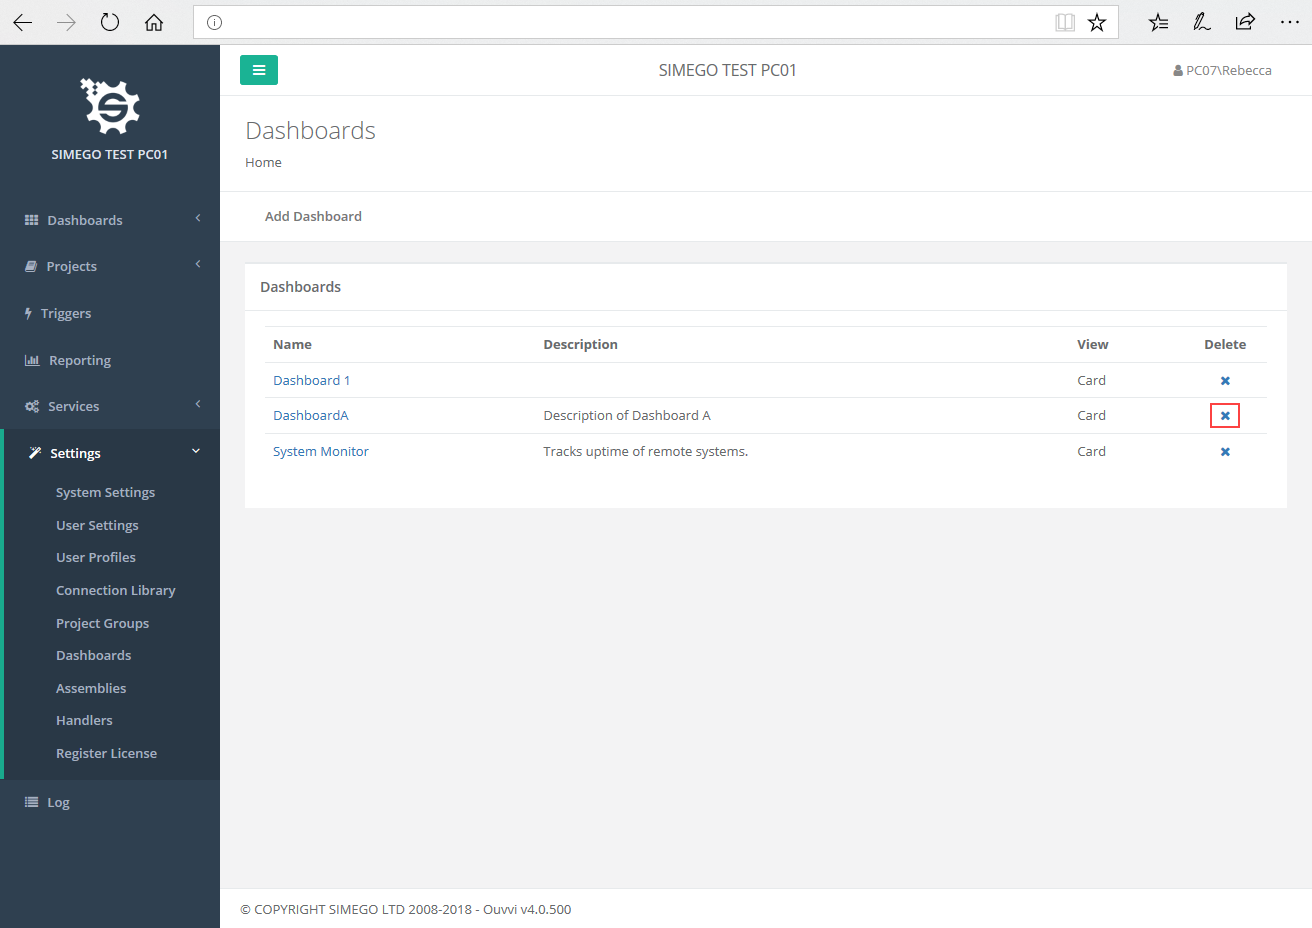
A confirmation message will appear, if you are certain you wish to delete then press 'Delete'.
