- Tour of Ouvvi
- Installing Ouvvi
- Deploy a New Tenant
- Create a Connection Library
- Using the Connection Library
- Edit the Connection Library
- Groups
- Dashboards
- Users
- Agents
- Create a Project
- Add a Step
- Add a Trigger
- Edit a Project
- Edit a Step
- Edit a Data Sync Project
- Edit a Trigger
- Edit Service
- Get Documentation
- Search
- Logs
- Change Sets
- User Settings
- Reporting
Uploading Connections and Data Sync Projects
If you have already created a local connection library (on your machine) then you may want to import the connection files so that you don't have to configure them again. You can also upload existing Data Sync projects as steps into Ouvvi to save you time.
If you are going to do this we recommend starting by uploading any connections you may need in your projects.
Upload Connection Files
To upload a connection to Ouvvi, open your Ouvvi site and navigate to Settings > Connection Library. Then click onto the Upload Connection button.
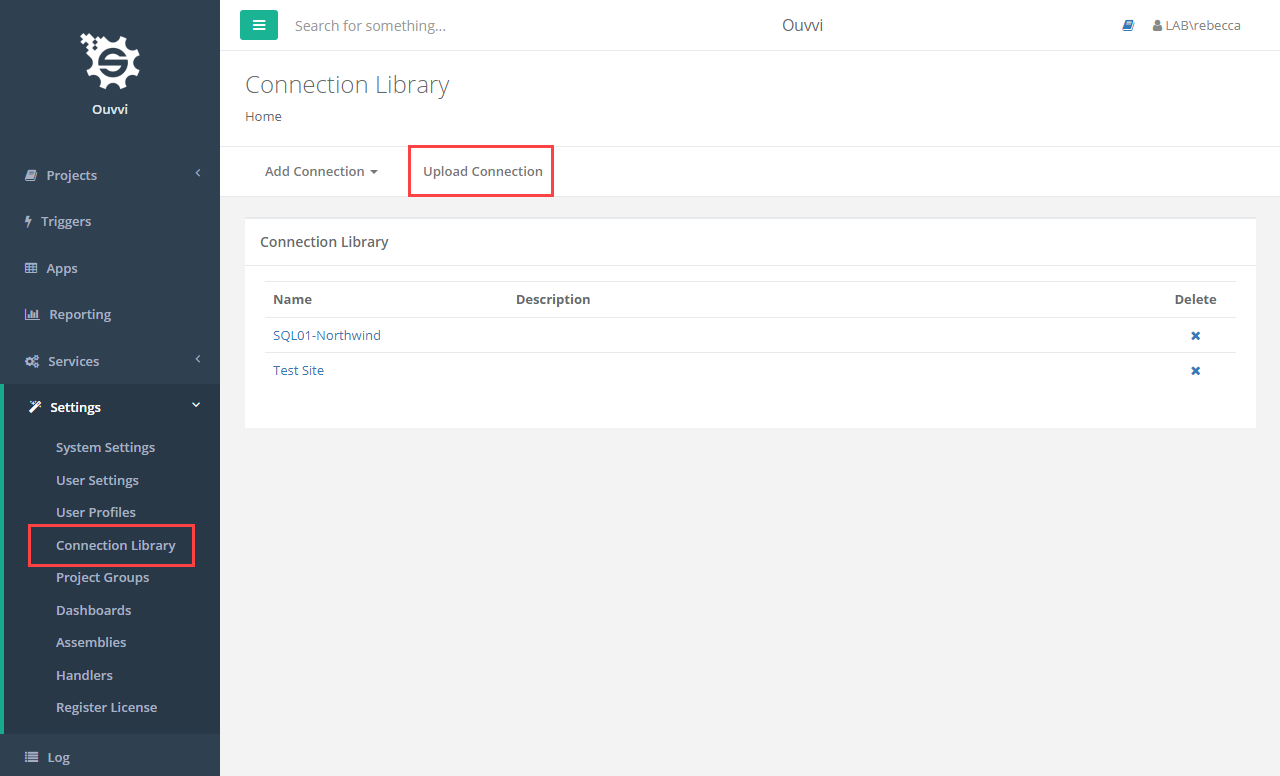
This will open a new page where you need to browse your local machine for the connection file to upload.
You can find your local connection library at the following link: C:\ProgramData\Simego\DataSyncStudio30\Registry
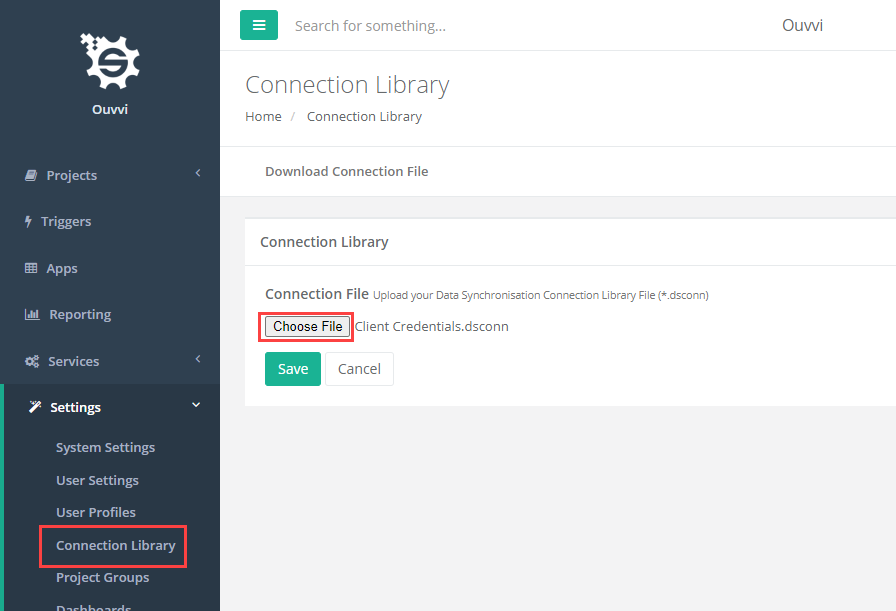
To save your connection to the connection library click Save and the connection will be added.
You can then repeat this process for each of the connection files you need to add so that the Data Sync projects we add next will work.
If you saved the connection with a different name locally but already have one in your Ouvvi Connection Library, you can skip uploading the connection as you can change the connection used in the Data Sync project from Ouvvi. For example, we have a connection to the SQL Database in the project to be uploaded but we previously configured this connection with a different name in the last training section. So we will edit the project details in Ouvvi in the next step.
Upload Data Sync Projects
Now that the connection library is full of our connections we can upload any Data Sync projects that we have previously created.
Please be aware that the Data Sync project in Ouvvi will be a copy of the project locally. They are not linked and so any changes made in one project will need to be replicated into the other.
To do this go to the "Getting Started Demo" project and add a new Data Sync step.
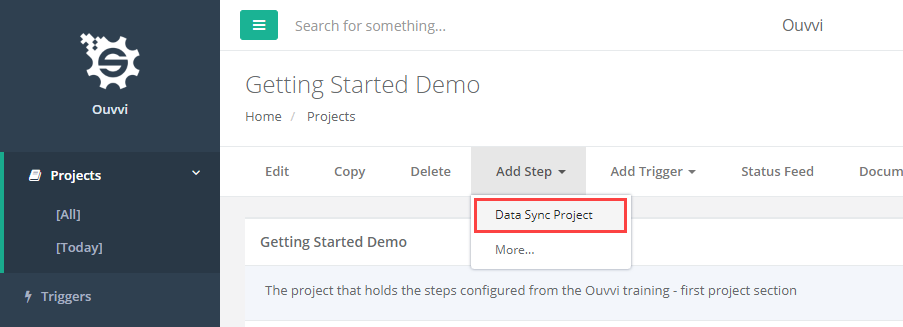
Before saving the new step click onto the Choose File button and then browse for the Data Sync file you want to upload. Click Save and your Data Sync project will be added.

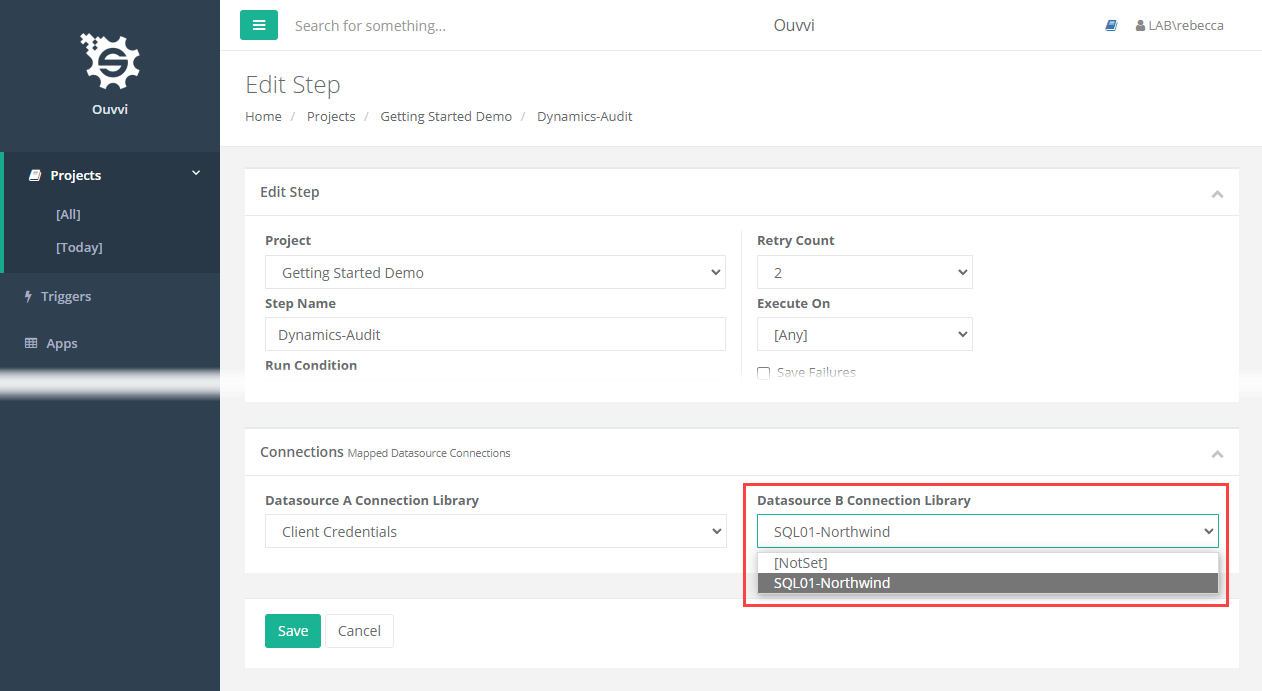
In this example the project uploaded is a Dynamics to SQL project, however we need to change the target SQL connection to use the pre-saved connection library connection. To do this select Edit when viewing the overview of the step.
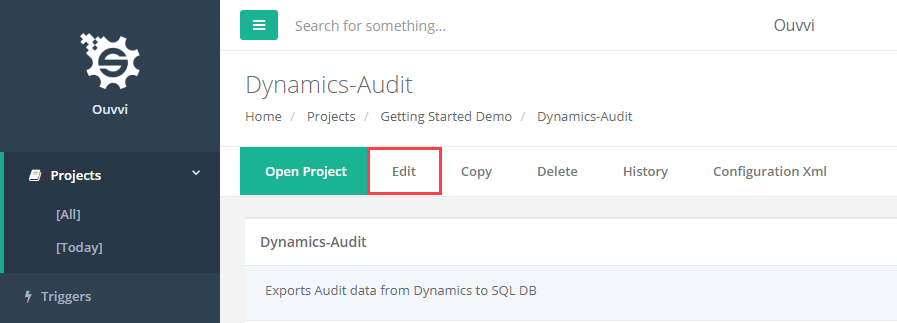
Now change the target connection library connection to be the right SQL connection and then click save.
We can now move onto the next and final section, scheduling.
