- Tour of Ouvvi
- Installing Ouvvi
- Deploy a New Tenant
- Create a Connection Library
- Using the Connection Library
- Edit the Connection Library
- Groups
- Dashboards
- Users
- Agents
- Create a Project
- Add a Step
- Add a Trigger
- Edit a Project
- Edit a Step
- Edit a Data Sync Project
- Edit a Trigger
- Edit Service
- Get Documentation
- Search
- Logs
- Change Sets
- User Settings
- Reporting
Editing the Service Account
When editing an Ouvvi service there are a few considerations you need to be aware of.
- The service is the account that will be running your projects. If this account does not have access to the resources your projects need then you will receive permission/access errors.
- You need to ensure that the service is added as a user in Ouvvi with agent and admin permissions.
- If you do not uninstall your Ouvvi instance before making the changes then you need to make the change in the Windows Services program as no changes will be applied from the config window.
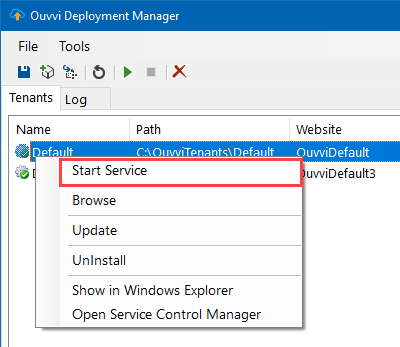
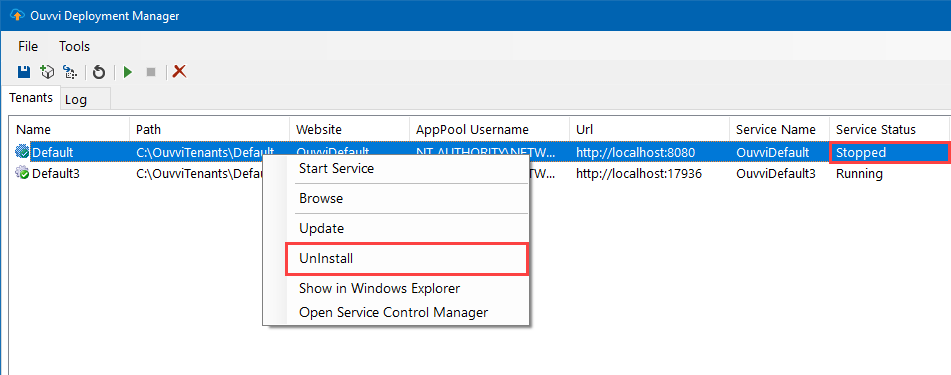
To change the Service Account you need to start by opening the deployment manager and stopping the current Ouvvi service.
Then right click onto your Ouvvi instance and select Uninstall.
You can then double click onto your instance to open the configuration window and make changes to the Service account under the Service tab. E.g. Changing the Service user account.
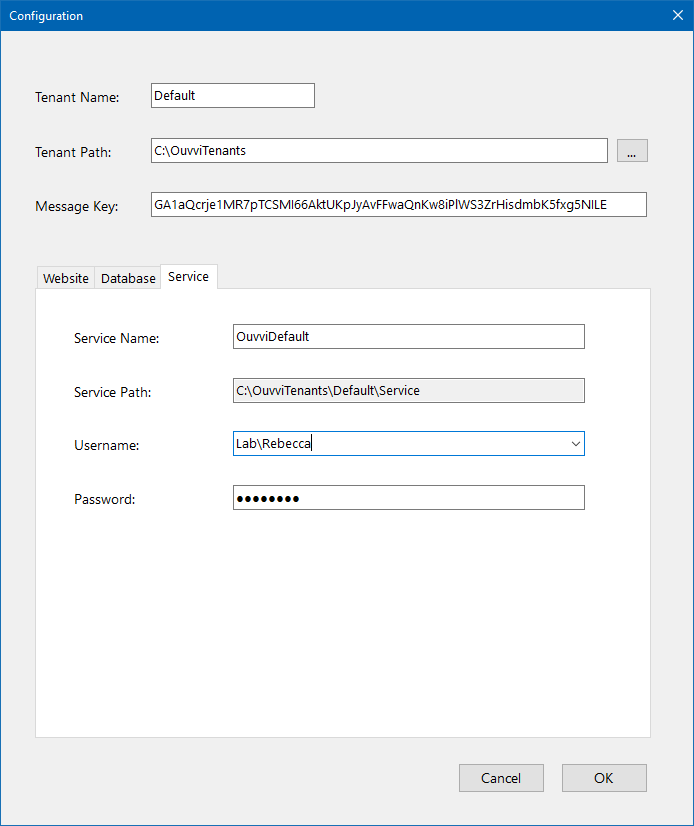
To save click OK and then right click onto your instance and select Install.
Your Service changes will now be applied.
Add User & Set Permissions
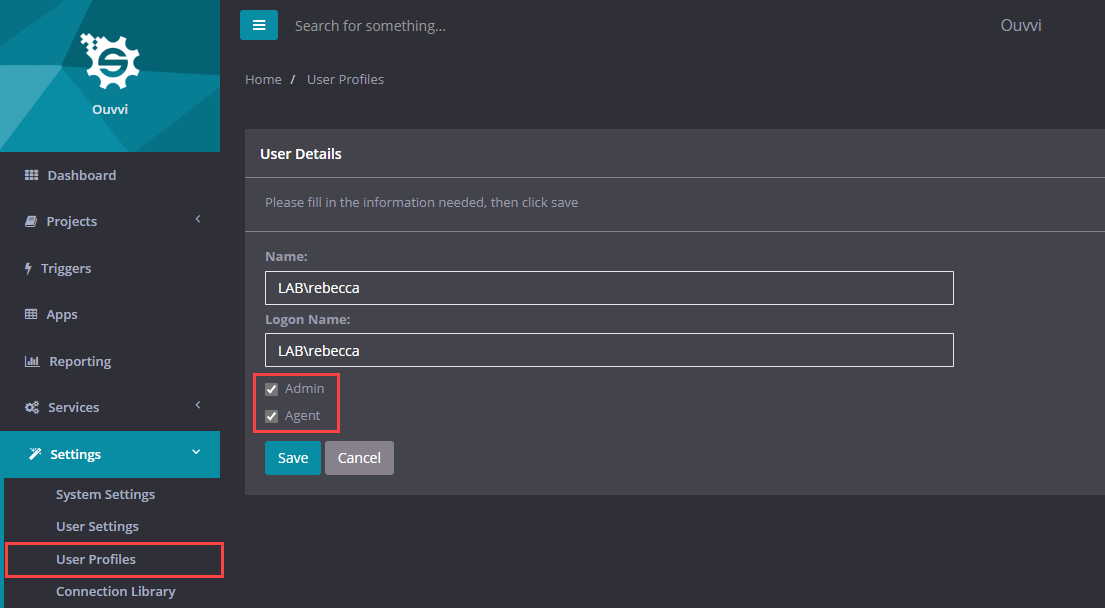
If you have not already done so, you need to add the new Service User to the Ouvvi user profiles and ensure that they have agent and admin permissions.
If the user account is not already a user in Ouvvi you will need to add the user profile. To do this browse to your Ouvvi site and go to Settings > User Profiles > Add User.
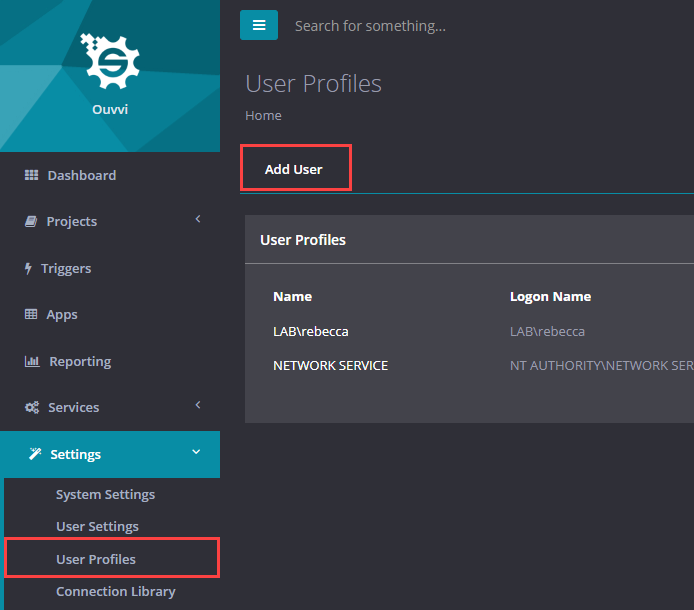
Then enter in the user details and check the checkboxes for agent and admin.
Click Save to add the user.
You can now go back to the deployment manager and start your services.
