- Tour of Ouvvi
- Installing Ouvvi
- Deploy a New Tenant
- Create a Connection Library
- Using the Connection Library
- Edit the Connection Library
- Groups
- Dashboards
- Users
- Agents
- Create a Project
- Add a Step
- Add a Trigger
- Edit a Project
- Edit a Step
- Edit a Data Sync Project
- Edit a Trigger
- Edit Service
- Get Documentation
- Search
- Logs
- Change Sets
- User Settings
- Reporting
Creating a Connection Library
The below tutorial will cover what the Ouvvi Connection Library is and how to add a connection.
Adding a Connection
The connection library is a useful tool to make setting up projects simpler and easier. Saving you time by not having to re-enter connection details.
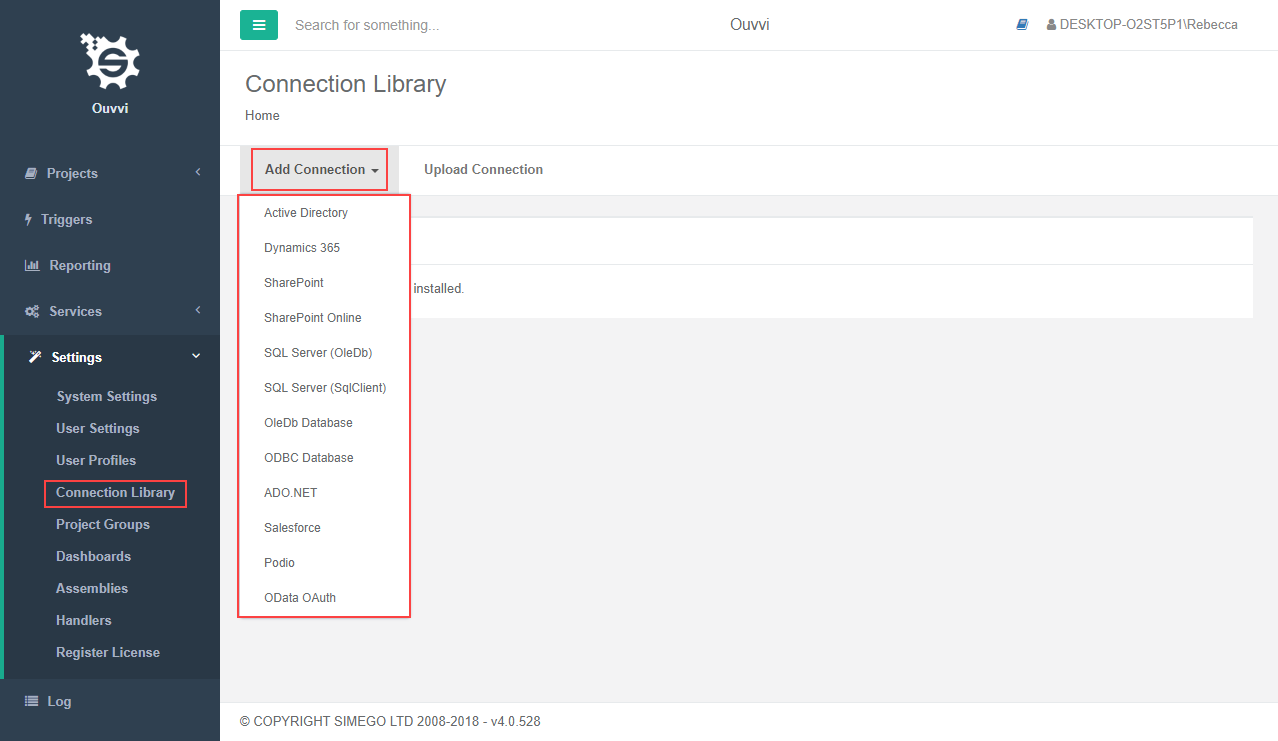
To add a connection to the connection library go to Settings>Connection Library and open the Add Connection drop down from the navigation menu. Select the connection type you wish to add and fill in the required credentials to configure this.
The configuration will depend on the type of connection you wish to add, please see the connection pages for details on each connection type.

Once you are done press Save to save the connection.
Please note that the Ouvvi Connection Library is different to the local Data Sync Connection Library. To change Ouvvi to use the same Connection Library as Data Sync please see our how to guide here.
Upload a Connection
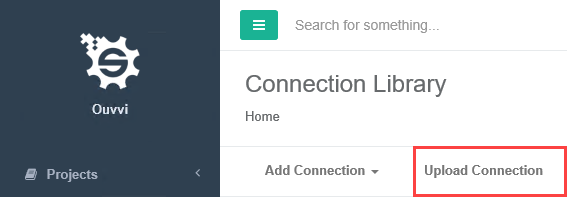
If you have already created connections in your local connection library (Data Sync opened from your desktop) but want these to be available in your Ouvvi projects then you can upload the connection using the Upload Connection button.

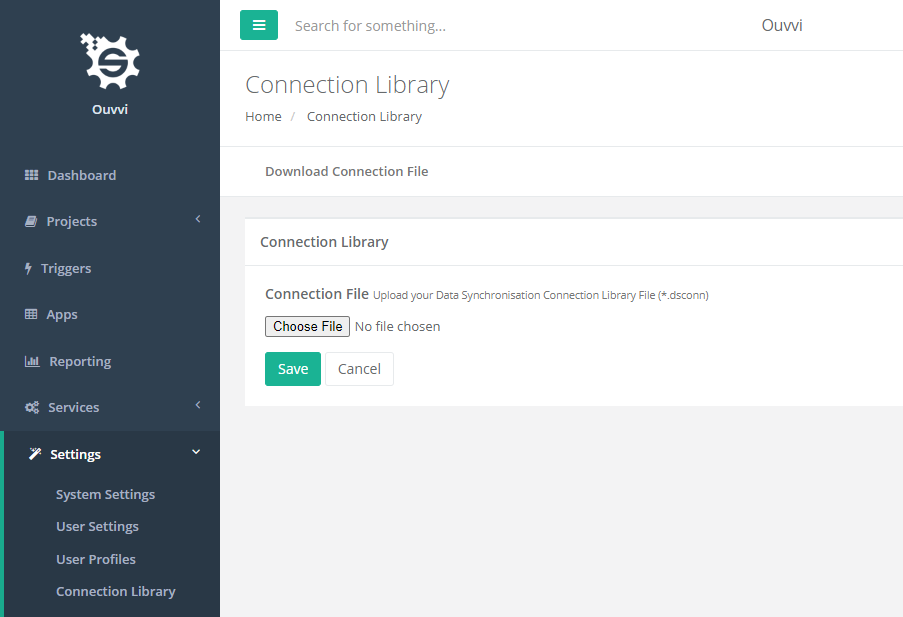
Then click onto the Choose File button and browse to your local registry. By default this can be found at: C:\ProgramData\Simego\DataSyncStudio30\Registry

You can find the path to your local connection library by opening Data Sync and going to the bottom right of the window. There you will find the path to your registry and clicking this will open the folder in file explorer.
Once you have located your connection to upload click Save to save it to your Ouvvi database. This will now be ready to use within your projects, steps and triggers (where applicable).

