- Tour of Ouvvi
- Installing Ouvvi
- Deploy a New Tenant
- Create a Connection Library
- Using the Connection Library
- Edit the Connection Library
- Groups
- Dashboards
- Users
- Agents
- Create a Project
- Add a Step
- Add a Trigger
- Edit a Project
- Edit a Step
- Edit a Data Sync Project
- Edit a Trigger
- Edit Service
- Get Documentation
- Search
- Logs
- Change Sets
- User Settings
- Reporting
Creating a Project
The below tutorial will cover how to create and copy an Ouvvi project.
Create a Project
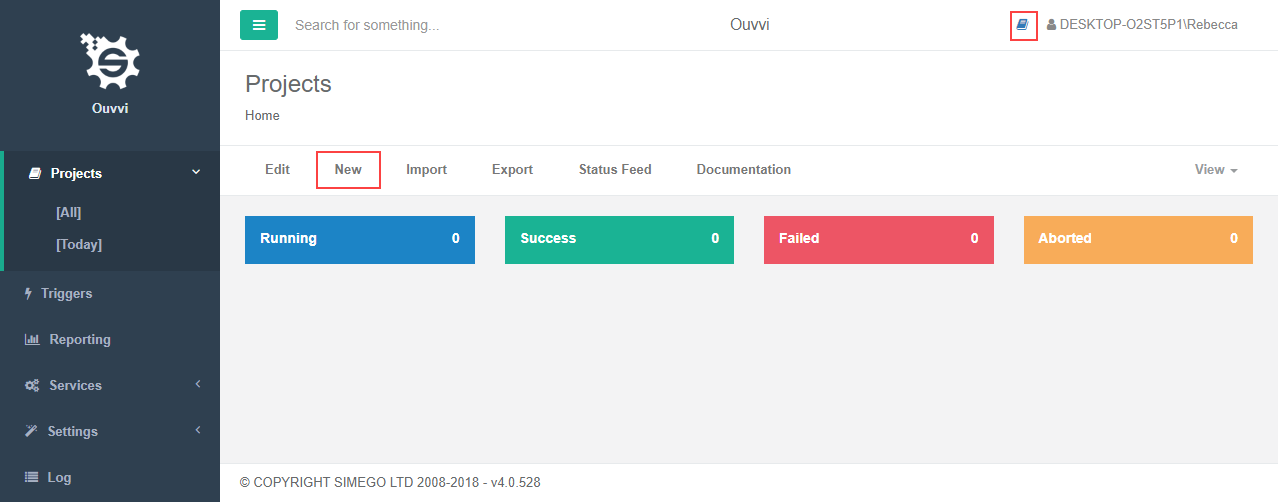
To create a new project go to Projects and choose either the New button from the navigation menu or the shortcut button at the top right of the screen, to create a new project.

This will open the New Project page where you will configure the details for your project.
Type in a title and description for your project.
You can also add you project straight into a group or dashboard if you have already created one, if not then leave these as they are.
You can also choose the project start mode either : Single Instance or Normal. You should be using Single Instance the majority of the time. Normal is only for when Ouvvi is being used as a queue system, and enables projects to be run in parallel across multiple agents.
The Enabled checkbox allows you to either enable or disable your project.

Click Save once you are happy with the configuration.
Copy a Project
Click into the project you wish to copy and click Copy from the navigation menu.

Type in a title for your project and change any settings you wish to, then click Save. Your new project will now be ready to view under Projects.
