- Tour of Data Sync
- Data Sources
- Installing Data Sync
- Install Encryption Key
- Connecting to a Source
- Connecting to a Target
- Connection Properties
- Schema Mapping
- Compare
- Synchronise
- Incremental Sync
- Create a Connection Library
- Using the Connection Library
- Edit the Connection Library
- Lookups
- Calculated Columns
- Filters
- Dynamic Columns
- Project Automation
- Project Properties
Tour of Data Sync
The below tutorial will cover where features and functions of Data Sync can be found. Please refer back to this page whenever you need help finding a feature or function.
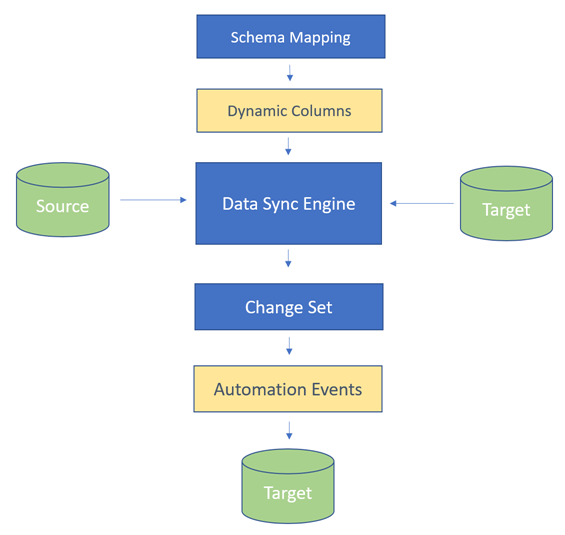
Data Sync is based in the concept of a Data Comparison Engine where you compare data in a source Data Source to a Target Data Source and Data Sync takes care of the operations required to make the Target the same as the source.
When you first open Data Sync you will be greeted with a page that looks like the screen capture below:
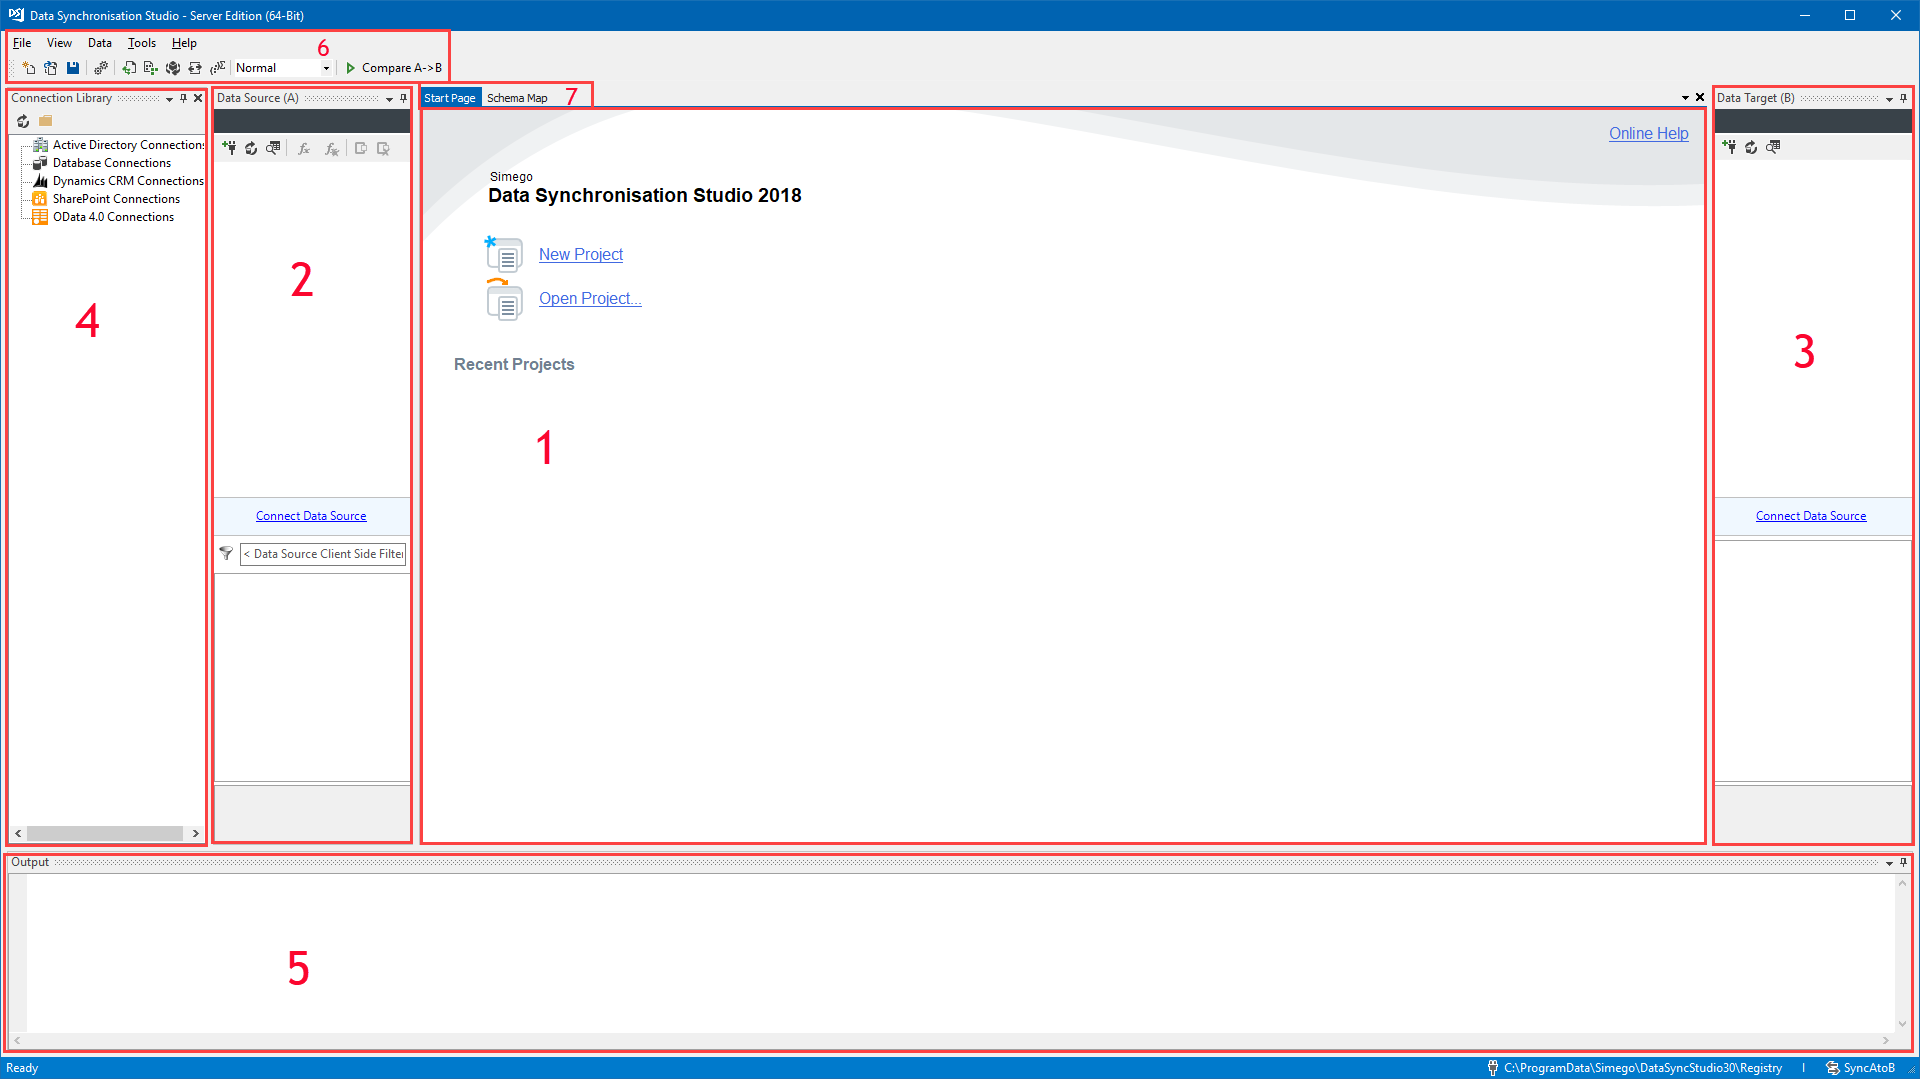
1 - Start Screen
The start page will show any recently opened data sync projects and will enable you to either create a new project or open a saved project.
2 - Data Source A (Source)
This is where you will connect to your Source data source. Once connected you will be able to view the source connection properties and columns available. You can then add columns to your schema map.
3 - Data Source B (Target)
This is where you will connect to your Target data source. Once connected you will be able to view the target connection properties and columns available. You can then add columns to your schema map.
4 - Connection Library Tree View
This window is the Connection Library Tree View window. Once you have saved connections to the Connection Library they will be visible in this window. You can then drag and drop connections onto your Source and Target Windows.
5 - Output Window
This is the Output window, where all feedback from Data Sync will be shown. This includes errors and successful or failed synchronisations.
6 - Menu Bar and Shortcuts
The Menu bar will give you access to all of the functions available in Data Sync.
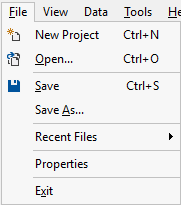
File
The file menu enables you to create a new project, open a saved project, save or save as the current project you are working on, view recent files, check the project properties or close the whole program.
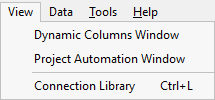
View
The View Menu enables you to open and write Dynamic Columns and Project Automation code. You can also reopen the Connection Library tree view window from this menu if you have closed this.
Data
The Data Menu enables you to run comparisons of the data in your source against your target (Compare A -> B) or your target against your source (Compare B -> A).

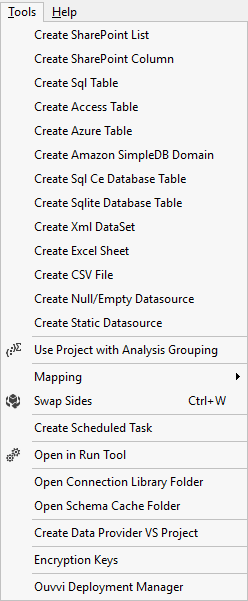
Tools
The Tools Menu is generally the most used menu within Data Sync. It contains the create functions for the various connector types, for example Create SQL Table and Create SharePoint List. You can schedule your Data Sync Projects using the Create Scheduled Task and you can open up the project in the Run Tool to take the scheduling further. You can also swap your Source and Target at the click of a button and you can open the Connection Library and Schema Cache Folders in file explorer.
The Tools Menu also enables you to perform more advanced functions such as writing a new data provider, add encryption to your projects, and create and apply mapping rules.
From this menu you can also open the Ouvvi Deployment Manager to manage and install your Ouvvi Management instances.
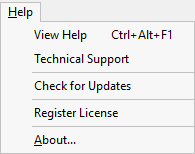
Help
The Help Menu gives you access to the documentation on our documentation site, our helpdesk so then you can create a support ticket. You can also check for software updates, register your license, and view details about the version of Data Sync you are currently running.
Shortcuts
The shortcut menu has the following shortcuts (these are listed in order from left to right):
- New Project
- Open
- Save
- Open in Run Tool
- Dynamic Columns
- Project Automation
- Swap Sides
- Apply Mapping Rule
- Convert to Group and Aggregate Project
- Sync Mode (Choose either Normal or Incremental Mode)
- Compare A -> B

7 - Tabs
Click through the tabs to change the view you are currently looking at.
When we fist open Data Sync for we have a choice of the Start Page or the Schema Map. Clicking on the tab Schema Map will open up the Schema Map window. This is where you will configure your project mapping from source to target.
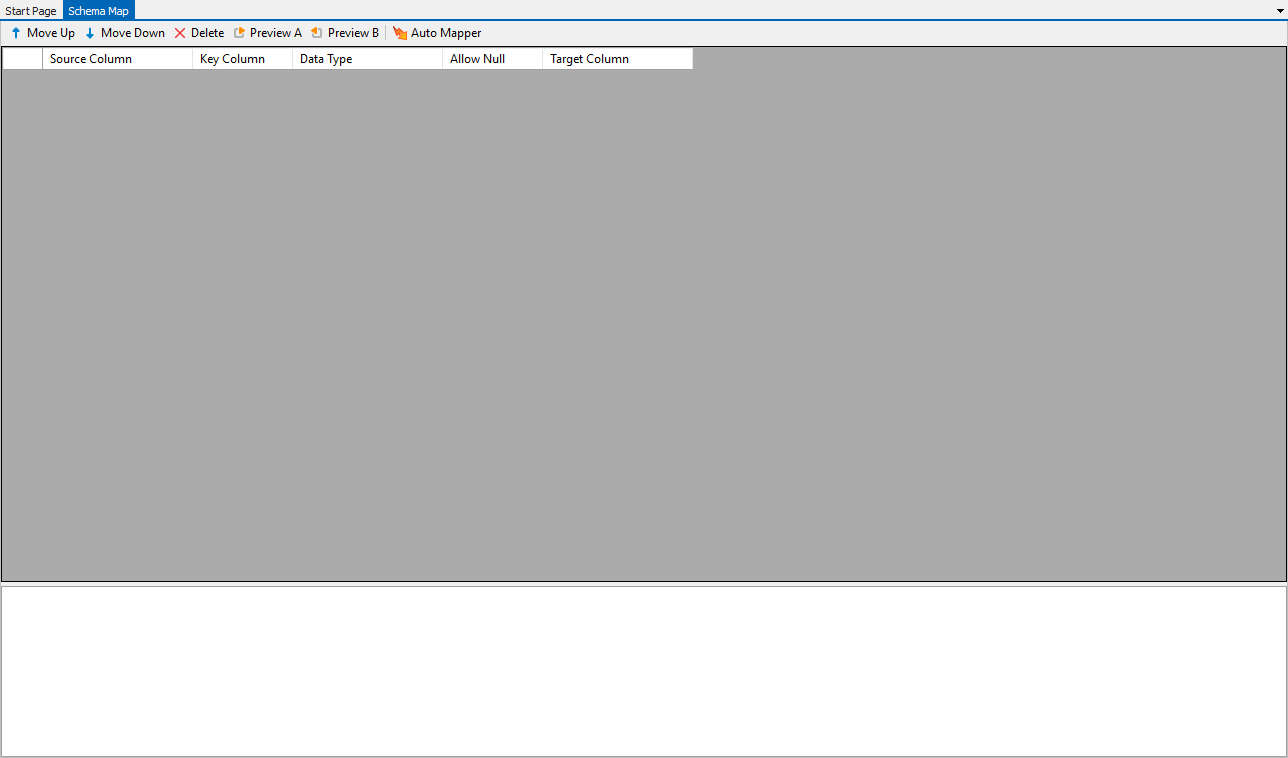
As you do more in Data Sync more tabs will open, for example Project Automation, Comparisons, and Dynamic Columns will each open a new tab.
Data Source Functions

The Data Source Function Menu has the following functions available (these are listed in order from left to right):
- Connect Data Source
- Refresh
- Preview Data
- Add Calculated Column
- Delete Calculated Column
- Add Lookup
- Delete Lookup
Data Source Filter
Below the Columns section of your Data Source you will find a a filter feature, you can use this to apply .Net Expression to return a boolean expression.

If you are needing to filter something that is expensive on API calls, then filter this on the server side before runnign through Data Sync. For example - Run a FetchXML query within Dynamics and connect to this in your Data Sync Project
Connection Properties
Connection Properties can be found at the bottom of your Data Source Connection Window. The below example shows the connection properties for a CSV file:

Within all connection property types there will always be a Synchronisation section. This enables you to set whether you want Data Sync to be able to Add, Update and/or Delete data if any changes are found. By default Delete is disabled.
