- Tour of Data Sync
- Data Sources
- Installing Data Sync
- Install Encryption Key
- Connecting to a Source
- Connecting to a Target
- Connection Properties
- Schema Mapping
- Compare
- Synchronise
- Incremental Sync
- Create a Connection Library
- Using the Connection Library
- Edit the Connection Library
- Lookups
- Calculated Columns
- Filters
- Dynamic Columns
- Project Automation
- Project Properties
Schema Mapping
The below tutorial will cover how to configure your schema map to your specifications.
Once you are connected to your source and target, you can configure which columns you wish to synchronise across to your target and how these link to one another.
Make sure you define a key column and include all of the columns you wish to synchronise.
The below example is a simple CSV to SQL Database:
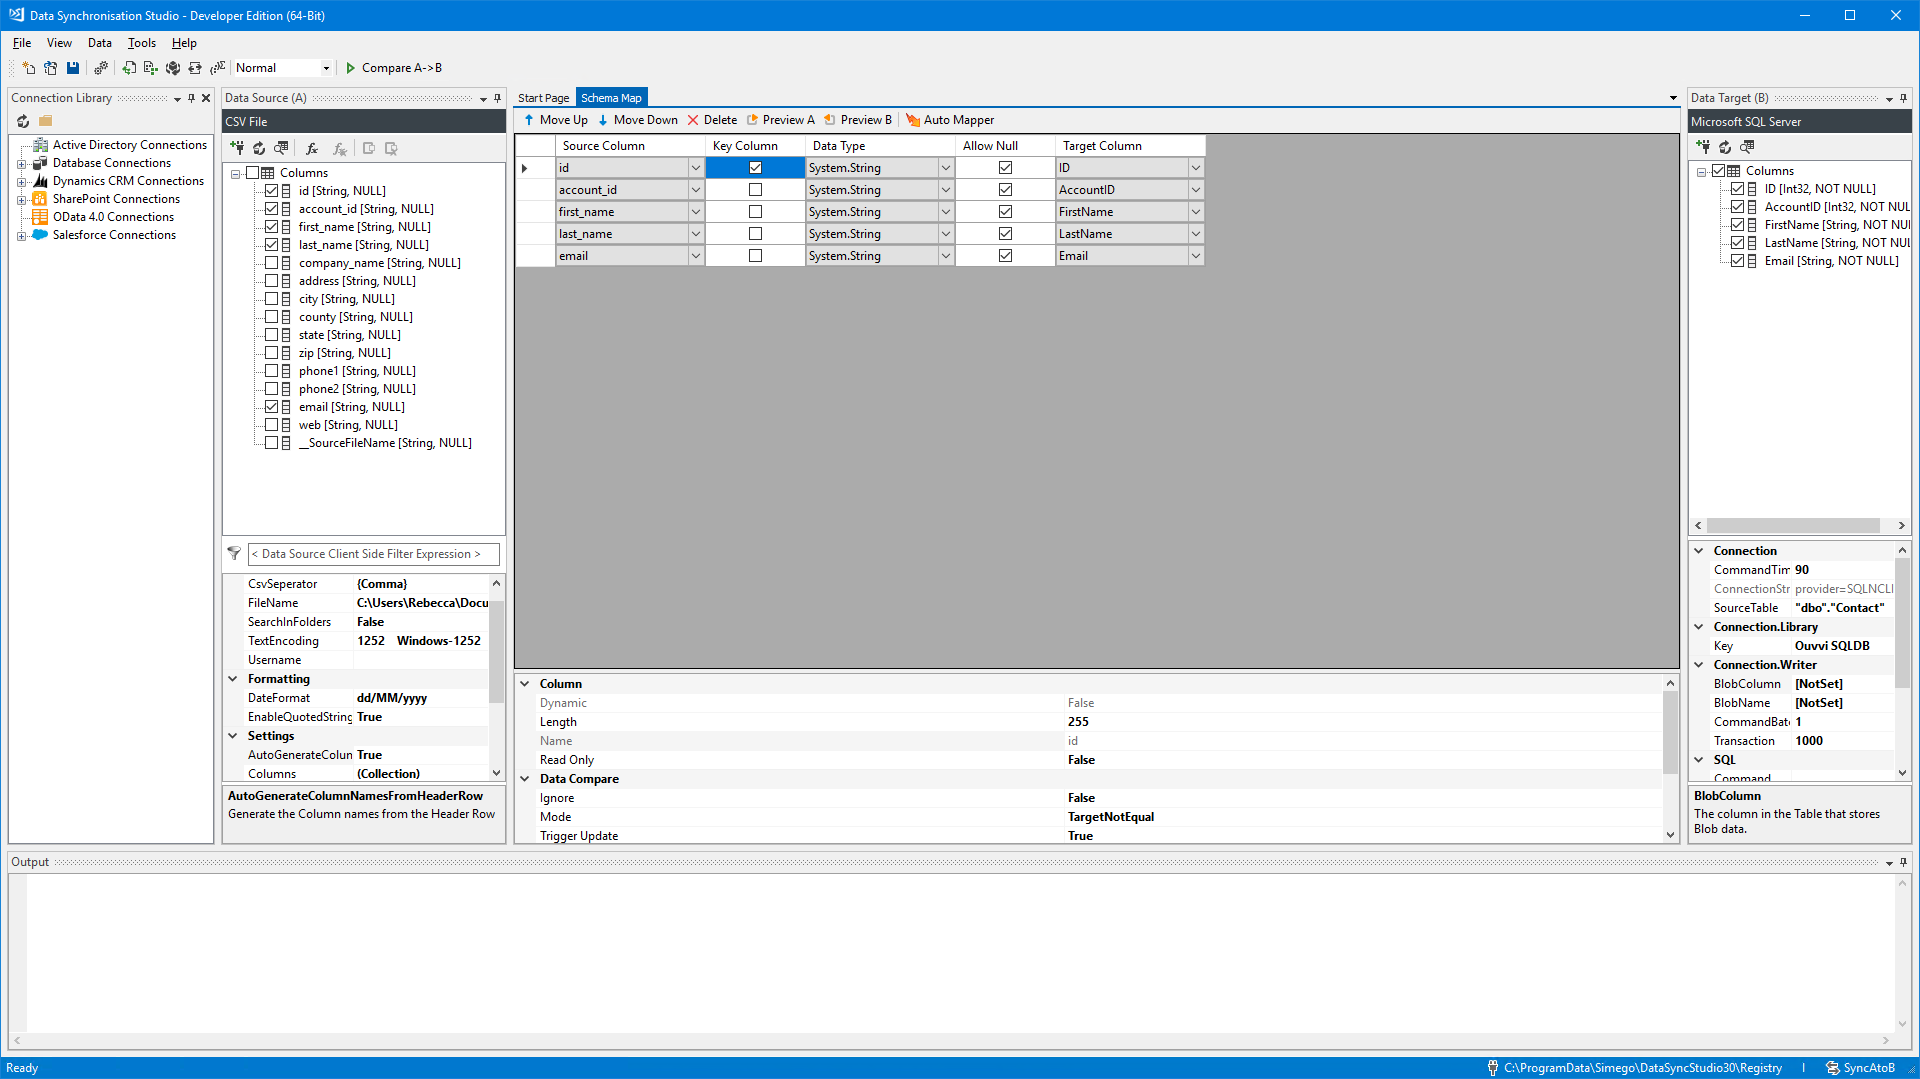
The columns from the source have been mapped to corresponding columns in the target.

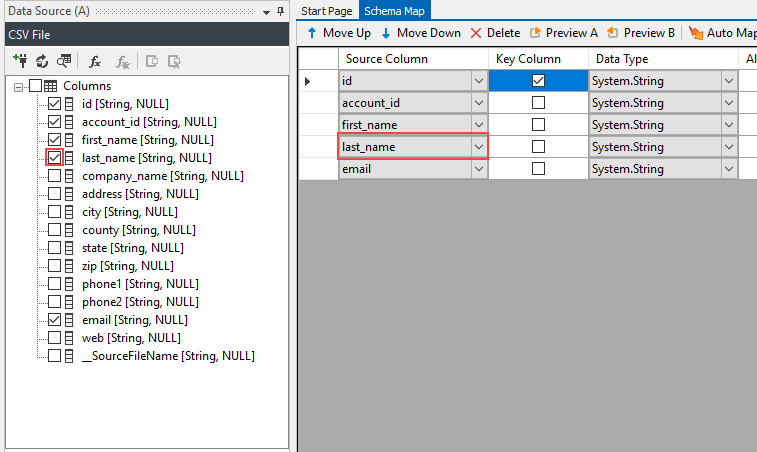
You can add columns to the schema map by checking the checkbox next to the column in the source or target, or you can drag and drop this into the schema map.
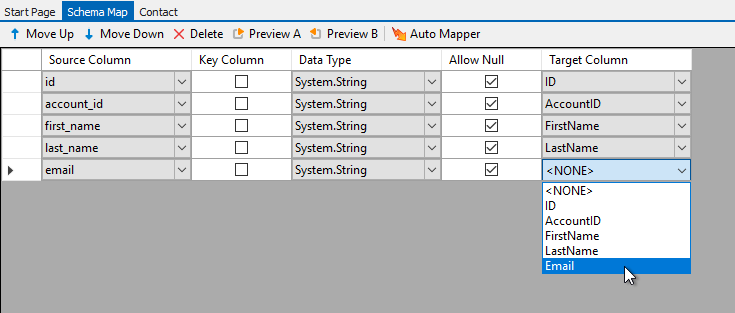
If this is not automatically mapped or the mapping is incorrect you can change the target column by choosing the column from the drop-down menu or by dragging the column from the target onto the correct column in the schema map.
If you wish to remove a column, select the column and then either click Delete in the toolbar or press delete on your keyboard.
Functions
The tool bar across the top of the schema map tab contains the following functions:

Move up
Where you can highlight a column and move this up the list.
Move Down
Where you can highlight a column and move this down the list.
Delete
Where you can highlight a column and remove this from the schema map.
Preview A
Where you can preview the data contained in your source, showing only the columns defined in the schema map.
Preview B
Where you can preview the data contained in your target, showing only the columns defined in the schema map.
Columns
Key
If your Data Source returns multiple rows for the same Key value, they are flagged as duplicates and the duplicate items are removed from the compare. Only the first row with a given Key value is part of the compare and sync. Therefore your key column needs to be unique.
This can be a composite key made up of multiple columns when a single unique key column field is not available. In this case the value(s) from these columns are combined to make a unique key value.
Data Type
Each column in the Schema Map defines a Data Type, when the Data Source is loaded the incoming Data is converted into this Data Type and during the compare phase these Data values are compared based on the Data Type.
This is useful where your source my have a True/False value that you need to map to a SQL Integer Field. If your Source returns "Yes" or "No" text values, setting the Data Type to System.Boolean will automatically convert the value to 0 or 1.
Allow Null
The allow null column of the schema map enables you to set whether you will accept null values for any given field. If your target system does not accept nulls into the column you are mapped to then un-check the allow null checkbox.
Column Property Options
The Data Compare Settings are used to control the comparison of data in Data Sync. You can change this on a column by column basis in the Schema Map.
The Column properties can be found below the schema map:
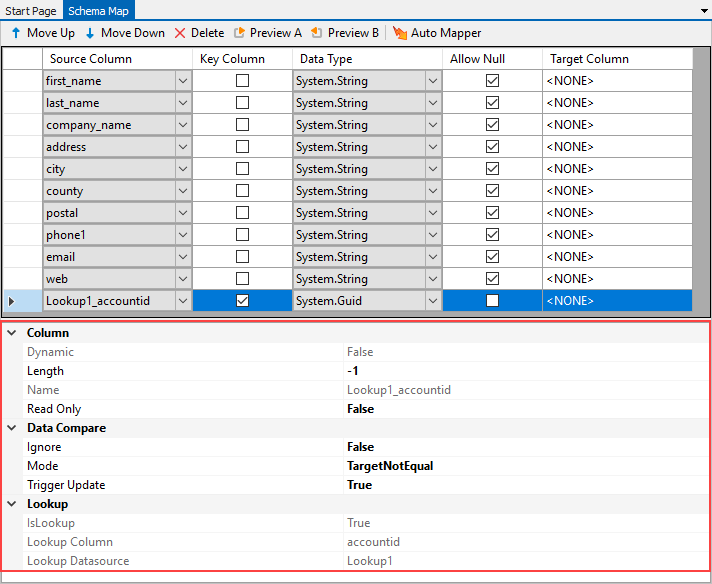
Column
The properties relating to the column directly.
Dynamic
Is the column a dynamic column? If yes then this will be True. If not then this will be False.
Length
What is the maximum number of characters you wish to allow in each field of this column.
Name
The name of the column you are editing the properties of.
Read Only
Does the column have read only permissions. If yes then this should be set to True, otherwise it will be False.
Data Compare
The properties relating to how the column should be handled during the comparison of the column.
Ignore
The Ignore setting will prevent Data Sync comparing the value and generating an UPDATE action for this column, however if any other column causes an UPDATE action then the value of this column will be added to the change set. This is useful when you want to force a columns value to always be sent to the target.
Mode
The Data Compare Mode is used to control how the source and target values are compared for UPDATE actions. The default comparison mode is to compare that the values from each side are equal.
- TargetNotEqual - Default configuration where a change is detected when the values are not equal.
- TargetEqual - Where a change is detected when the values are equal.
- TargetLessThan - Where a change is detected when the target value is less than the source. Typically used in 2-Way sync scenarios to prevent updates to a row when the Modified Date is greater on the Target.
- TargetGreaterThan - Where a change is detected when the target value is greater than the source.
- TargetIsNullOrEmpty - Where a change is detected when the target value is null or empty and the source has a value.
- SourceIsNotNullOrEmpty - When the source has a value and the target is not equal to the source.
Trigger Update
The data compare mode is typically used in conjunction with the Trigger Update setting. This setting is used to decide what change(s) will cause an UPDATE action to be created.
For example in 2-Way sync where you have a modified DateTime value on each side which is updated when the row is changed. You would create 2 projects each running in a different direction.
The First project you would set TriggerUpdate=False on all columns in the Schema Map except for Modified and then set the Mode=TargetLessThan for the Modified Column. This causes Data Sync to only compare the values on this row when then Target Modified value is less than the source. i.e. the Source is more recent.
The Second project can now be setup as normal but in reverse, you then set the projects to run after each other in Ouvvi or the Run Tool.
Lookup
The properties relating to the column if it is a lookup column.
IsLookup
Is the column a lookup column? If yes then this will be True. If not then this will be False.
Lookup Column
The name of the lookup column.
Lookup Datasource
The name of the lookup, this is determined by the user when configuring the lookup parameters.
Troubleshooting
Define a Key Column
If you get the following error message appear when you go to compare the data:
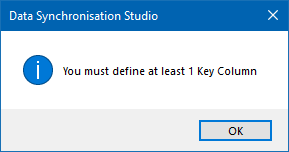
This means you have not defined a key column. To resolve this go back to your schema map and check the key column box for your key column.
Have a Unique Key Column
If you get the following message appear in the compare window:

and a message similar to this in the output window:

Then you do not have unique key values for your data, please go back and review your data to ensure that each record has a unique identifier.
Data Types
If you get an error message similar to the one below appear when you go to compare the data:

Then it means you do not have the right data type for columns, please go back and review your data and the columns corresponding data types. For example this could be trying to insert string data into a int32 field.
