Configuring Simego Online to use Azure AD Authentication to Log In
Once you have your basic Simego Online tenant you can configure the tenant to use Azure AD to authenticate your users. This will save you and your team needing to remember another login and make user management easier. If a users leaves, their access can be removed from Simego Online as soon as their account is disabled in your Azure AD.
Creating an App in Azure AD
To use Azure AD authentication you need to create an app within Azure AD to allow your Simego Online tenant access to validate user credentials.
To do this open your Azure AD Portal and go to App Registrations > New Registration.
Now enter in a name for your application and choose the supported account types, for this we only need access to those within our organization so we have selected Accounts in this organizational directory only.
For the Redirect URI you need to enter in the URL to your Simego Online tenant with /account/callback added on the end e.g. mytenant001.online.simego.net/account/callback. You can get this URL from system settings by going to Settings > System Settings and select Azure AD from the toolbar at the top.
The redirect URL is then listed for you.
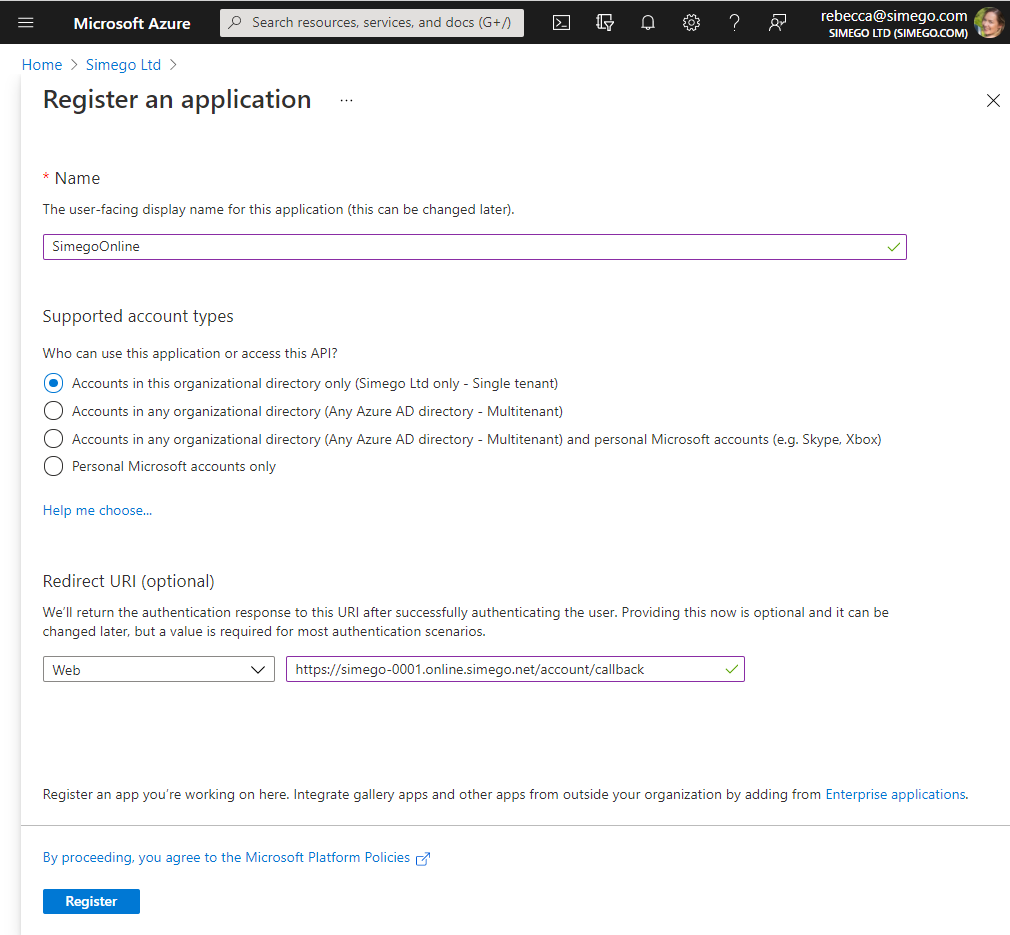
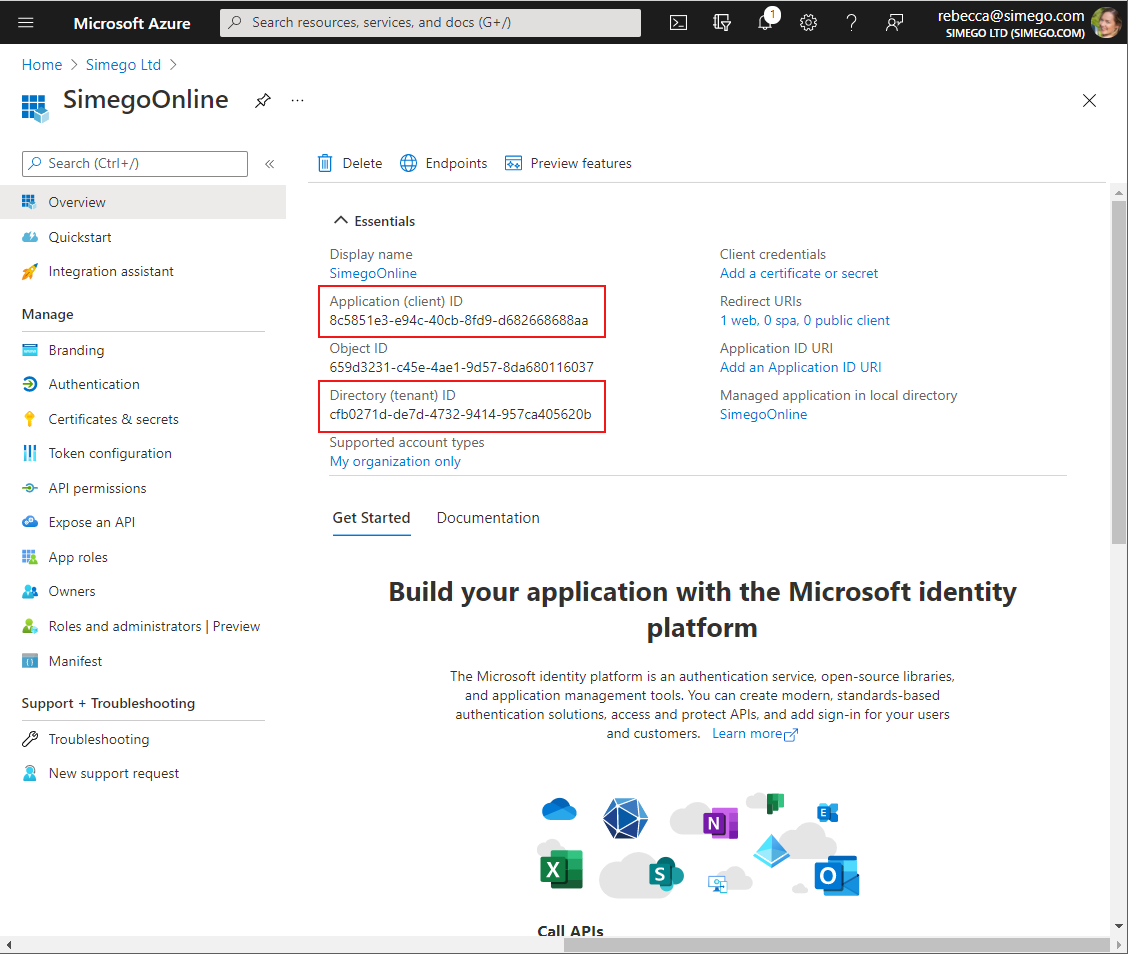
Once you're done click onto Register to create the app. You'll now be given an overview of your app credentials (Client ID and Tenant ID).
You now need to create a Client Secret. To do this go to Certificates & Secrets > New client secret, enter in a description and set an expiry term.
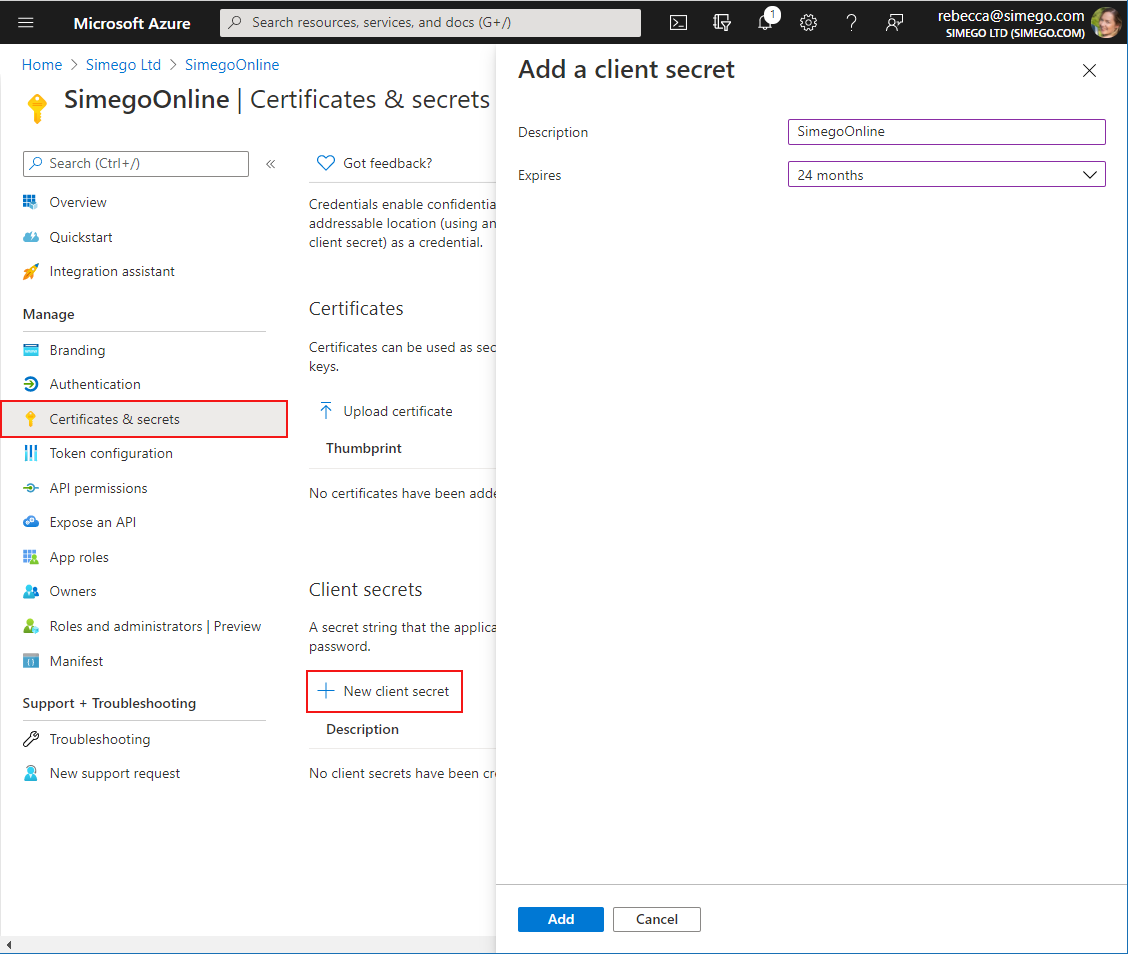
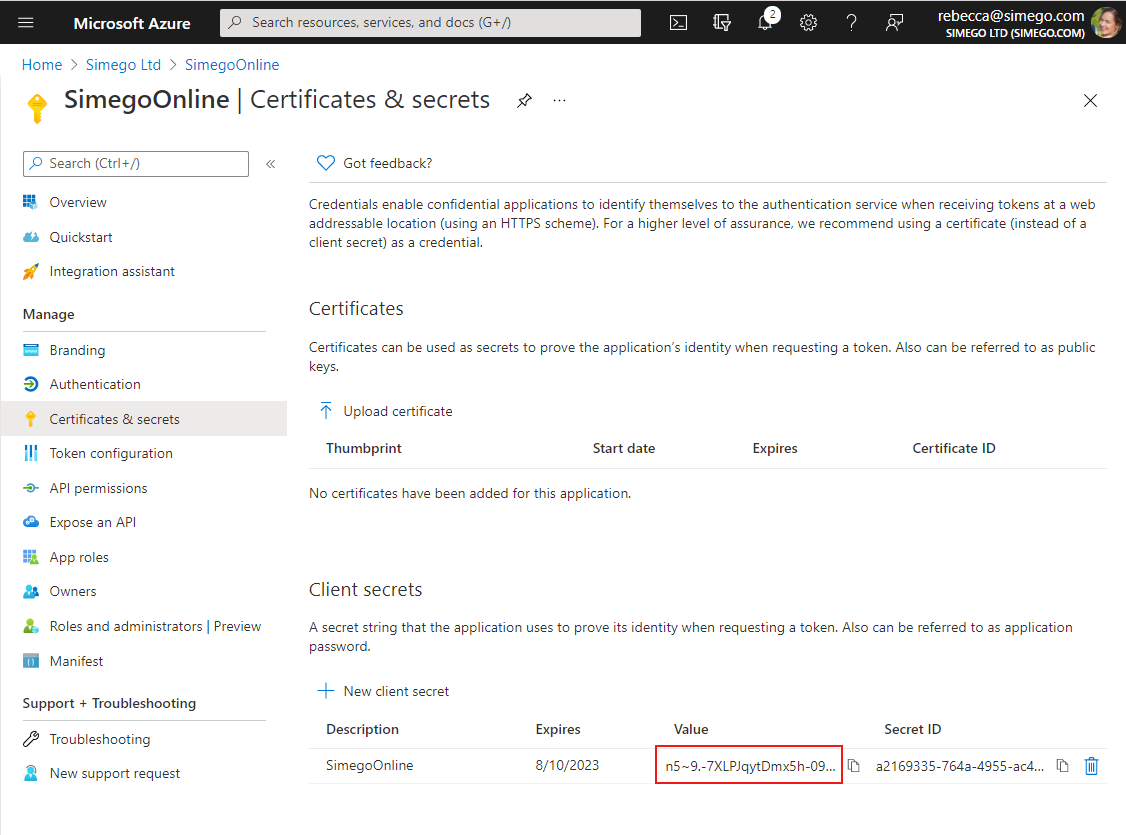
Make sure to save your Client Secret somewhere safe to use later as once you leave the page you will not be able to retrieve it.
Configure Simego Online
Now we need to configure Simego Online. To do this browse to your tenant and go to Settings > System Settings and select Azure AD from the toolbar at the top.
Enter in your Tenant ID and Client ID from your Azure App and then click Continue.
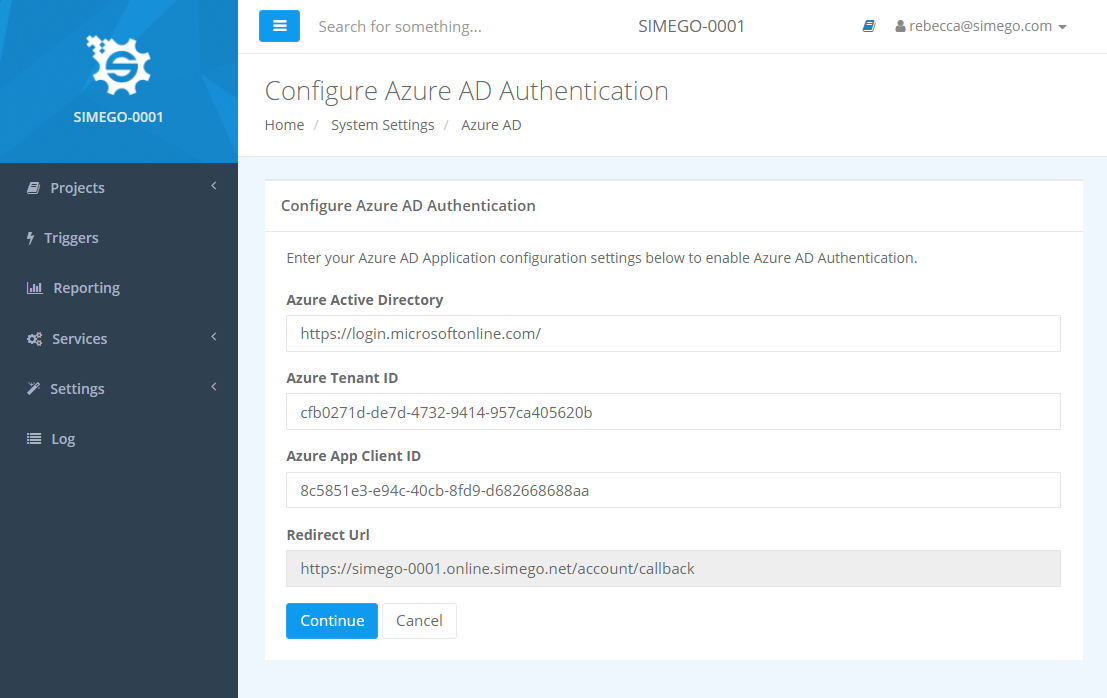
Sometimes it takes a little while for the Client Secret to register, so this may throw an error. If it does go back and try clicking continue again.
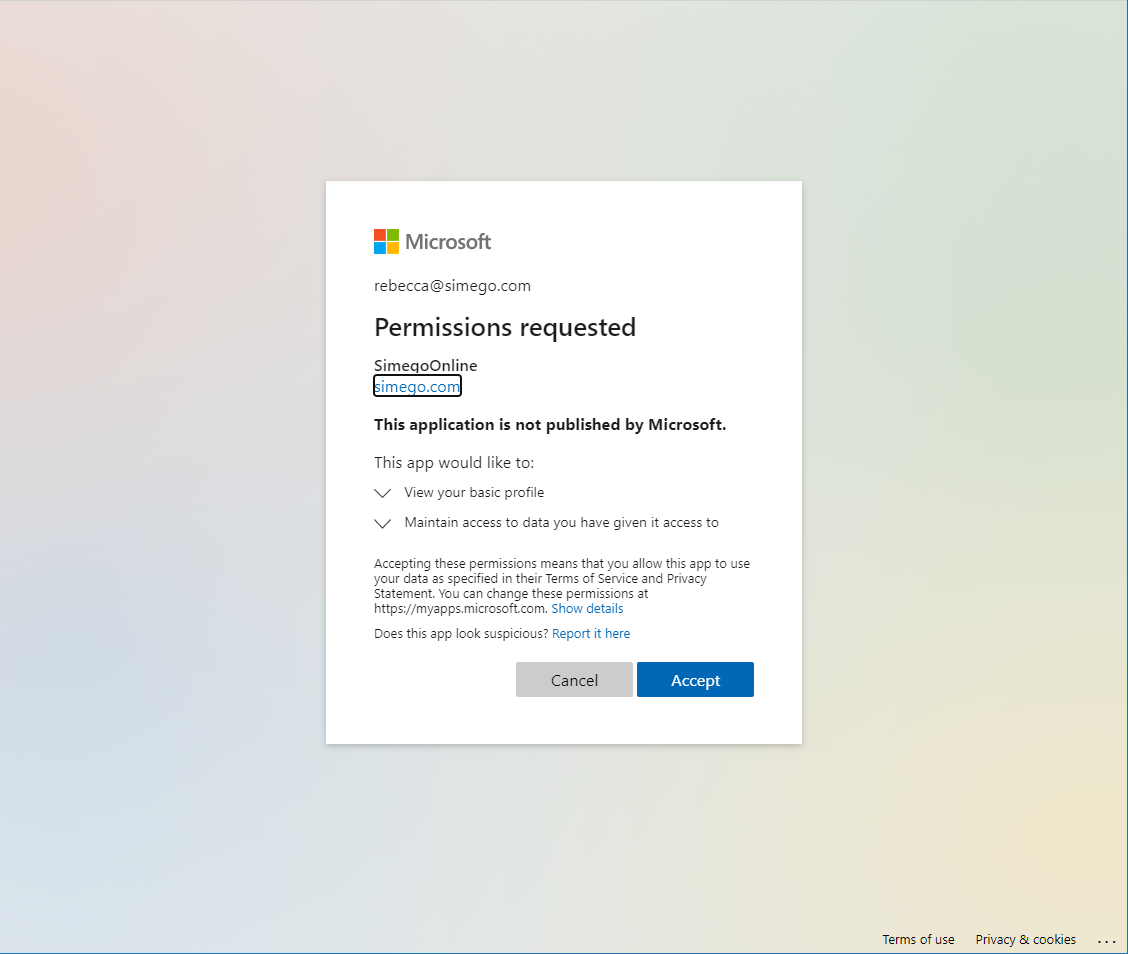
This will then prompt you to log in to your Microsoft Account and allow the permissions to connect.
Now you need to enter the Client Secret you saved earlier and then click Save.
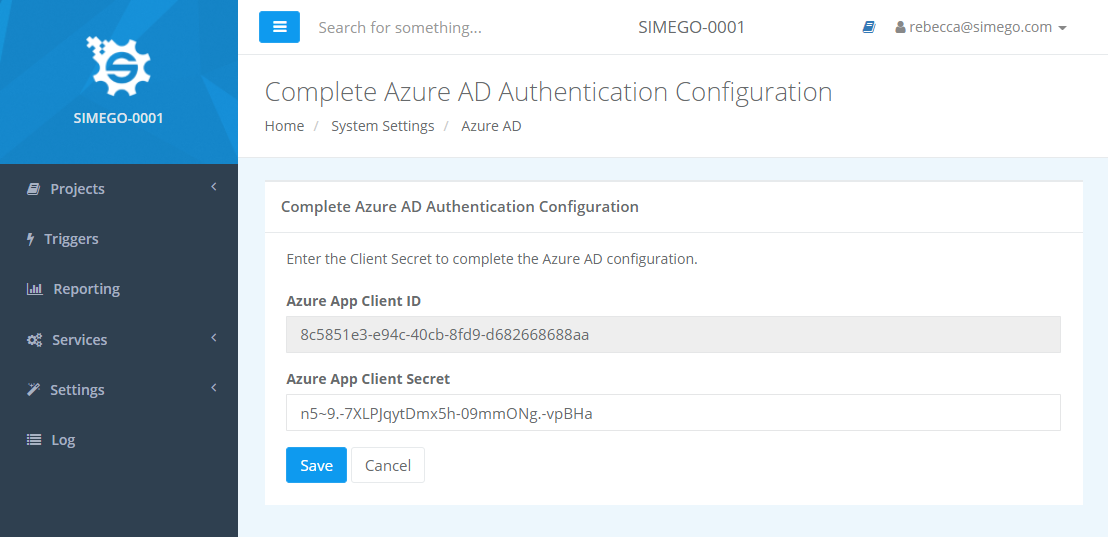
You will then be signed out and when you sign back in, you will need to use your Microsoft credentials.
The configuration for Azure AD Authentication is now complete.
Adding Another User
Once you have configured Azure AD Authentication for your tenant you can add additional user accounts so then they can access the system.
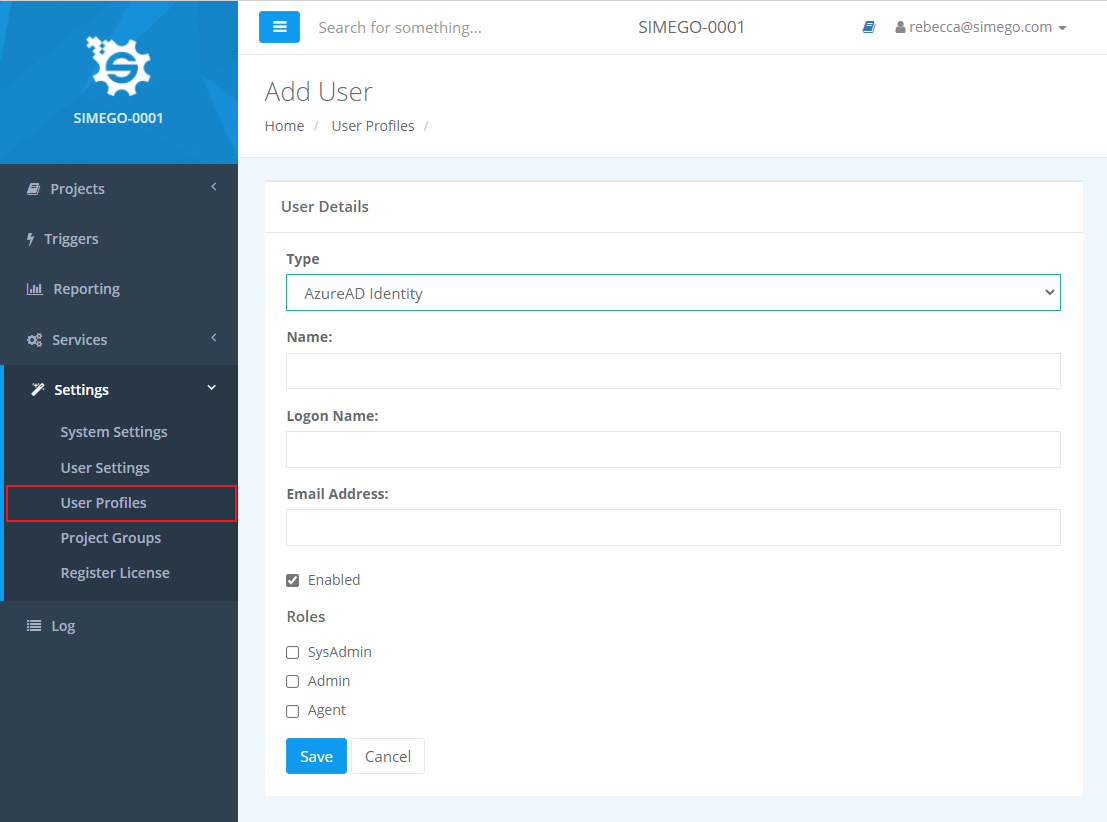
To do this go to Settings > User Profiles > New User and then enter in a name and their logon name. You can leave the email address blank.
You can also set their permission level by giving them System Admin or Admin roles. If you leave all the boxes unchecked then they will have permission to start and view projects but not edit them.
