Service Agents
Service Agents run the tasks in Ouvvi, they can run across multiple machines and networks providing they can reach and authenticate with this web application.
Setup the Agents to run your Projects, Steps and Triggers in the locations where you need them.
Each configured Agent is an individual Thread in the Agent Service so the more agents configured the more work is executed in parallel.
Dependencies allow you to control Ouvvi Steps so that they only execute on a specific group of Agents. For example running a Step that accesses On Premise resources behind the corporate firewall.
Adding a Service Agent
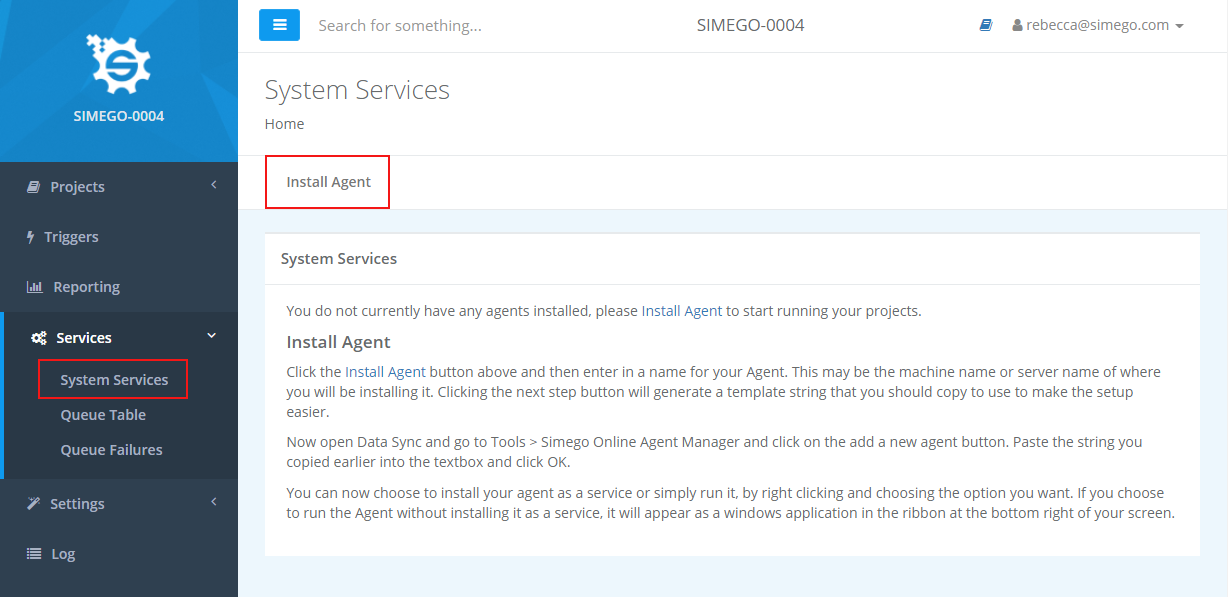
Go to Services > System Services and click onto the Add Agent button.
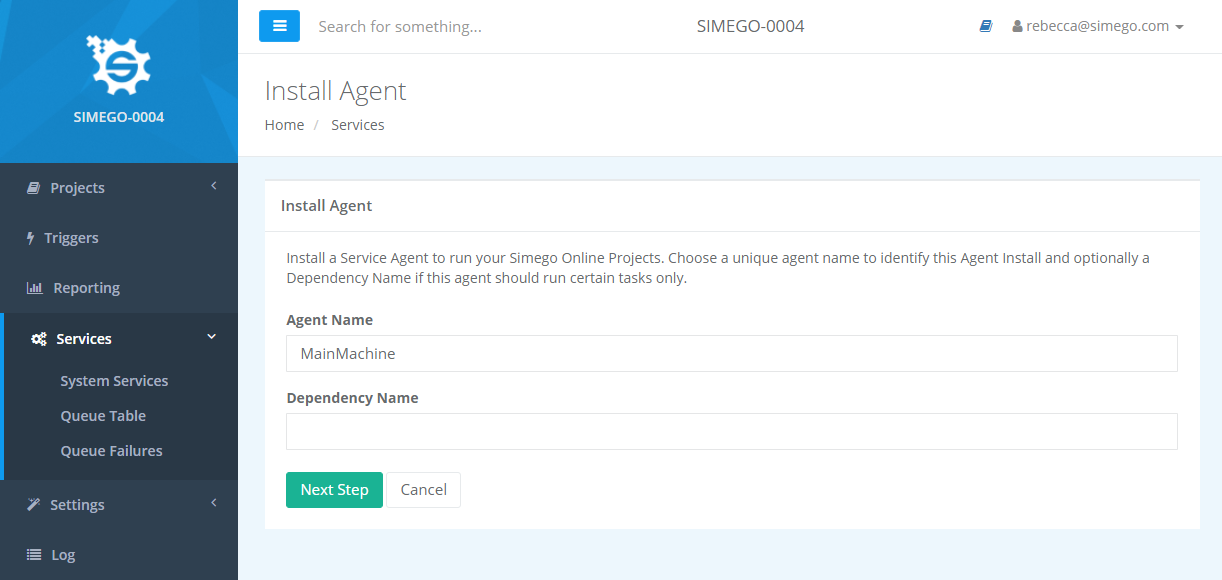
Type in a name for your agent and then click Next Step. You can add a dependency however this is not a requirement for typical installations.
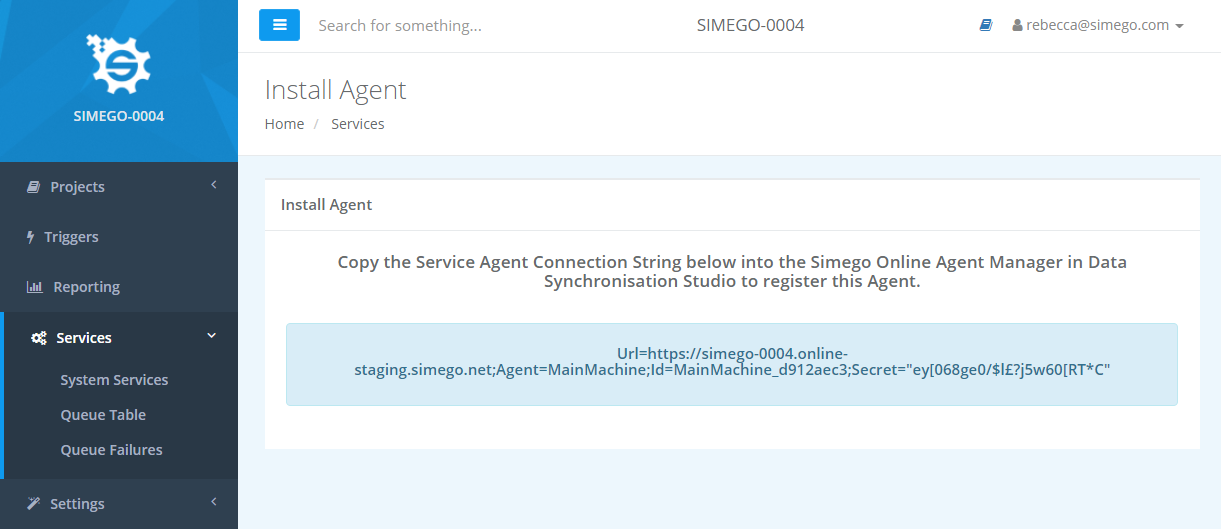
Now copy the text that appears in the blue box. You will need this to install your agent.
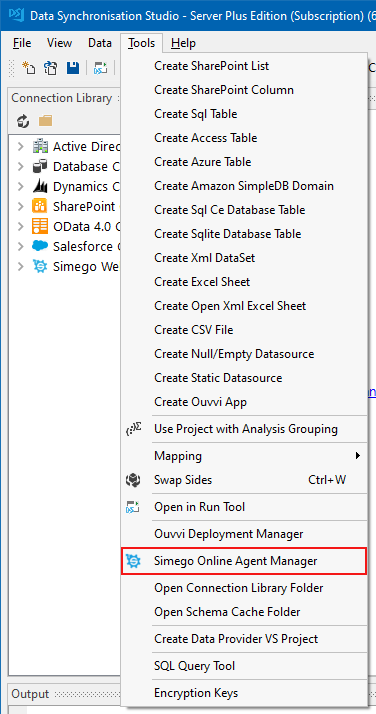
Now open Data Sync and go to Tools > Simego Online Agent Manager.
Click the New Agent button to open the configuration window.
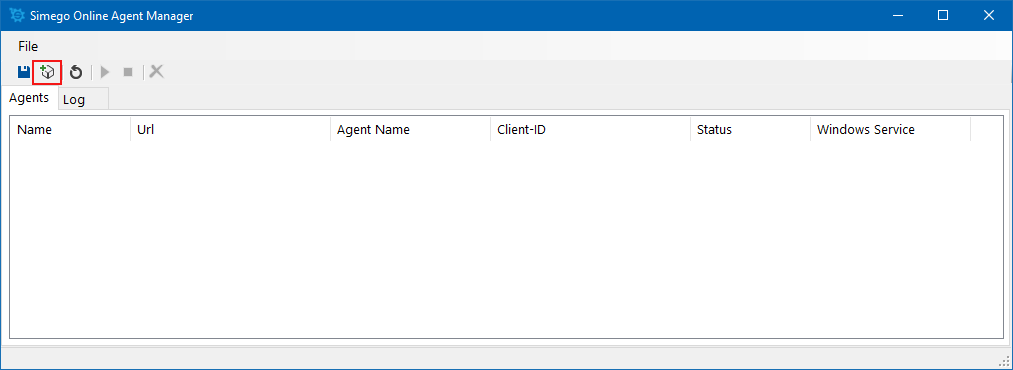
Now paste the text that you copied earlier from Simego Online into the window and click OK.
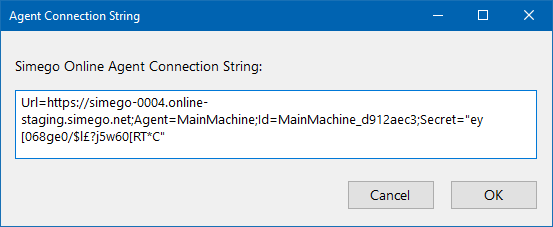
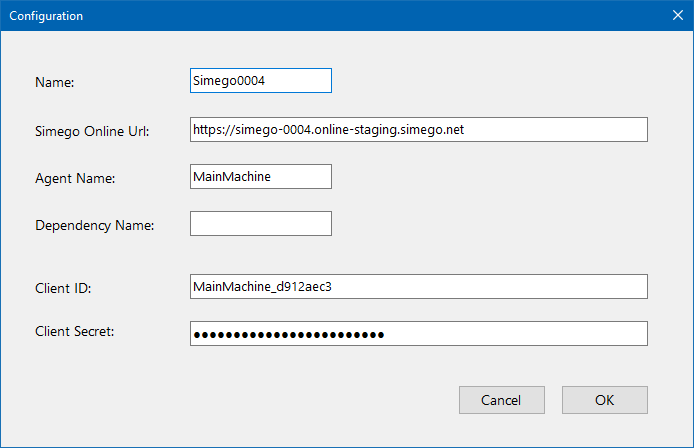
Type in a name for your agent and then click OK to install and create it.
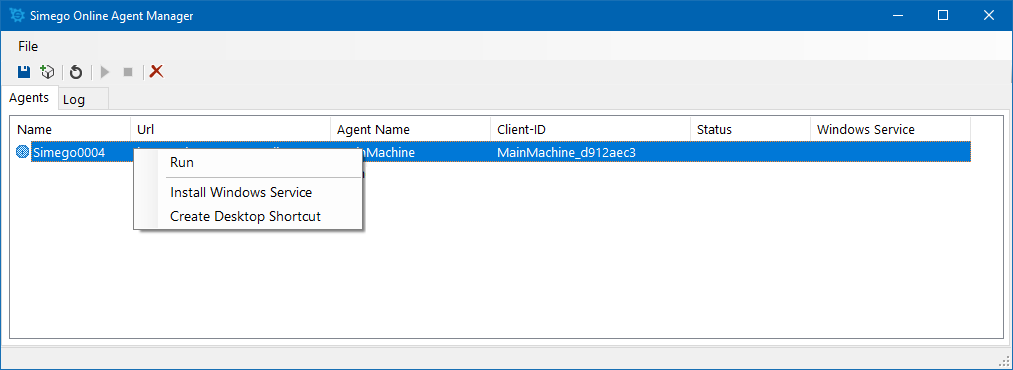
You can now run your agent as a windows application, and create a desktop shortcut to make this quicker to run when you start your machine or you can install the agent as a Windows Service.
Typically we would install as a Windows Service, however it will depend on your setup and how you would prefer Ouvvi to run as to which option is best for you.
Start the Services
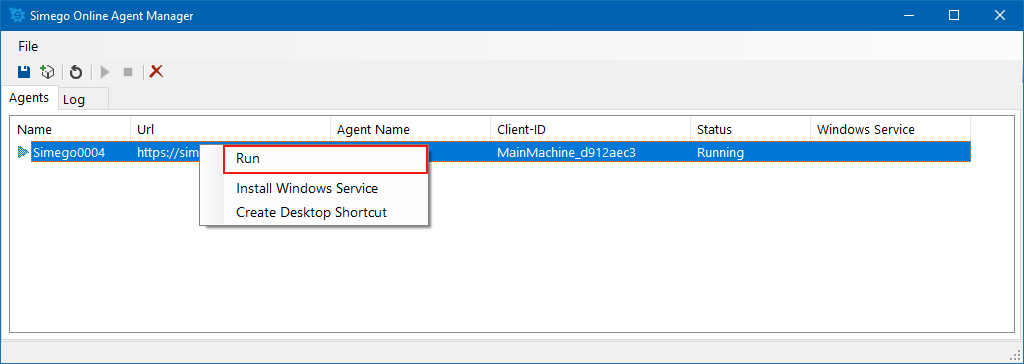
You now need to start your agent, you can do this by selecting your agent and clicking the green play button or right clicking and choosing Start Service.
If you are running the agent interactively you can right click and select Run.
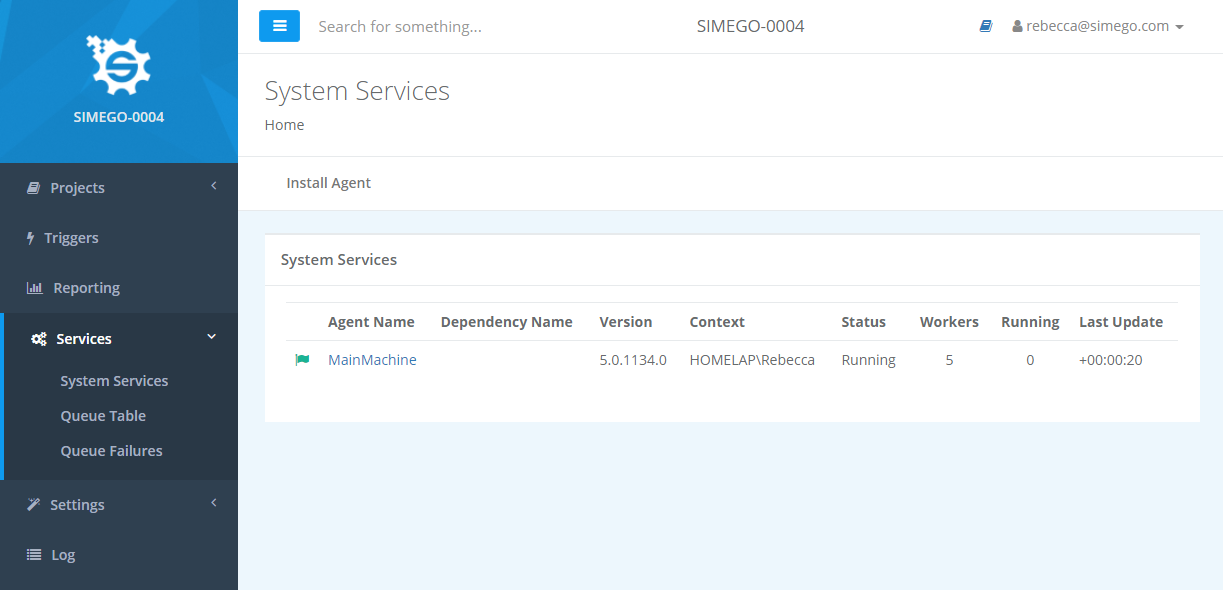
Go back to your Ouvvi site and look at the System Services page, you will see that the agent has been created and the service is running. Simego Online is now ready to use.
Adding an Agent User
When you add an agent to Simego Online they will be added as an Agent user. You can add additional agent users manually by creating a user account and checking the agent checkbox.
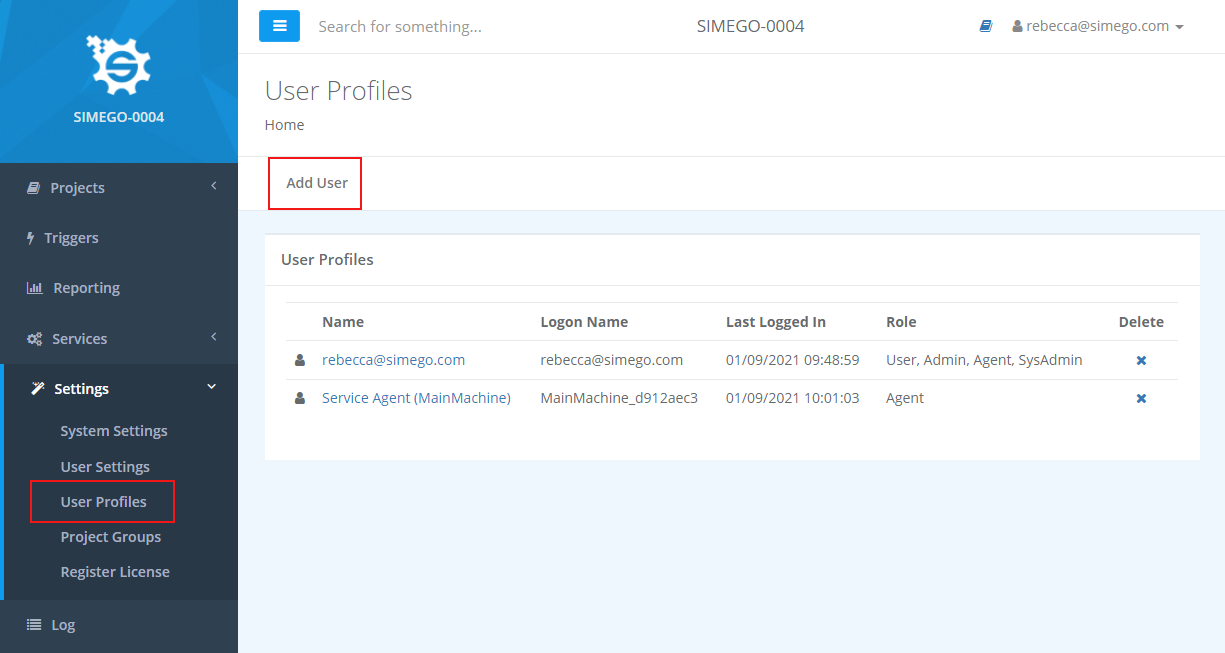
Go to Settings > User Profiles and click on the Add User button in the mini menu.
Then enter the required details as listed below:
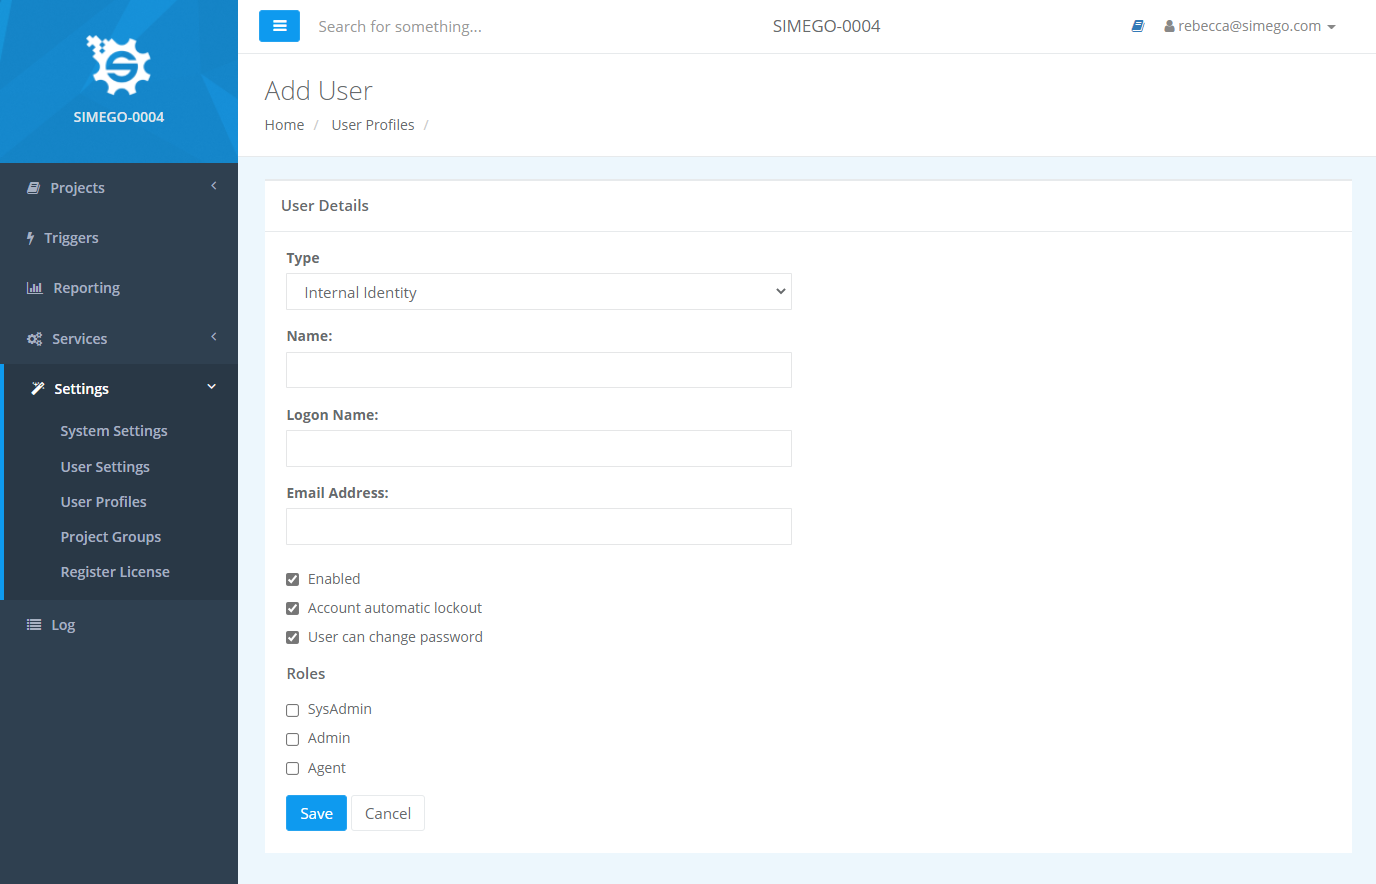
Select the Agent checkbox to make the user an Agent. If the agent is installed as a service you will need to enable admin permissions to install it. Once it has been installed these permissions can be removed as admin permissions are not required to run.
The agent allows API calls and the admin enables read and write status. To add admin rights check the Admin checkbox and press Save.
