- Data Sync
- Project Status
- Send Email
- Run External Program
- File Copy
- File Delete
- Folder Delete
- Import Command Line Parameter
- Import Environment Variable
- Set Process Environment Variable
- Execute SQL
- HTTP(s) File Download
- HTTP(s) File Upload
- Log Entry
- Run Ouvvi Project
- Run Powershell Scripts
- Run Python Scripts
- Time Delay
- Save Project
- Version Number Increment
- Zip a File
Schedule your Run Tool Projects with Ouvvi
To use Ouvvi to schedule your Run Tool projects you will need to have first installed Ouvvi. If you haven't already done this you can find the details here.
By default this will use the Connection Library where the Ouvvi Processing Service is running from, not the Ouvvi Connection Library.
Create the Project
You need to start by creating an Ouvvi project to hold your Run Tool project. You can do this either by clicking onto the book icon at the top right of the page or by browsing to projects and clicking New.

Add the Run Tool Project
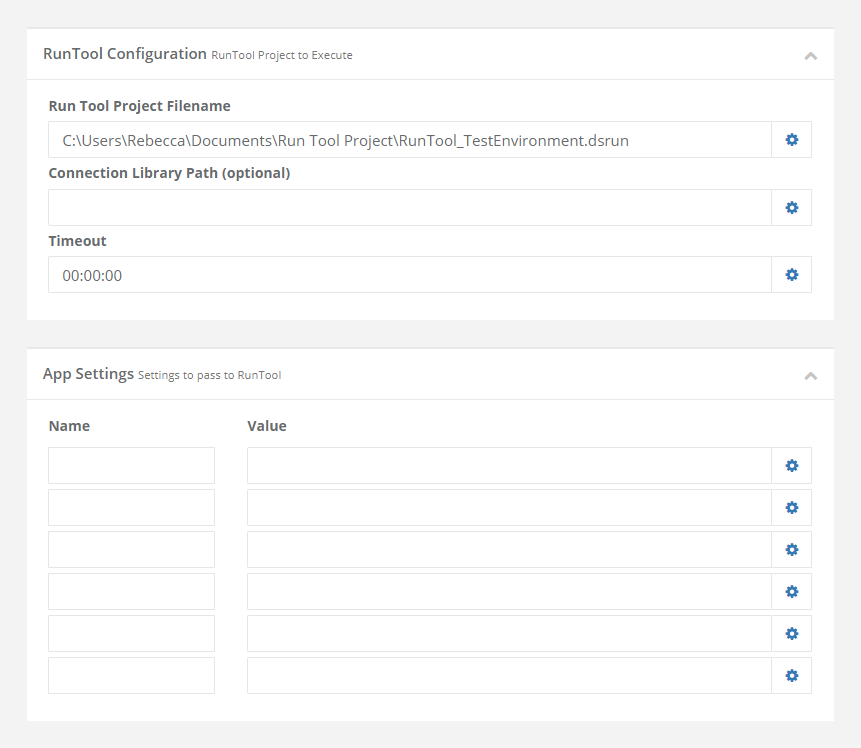
Now you need to add the Run Tool project as a step go to Add Step > More... and then select Data Sync RunTool Project from the list.
At a minimum you need to enter in the full path to the Run Tool project to be scheduled. If you want to make use of Ouvvi App Settings in your Run Tool Project then add each of them as a new line under the App Settings section.

Once you are done click Save to save and create the step.
It is good practice to try running the project to make sure it runs as expected. To do this click the Start button.
Add the Schedule
Once the project is configured and running as expected, we need to add a trigger to schedule it to run. You can make use of the full Ouvvi trigger library to schedule this either by event based or time based triggers.
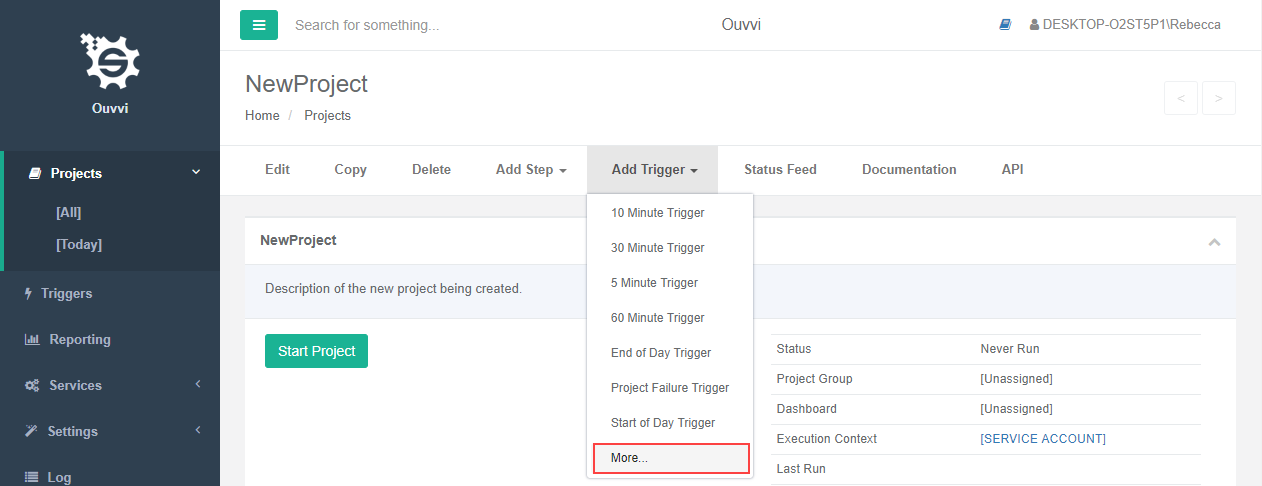
To add a trigger go to Add Trigger and either select the trigger from the list or click on more... to configure a new trigger. Select and configure the trigger you need and then add this to your project.

For more details on Triggers, please see our documentation here.
Troubleshooting
If it errors with the error RunTool Project file not found then it is most likely that the agent cannot access the location where the Run Tool project is stored.
The first thing to do is check that the service user identity has access to the path of where the Run Tool project is stored. You may find that it is either a different user or the agent is running as Network Service.
To change this open the deployment manager and right click onto your Ouvvi instance. Select Open Service Control Manager and then locate your Ouvvi Service.
Right click and go to Properties > Log On and change the account to a user that can access the file location.
If the user is not already added as a user in Ouvvi you will need to do this now, and give them agent & admin permissions.
