Getting Started with Data Synchronisation Studio
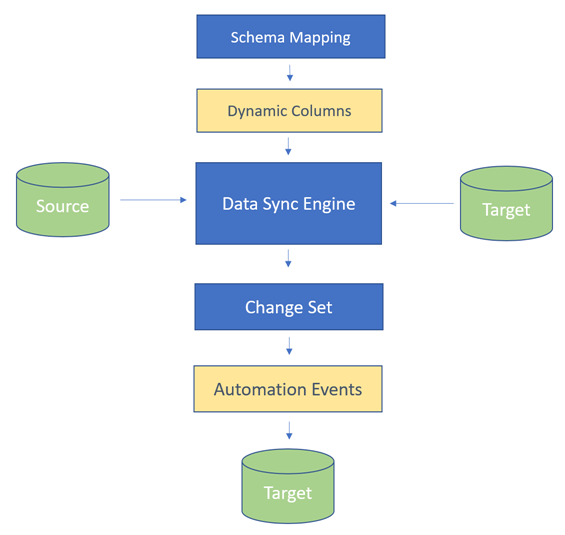
Data Sync is based in the concept of a Data Comparison Engine where you compare data in a source Data Source to a Target Data Source and Data Sync takes care of the operations required to make the Target the same as the source.
Data Sync reads the data from the source and target systems then reconciles the data by joining the data sets via the Key Column(s) defined in the schema map. This produces a Change Set of ADD/UPDATE/DELETE actions to apply to the target to make the Target the same as the source.
The Data Sync Designer is where you design your Data projects, the Designer allows you to quickly and easily build and test your data projects.
The basic steps required for any Data Sync project are as follows (highlighted in the screenshots below) :-
- Connect Source Data Source
- Connect Target Data Source
- Map the Fields from Source to Target
- Define the Key Column(s) that join the records together
- Compare the Source to the Target
- Synchronise the Change Set to make the Target the same as the source
Connect
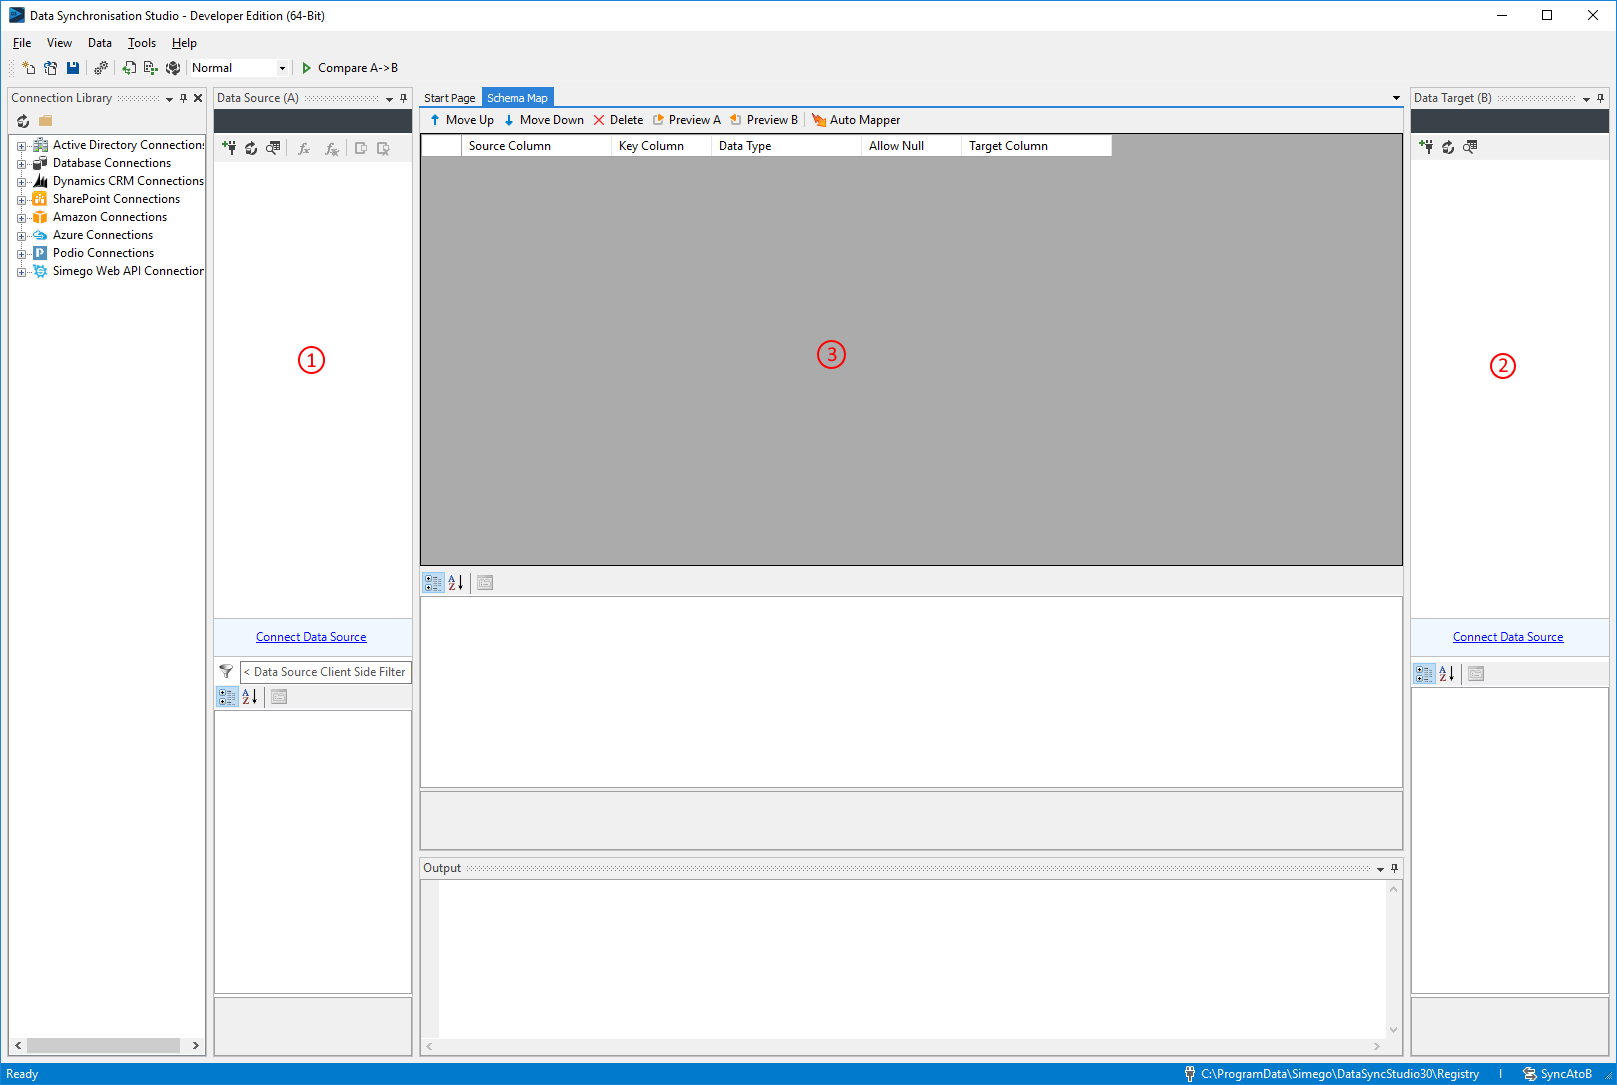
Connecting your data sources will show the default schema from each Data Source in each Data Source Window (1 and 2).
A default Schema Map will be displayed (3) that defines the mapping between the two systems.
Map the Fields
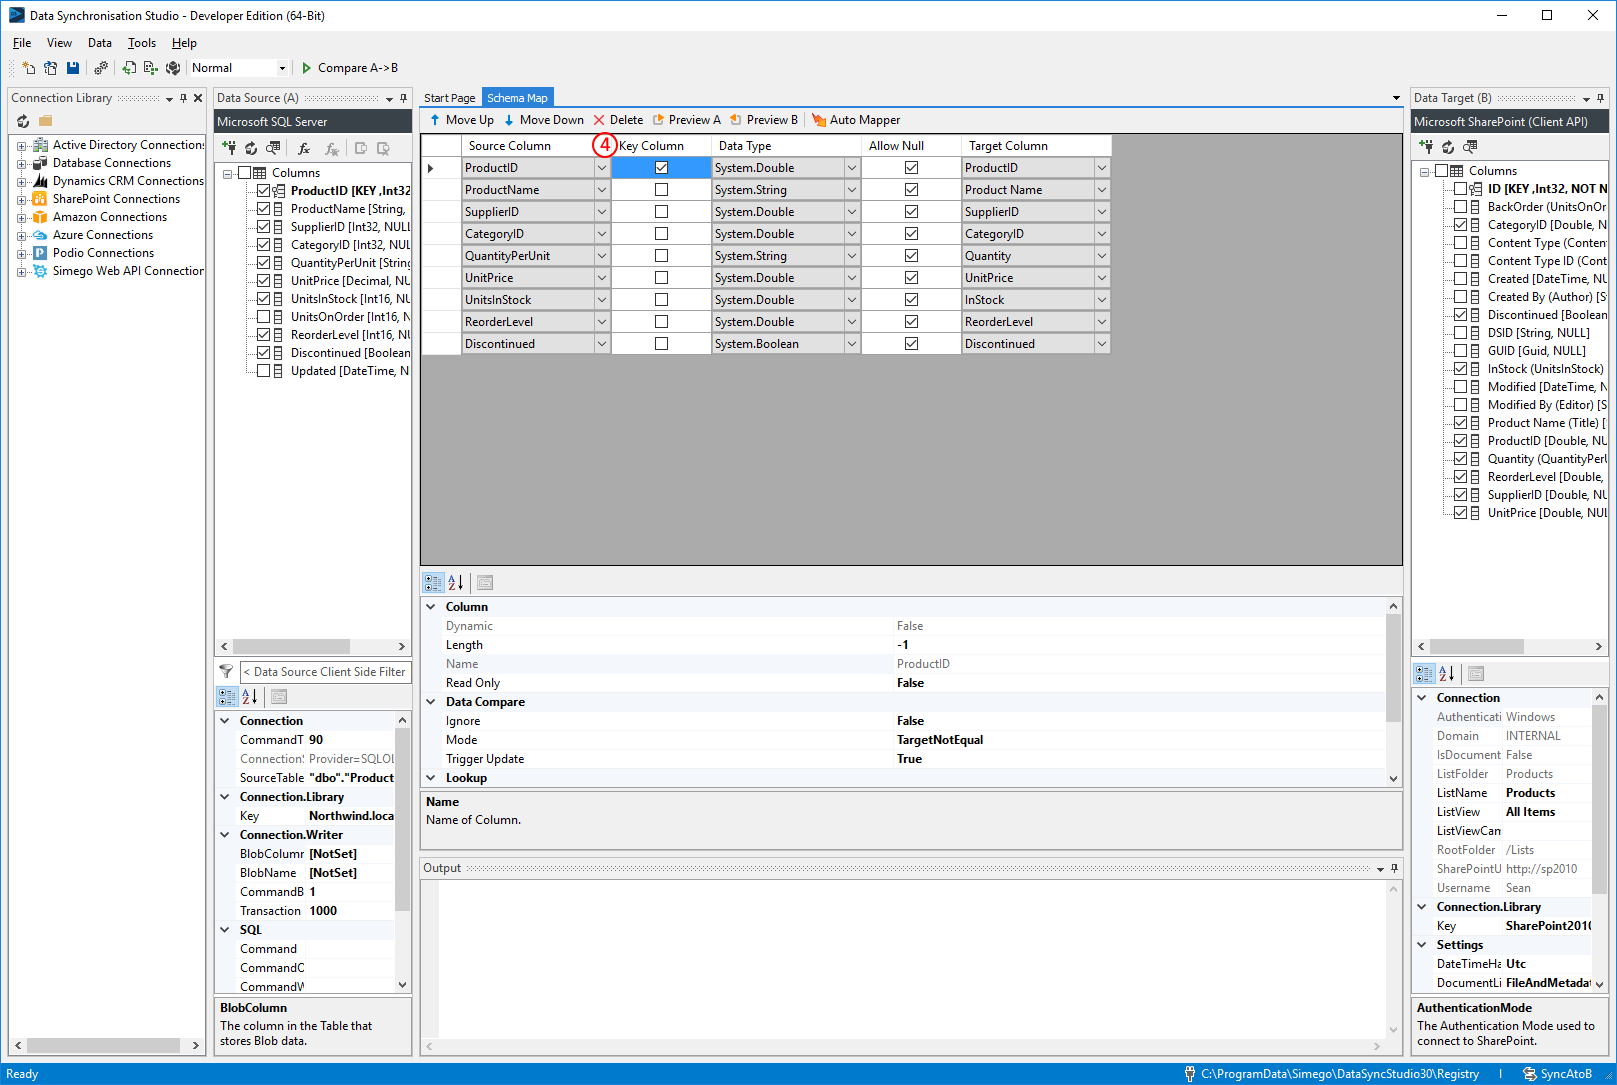
Adjust the Schema Map (3) and set the Key Column (4) that joins the records, the Key column is used for Data Sync to work out ADD/UPDATE and DELETE operations.
- If the Key Value exists in the Source Only it's an ADD Operation
- If the Key Value exists in both the Source and Target it's an UPDATE Operation
- If the Key Value only Exists in the Target then it's a DELETE Operation
DELETE is disabled by default via the Target property EnableDelete = False
Compare and Sync
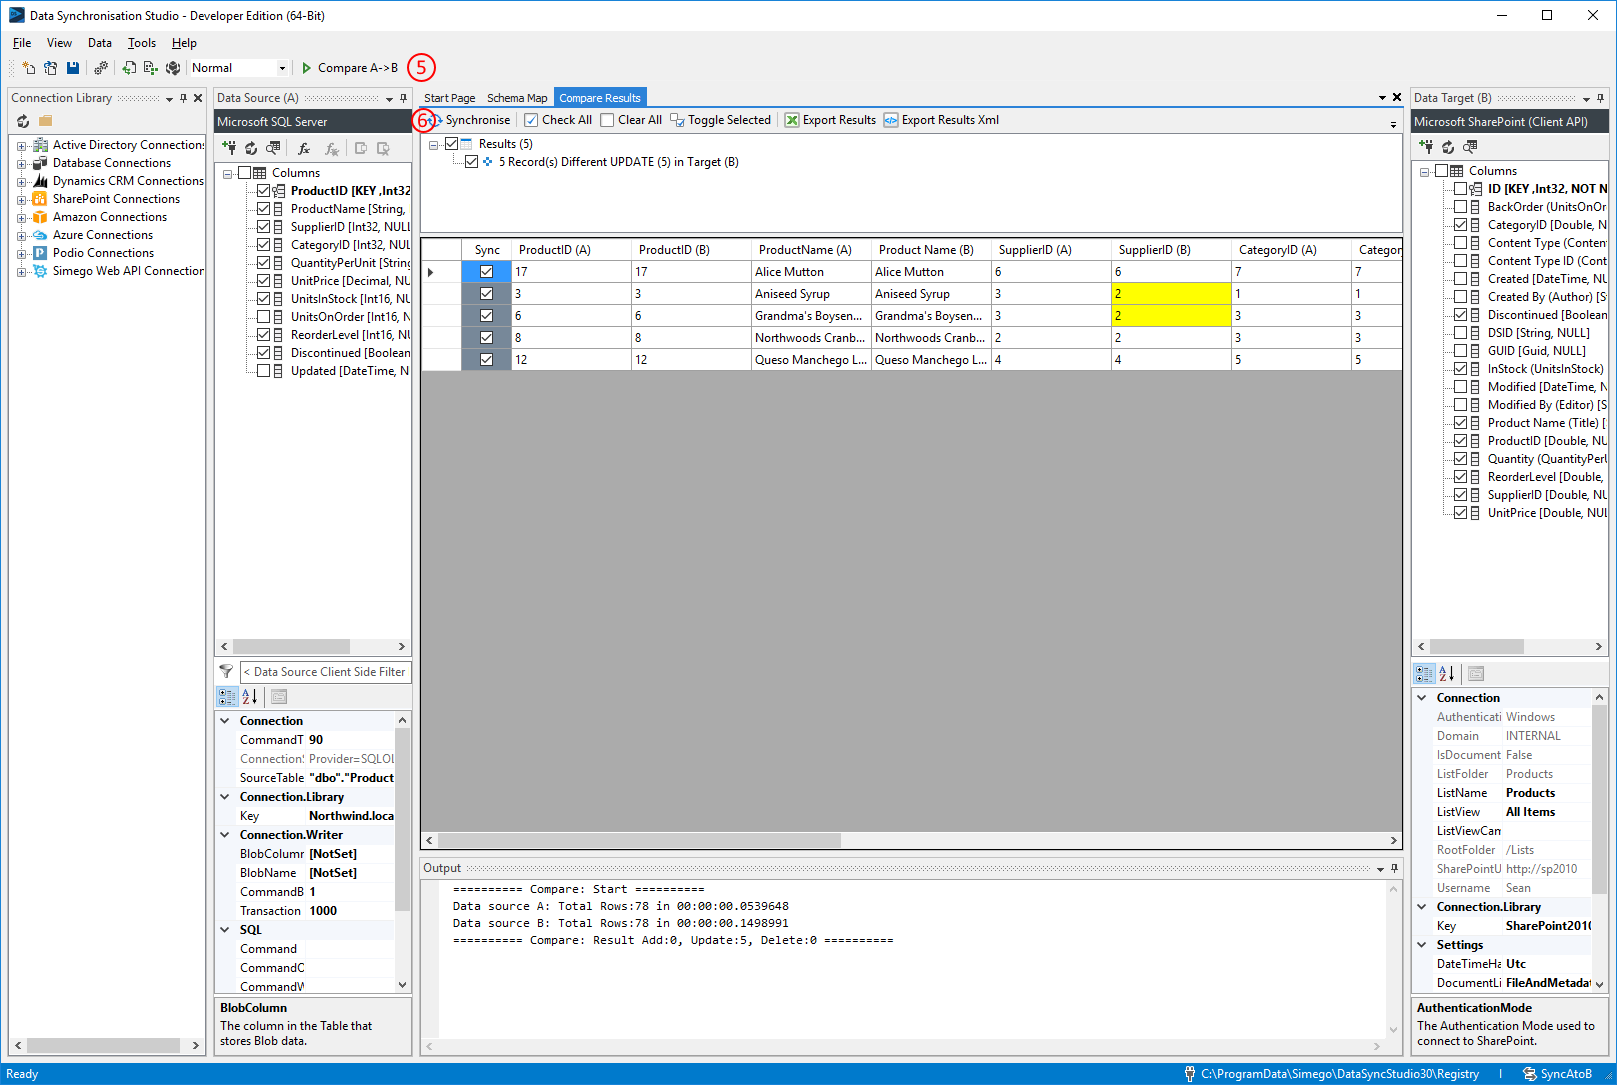
To run the data compare press the Compare A->B (5) button on the Toolbar, this loads the Data from both sides and runs the data comparison. This does not affect your data it just reads the data to work out what changes are required to make them equal.
The Results window shows you the Changes that are required to make the Source and Target equal. You can view the changes and selectively choose which rows you want to sync via the Sync checkbox. The Update Set shows changes with a Yellow background, only those columns with a Yellow Background are updated.
Pressing the Synchronise (6) button on the results window mini-toolbar starts the process to update the data in the Target.
Troubleshooting
Failing to Start
If your copy of Data Synchronisation Studio fails to open the main window when you run the program it could be that the window location file is corrupt.
The easiest thing to do is to remove your local settings for Data Sync and let it start from a clean start.
Delete the following directory replacing '[PROFILE]' for your profile name. C:\Users\[PROFILE]\AppData\Local\Simego\DataSyncStudio30
Now when Data Sync starts it will start with default settings.
Note: This directory maybe hidden on your system so you might need to show hidden files.
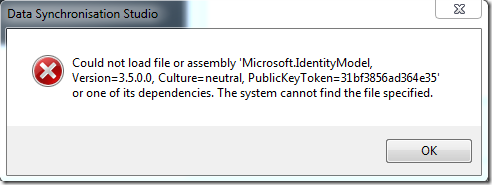
Could not load file or assembly Microsoft.IdentityModel error
If you get an error message when you try to connect that the system cannot load the Microsoft.IdentityModel assembly then you need to install the Windows Identity Framework (WIF) then re-start the application for the changes to take affect.
To enable this feature in Windows type the following into a command line:
dism /online /Enable-Feature:Windows-Identity-Foundation.
When using Windows or Windows server you will need to enable the feature from theAdd/Remove Features utility.
