Message Configuration
Please note that Microsoft is retiring the Exchange Web Services API in 2026. As our connector is based on this API, it means that it will not work from this date. For more information on this retirement please see the Microsoft page here.
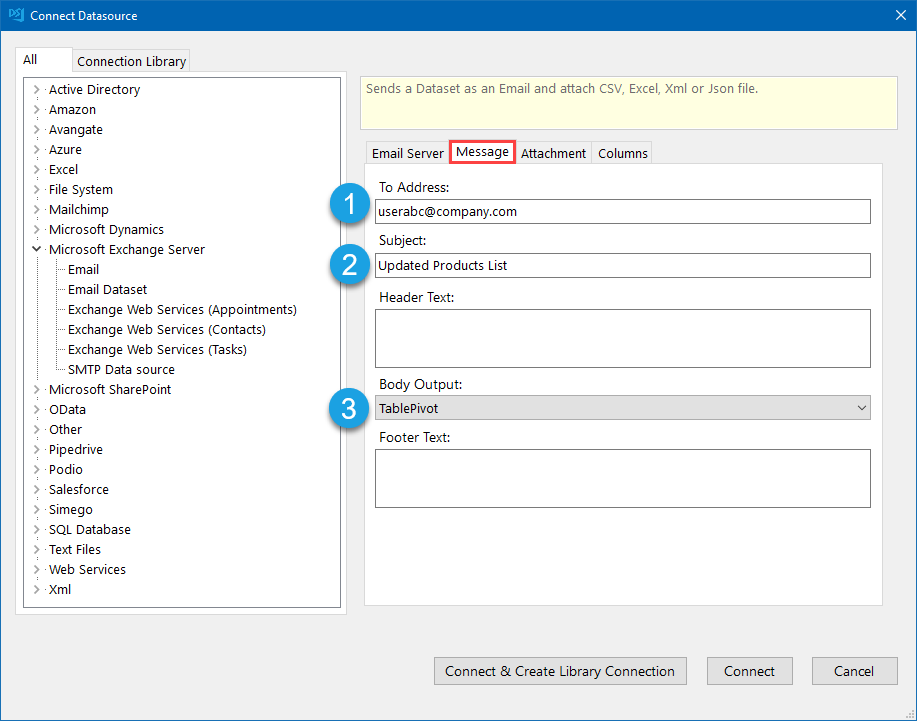
Under the message tab you can configure who to send the message to, the subject and the body of the message. This is where you can determine if you want to include a table containing the data inside the attachment.

Enter in an email address or multiple email addresses separated by a semi-colon to send the message to. Make sure to enter a subject that will help users know what the email is about.
You can then decide if you want to include any text in the table header and footer and whether you want to include the table to show the data.
There are three options to choose from for the Body Output: None, Table, TablePivot.
None will mean there is no table added to the message.
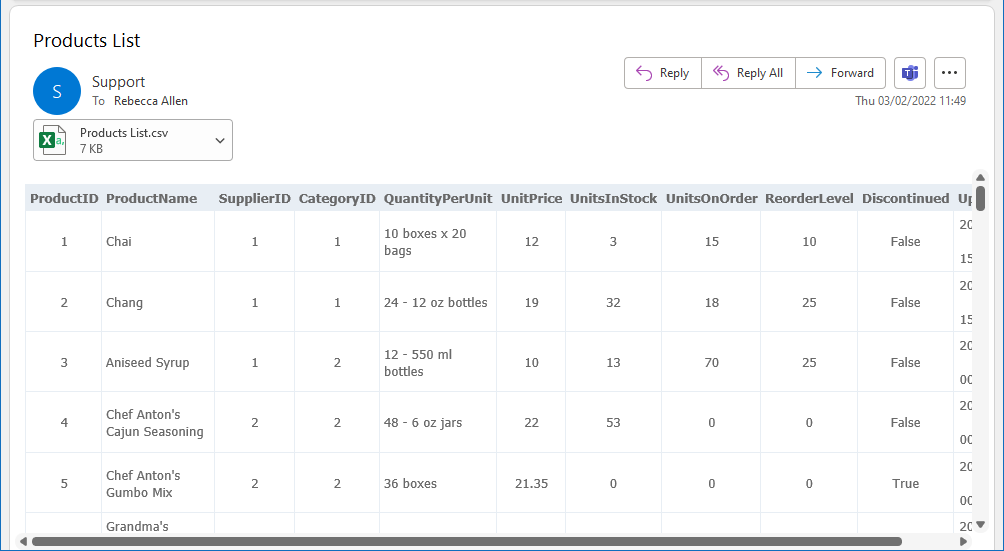
Table will list each record as a new row. The output might look something like this:

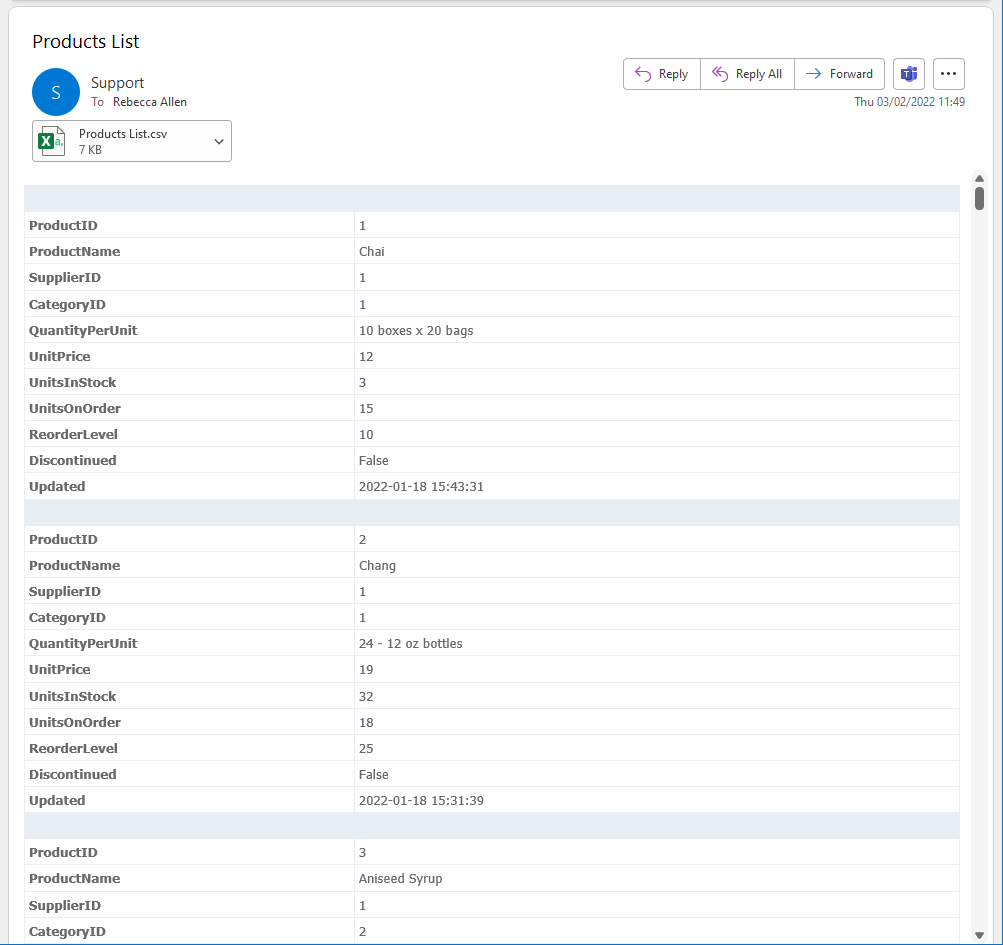
TablePivot will list each record as a separate table and each column as a row within that table. The output for this would look similar to this:

You can always change these properties once you have connected by editing them in the connection property window.
Then move onto the attachment configuration.
If you decide not to configure your attachment and columns now, make sure to save the connection to the connection library by clicking onto Connect & Create Library Connection. This will enable you to be able to use the quick start Create Email Dataset function.
