How to Enable and Disable Users in Active Directory using the V1 Conector
You may be given a list of users that need to be either enabled or disabled in Active Directory, this list might be in SharePoint, it might come from your HR system or it might be a document. To enable and disable users in AD using Data Sync you would connect to this list as your source, and connect to your Active Directory OU where your users are located as your target.
Disabling accounts requires the ACCOUNTDISABLE flag on the UserAccountControl attribute to be reset to either 0x0202 (in Hexadecimal) or 514 (in Decimal), as described by Microsoft.
We will need to lookup the current value of the UserAccountControl to see if the account is currently enabled or disabled and then set this accordingly.
Warning: Testing is a great way to make sure you know what is happening.
Please try this on test data before trying on your production OU. You do not want to disable all accounts by mistake!
Depending on the version of Data Sync you are running, you may need to add UserAccountControl to the properties collection. You can read more on how to do this here.
Lookup the Current UserAccountControl Value
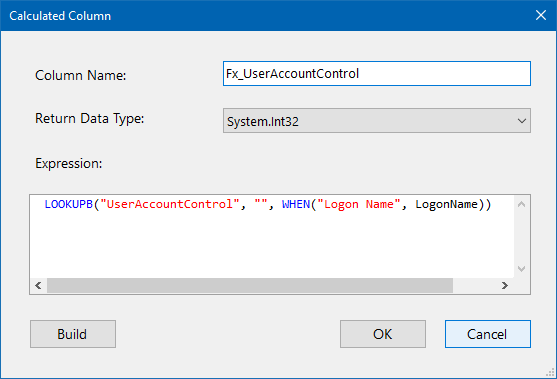
Once you have connected to your source and to AD as your target, you need to create a Calculated Column (in this example we've called it Fx_UserAccountControl) of type Int32 which will get the value for UserAccountControl from your AD.
LOOKUPB("UserAccountControl", "", WHEN("Logon Name", LogonName))
The WHEN statement of the lookup should match your project configuration for the Key Column and may be different to our example.
You need to use your linking column within the WHEN clause to link the two sources, we use LogonName in this example. Alternatively you could use another column that is unique such as EmployeeID.
Please see our page on Lookups in AD for more guidance.

If your lookup is not returning results it may be that either the user does not exist in your AD or the column names are not correct.
Set the Enabled Status of the User
The next step is to set the enabled status of the user.
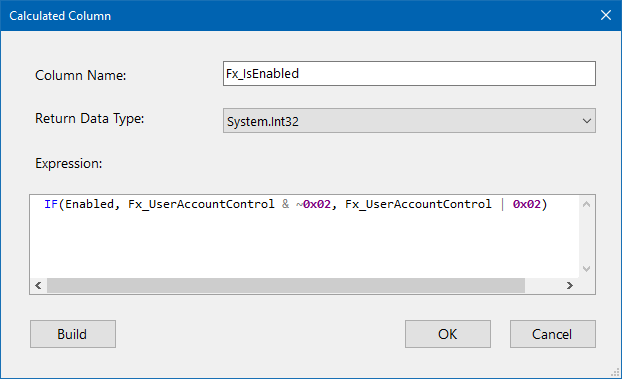
We do this by creating another Calculated Column (Fx_IsEnabled) of type Int32 which will return the modified value for UserAccountControl (this is the calculated column you just made) based on whether the account is enabled.
This expression assumes your source bool value is called Enabled you might need to change this to match your column name.
IF(Enabled, Fx_UserAccountControl & ~0x02, Fx_UserAccountControl | 0x02)

Map the Columns to the Schema Map
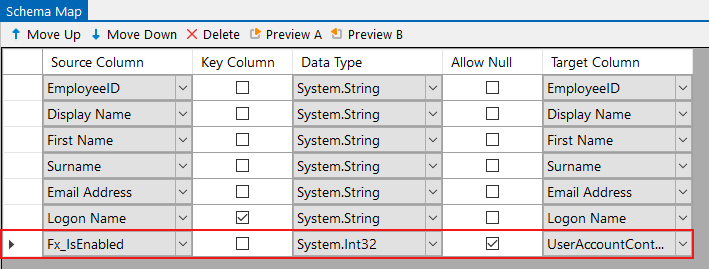
Now map your Fx_IsEnabled column to UserAccountControl on the target.

You can now run the comparison and synchronise the results. Make sure to test a few first as you do not want to disable all accounts in your AD.
Handing New User Accounts
If you are adding accounts to Active Directory you need to make a few changes to handle the additions. As the account does not exist yet there is no value for the UserAccountControl attribute.
To get around this we need to set a default value for UserAccountControl, for example this could be: 512 which is the value for enabled.
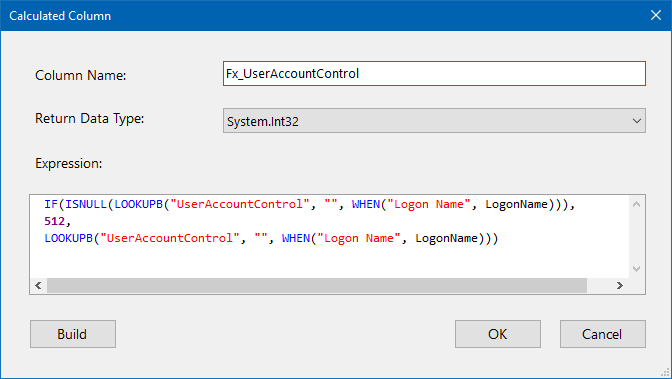
You can do this by changing the Fx_UserAccountControl lookup to contain an IF statement to return this default value when no value exists.
IF(ISNULL(LOOKUPB("UserAccountControl", "", WHEN("Logon Name", LogonName))), 512, LOOKUPB("UserAccountControl", "", WHEN("Logon Name", LogonName)))

You will also need to set EnableAdd to True on the target properties to add your new users.
Use Dynamic Columns
Another way to enable and disable users is to use a Lookup back to the target Active Directory to bring in the values from the Target to the Source and then use Dynamic Columns to Set the Flag in UserAccountControl.
Use the Dynamic Columns code below to either Set or Clear the ACCOUNTDISABLE flag in UserAccountControl.
partial class DataSourceRowOverride : Simego.DataSync.DynamicColumns.DataSourceRowInternal //Do Not Change This Line
{
    public int MyUserAccountControlEnable
    {
        get
        {
            return Lookup1_userAccountControl.Value & ~0x02;
        }
    }

    public int MyUserAccountControlDisable
    {
        get
        {
            return Lookup1_userAccountControl.Value | 0x02;
        }
    }

}
