Create User Accounts in Active Directory and Set Passwords
The following documentation covers creating users in Active Directory, enabling the account, setting a default password, assigning the manager and adding the user to groups.
You can find a copy of the data we are using in this example in the zip folder of the sample project available here: Download Create Users Project
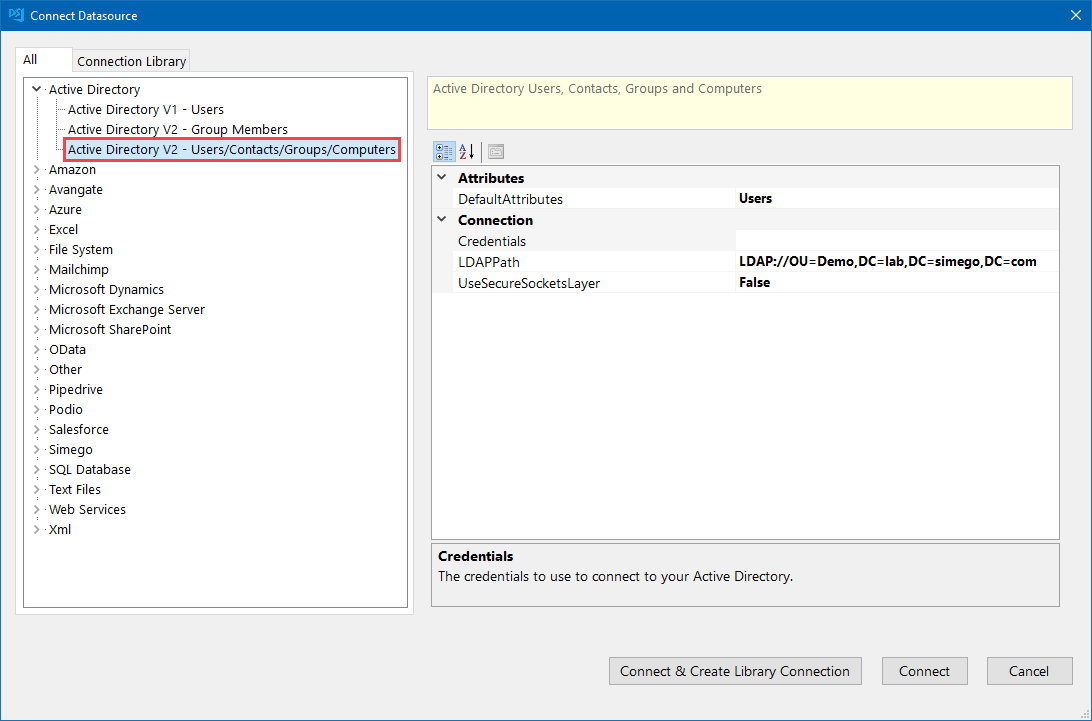
To begin connect to your source data and connect the target to your Active Directory using the Active Directory V2 - Users/Contacts/Groups/Computers provider.
We now need to map our columns to our schema map. You have a few options available for each depending on your data so lets walk through each step and their options.
User Details
At a minimum you will need to provide a first name, last name, account name, and logon name for each user. However if they do not currently exist in your source data you can create some of these fields.
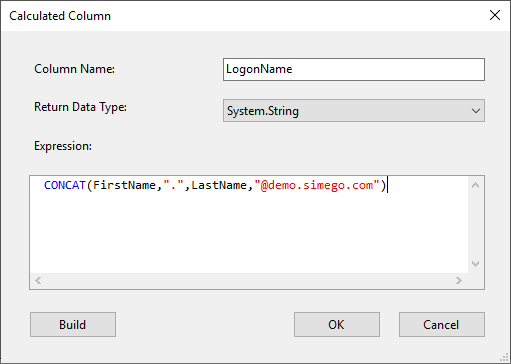
For example if you do not have the logon name already in your source data then you would use calculated columns to provide one in the format you need.
An example of how you might do this for the format firstname.lastname@domain.com is: CONCAT(FirstName,".",LastName,"@demo.simego.com")
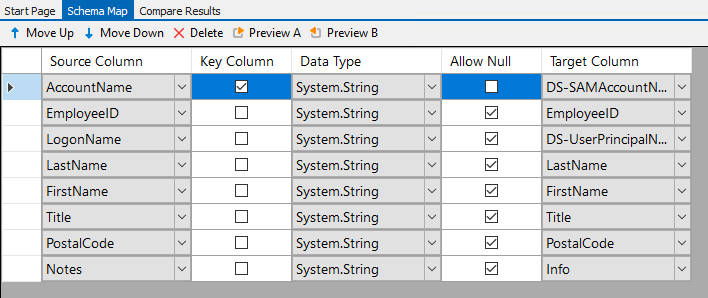
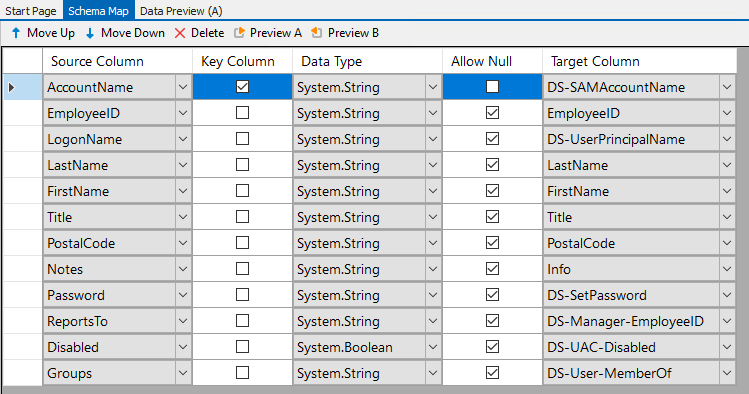
You need to map your logon name to the Data Sync attribute DS-UserPrincipleName.
DS-columns are Data Sync attribute columns that handle the addition of that field for each user. These usually have to be handled differently to add the values, which in previous versions would have needed you to write code. These columns take away the need to add code to project automation.
You also need to map your account name attribute DS-SAMAccountName and this should be set to be your key column.
In addition to the fields mentioned above you can map as many additional ones as you need, for example job title or notes.
Your schema map should currently look similar to:
Note: When adding new users, the account is set to enabled automatically. If you require different functionality you can learn how to set enabled/disabled status here.
Set a Default Password
To set a password on a new user account, the DS-SetPassword attribute clears the UAC ACCOUNTDISABLE flag from the account in AD.
If your data already has a column containing a default password for each user, you can simply map your password column to the DS-SetPassword attribute on the target.
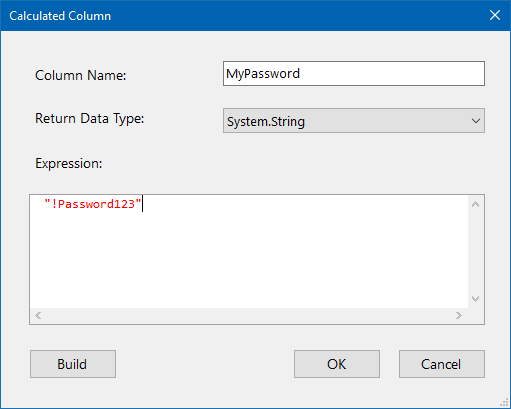
If you do not have a password listed you can supply a default value to be applied to all new accounts as their password such as
!Password123using calculated columns.
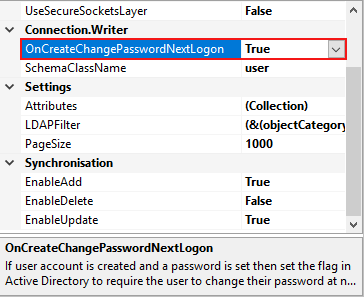
We can additionally set that the user must change the password at their next logon by setting pwdlastset in the connection properties.
By default this is set to True. If you do not want users to change the password, then set this to False.
To do this go to the connection property window for AD and change the value for OnCreateChangePasswordNextLogon.
Assign the Manager
When assigning a Manager to a user Data Sync looks up the manager details for you.
You can use either the sAMAccountName, EmployeeID, DistinguishedName(DN), or an EmailAddress to add a manager to a user being added.
Please only map one of the 4 available columns for manager.
Please note that if the manager does not exist in AD it will return
nullfor the manager field. For example a new manager may be in the list of users you are adding. If you have this scenario then you will need to run the project again to update the manager column. Make sure to setEnableUpdatetoTrueif it is not already.
Alternatively you can handle the setting of manager in a different project, we cover the project setup for this here.
The target column you would map to for each available option is:
- DN -> DS-Manager-DN
- EmployeeID -> DS-Manager-EmployeeID
- Email -> DS-Manager-Email
- sAMAccountName -> DS-Manager-SAMAccountName
In our sample data the manager is listed by the EmployeeID, so for this we would use the attribute DS-Manager-EmpoyeeID.

Add to Groups
If your source data defines the groups the user needs to be added to, you can set this now.
Your groups need to be listed as an array in alphabetical order separated by a semi-colon (;).
Map your group list to the attribute DS-User-MemberOf, and Data Sync will handle the rest.
Groups can be created from the Group connector, but not when you are targeting users.
Schema Map
At the end of each of the above steps your schema map should now look similar to:
Compare & Sync
Once you are happy that you have all the data you need, click Compare A-> B to run the comparison. You can preview the results to make sure the data presents as you expect.

If you want to test the creation on one account simply deselect the checkboxes using the Clear All button and check the checkbox next to the record you want to add.

Once you are satisfied, click Synchronise to start the sync.
Once it has run you can either look for the users in AD or you can preview your target dataset to ensure that everything has run as expected.

