Connecting to Dynamics 365 via OAuth using a Custom Azure App and the Client Credentials Flow
The following documentation relates to version 3.0.2076 and above.
You can create your own custom Azure Application to allow Data Sync to connect to your Dynamics 365 site using OAuth. The following documentation will explain the process you need to follow to create your own Azure app and use the client_credentials flow. If you want to use the authorization_code flow, please see our documentation here.
Create the Application
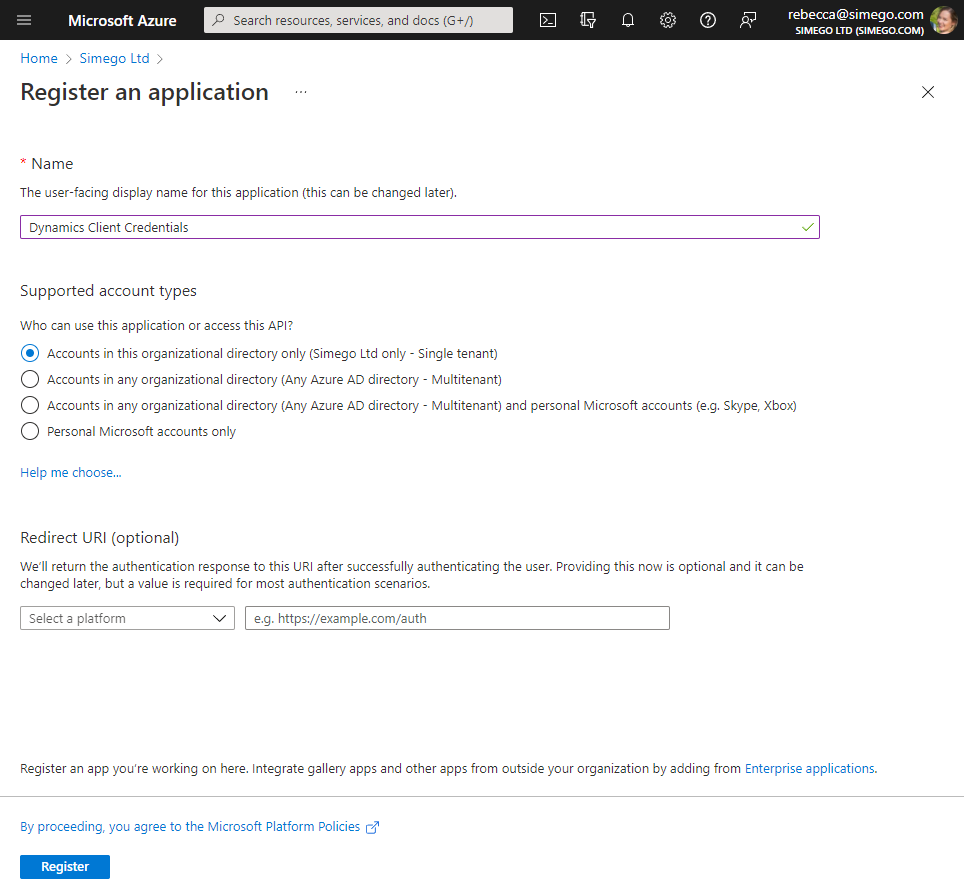
Login to your Azure Portal and navigate to Azure AD > App Registrations > New Registration to create your application.
Now enter in a name for your application and select the account type you need. In this example as we want to keep this private and only need access to those within our organization so we have selected Accounts in this organizational directory only.
Leave the redirect URI blank and then click onto Register to create the app.
Something to consider: If you make this a public app you will not need to generate and enter a client secret. If you choose this then please skip the add a client secret step and leave this field blank in Data Sync
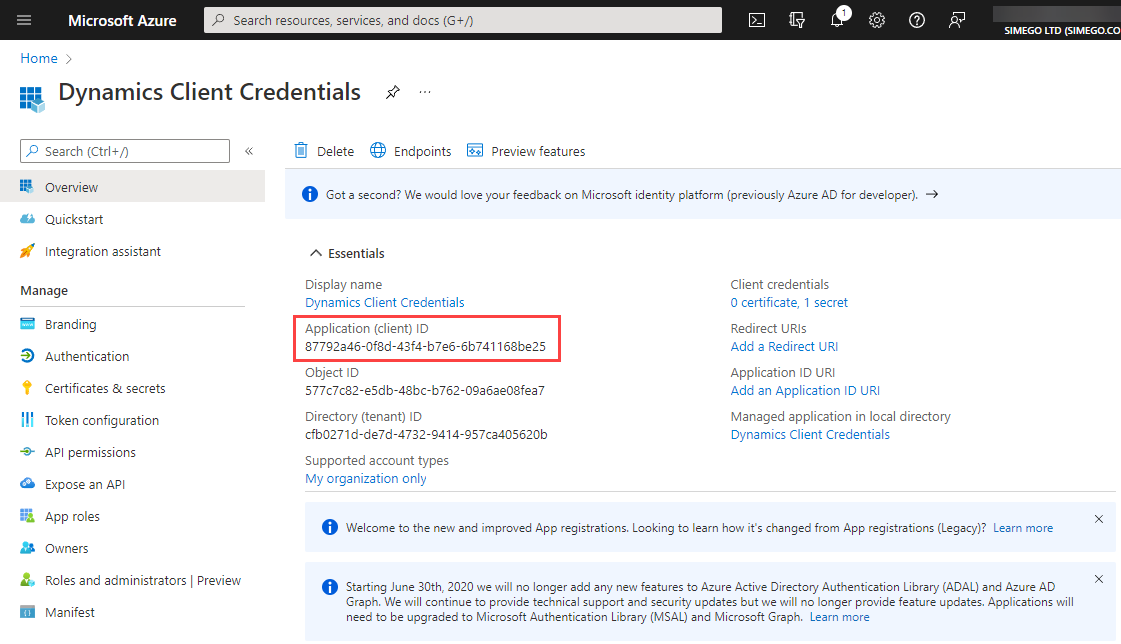
You'll now be given an overview of your app details, make sure to make a note of your Client ID, as you will need this to register the user in Dynamics and to connect in Data Sync.
Add a Client Secret
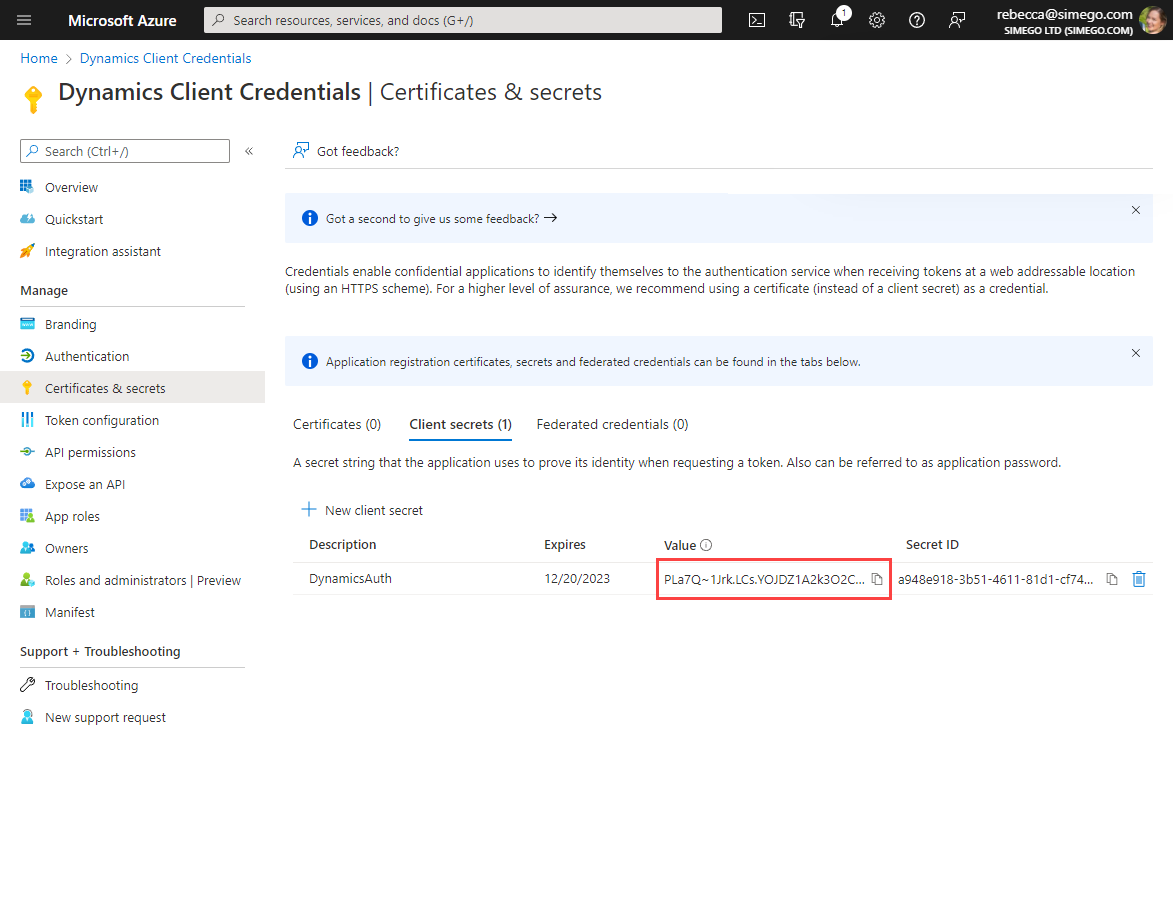
Now you need to create a client secret. To do this go to Certificates & Secrets and click onto New client secret. Type in a description and set an expiry for the secret. Once you are done click Add.
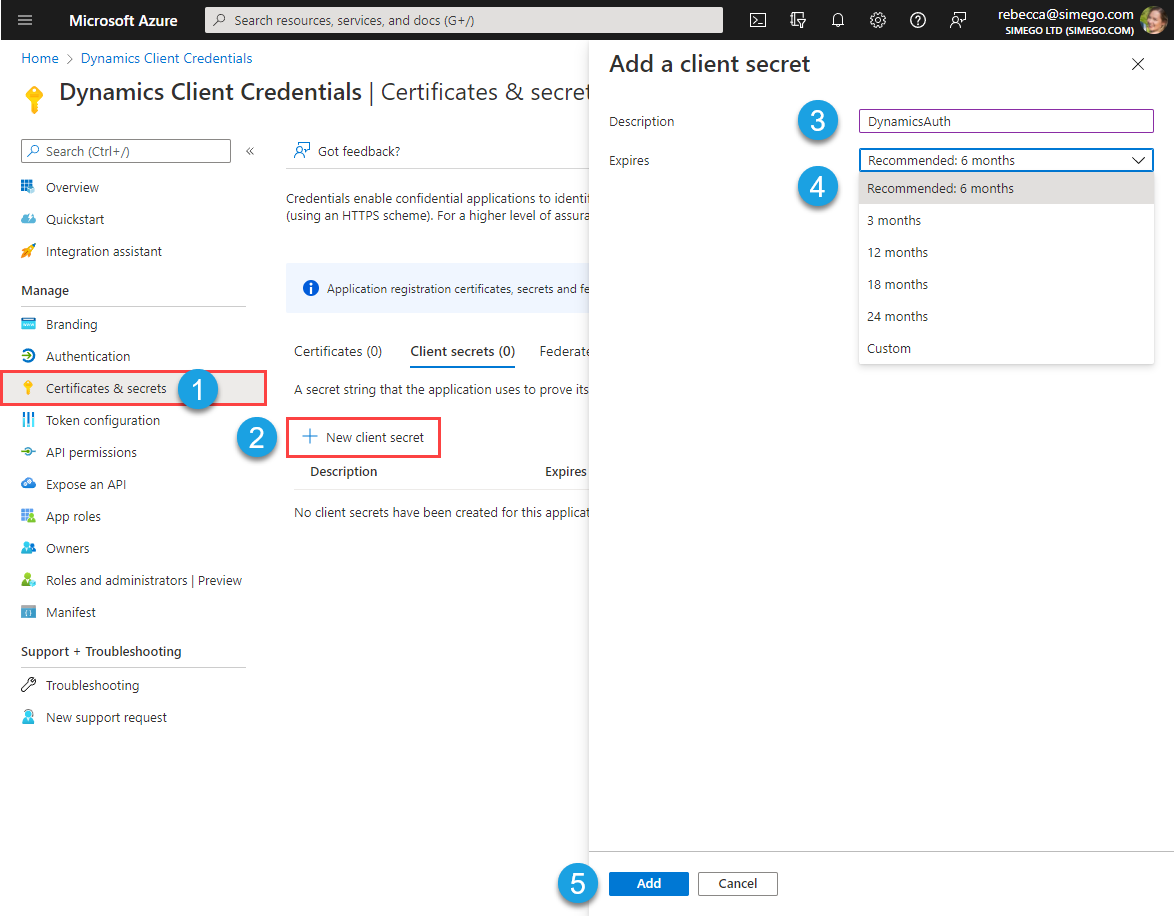
You now need to copy the client secret value to use in Data Sync later on. Please make a note of this value as you will not be able to view it again. If you loose it you will need to create a new client secret.
Get the Endpoint URLs
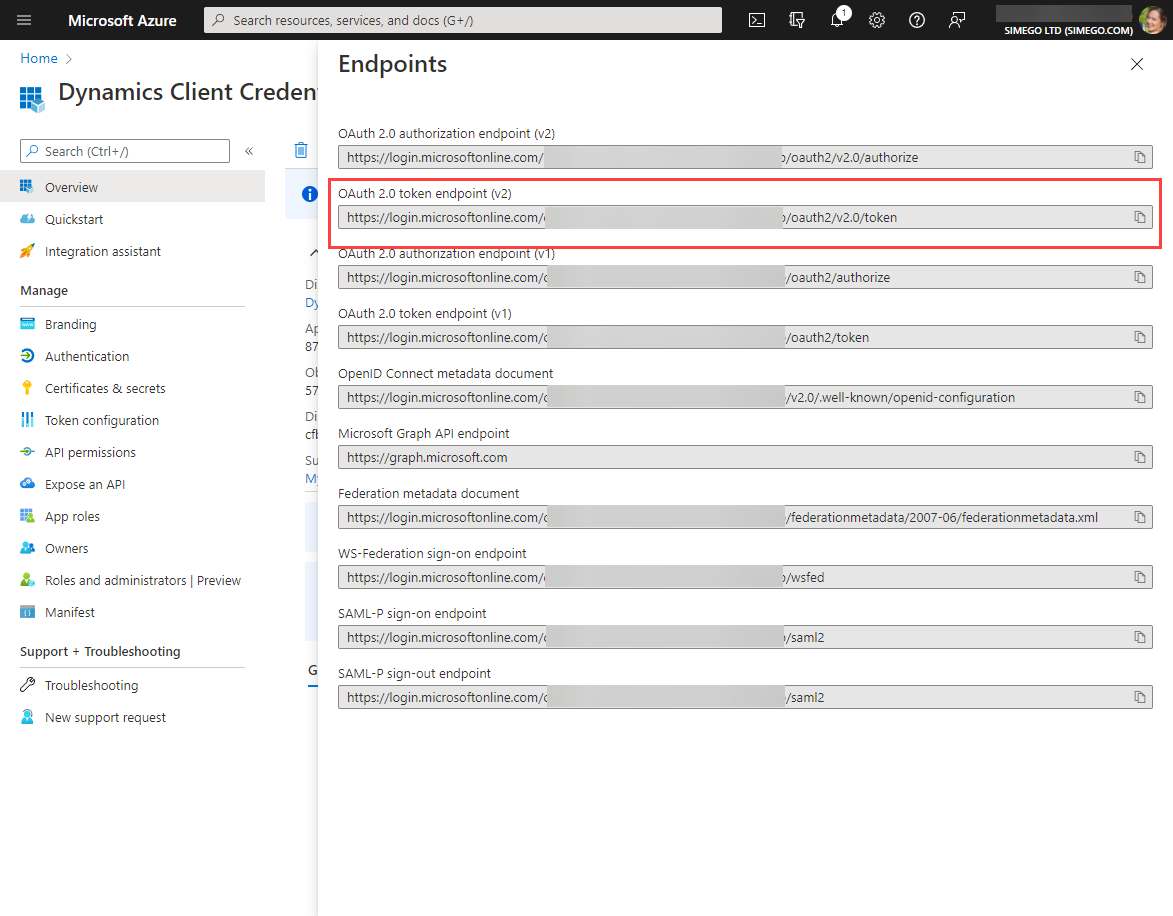
You need to gather the endpoint URLs so then you can connect in Data Sync. To do this click onto Overview > EndPoints and then copy the OAuth 2.0 token endpoint (v2).
Now go to your Dynamics site to add the app as a user.
Application Authorisation
You now need to add the application as an application user to your Dynamics site.
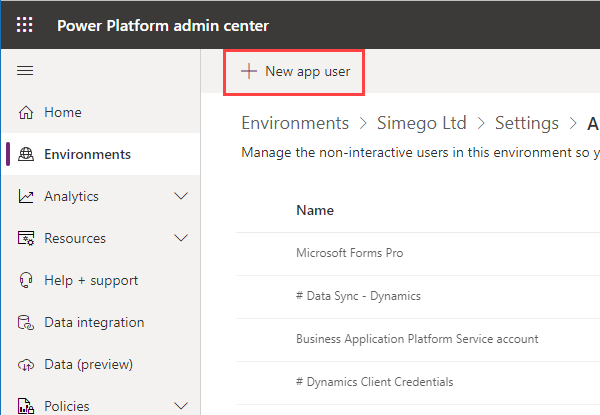
To do this you need to go to the Power Platform Administration Centre. Then go to Environments and click onto your Dynamics site. Then select Settings > Users + Permissions > Application Users > New app user.
Then search for your application by clicking onto Add an app and enter in the Client ID of your application. Click onto your application and then click Add.

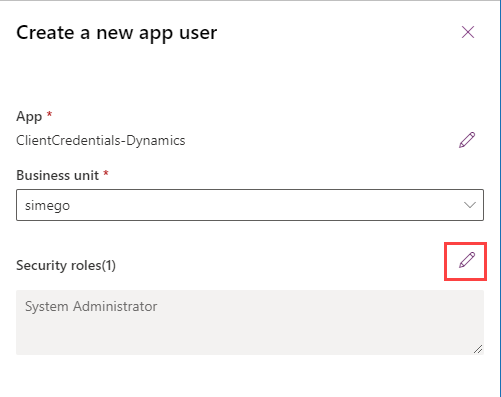
Now select a business unit and then edit the security roles so that your application has permission to access Dynamics. For ease we have used system admin however for best practice you should create a custom role so that the app can only read and write the data you want it to be able to access rather than your whole system. Click Create to save the user
You are now ready to connect in Data Sync.
Connect in Data Sync
In Data Sync open the connection window and select Microsoft Dynamics and then the Microsoft Dynamics 365 provider.
Enter in the URL to your Dynamics site into the URL field. This will be automatically formatted to use the Organisation Service SOAP\WCF service endpoint.
You can just copy and paste the URL from your site into the field, e.g. https://<domain>.crm4.dynamics.com.
Make sure that the Authentication Method is set to Custom OAuth Application and then enter in the ClientID, ClientSecret, and TokenURL gathered earlier. Make sure to set the GrantType to be client_credentials and remove any text from the RedirectUrl field.
Then click the Authorise Connection button.
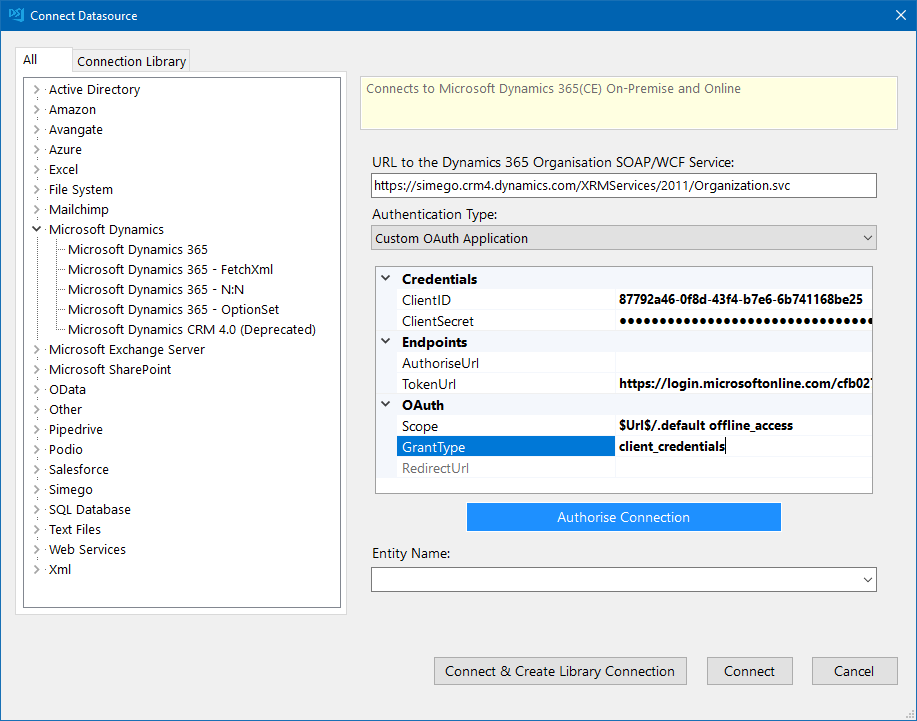
This will call back to Dynamics to authenticate the user/application and if it is successful your entities will become available in the Entity Name dropdown list.
Select the entity you want to connect to from the dropdown and click on to Connect & Create Library Connection to save the connection to your local connection library.
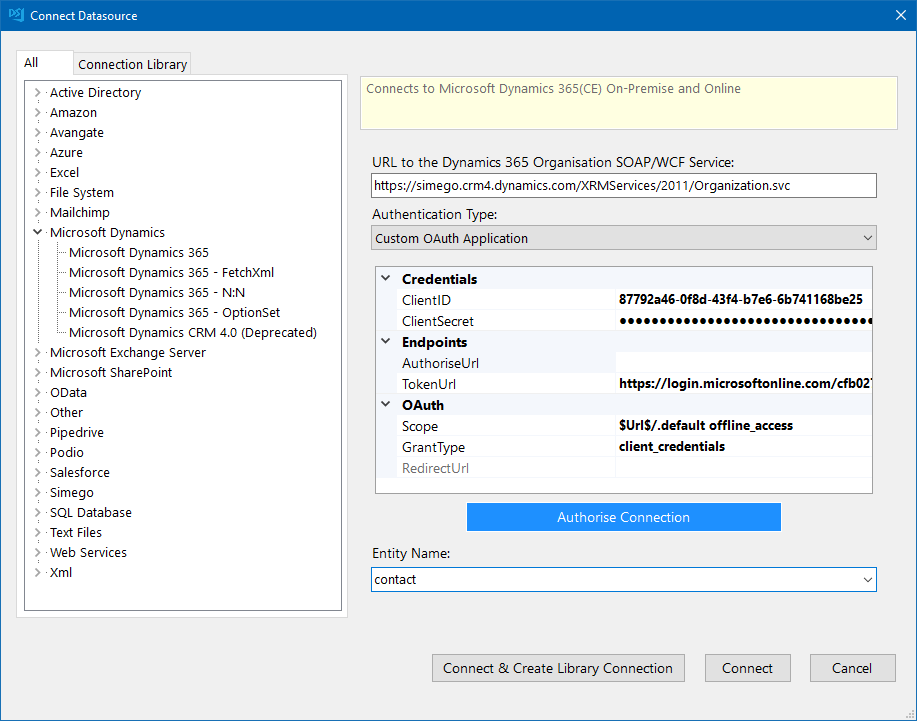
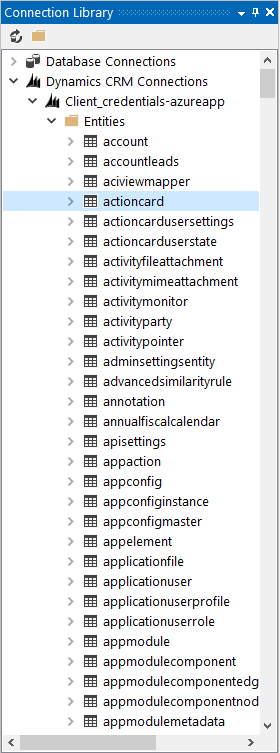
You can then re-use the connection to your Dynamics site from the Connection Tree whenever you are creating projects or adding lookups. You can also preview the data before selecting it as your source or target.
Please note that you only need to save the connection to your site once, you will be able to access all of your entities within that site from the connection library.
