- Simego OAuth (default)
- Custom OAuth Azure App
- ACS OAuth App
- Legacy Authentication
- Client API
- Web Services
- Lookups
- Managed Metadata
- CAML Query
- User/Group Columns
- Security Groups
- List Attachments
- Document Check in
- Document Libraries
- Adding Files and Folders from Excel
- Adding Folders based on File Structure
- Adding Folders based on Metadata
Custom SharePoint OAuth Connection
We advise that if you are using OAuth connections you should install an encryption key.
Use the following guide to learn how to connect to SharePoint Online using a custom Azure App rather than the default Simego App. This relates to version 3.0.2073 and above.
The process involves creating an app in Azure AD, delegating permissions and then using the app details to connect from Data Sync.
You have two options to choose from when creating your app, public or private:
- Making the Azure App public will mean you do not need a client secret. This is how the default Simego App is configured.
- Making the Azure App private means you will need a client secret. If you are configuring your own app then you most likely will be wanting to select this option.
The steps below will use a private application as the example.
Create the App in Azure AD
Login to your Azure Portal and navigate to Azure AD > App Registrations > New Registration to create your connection.
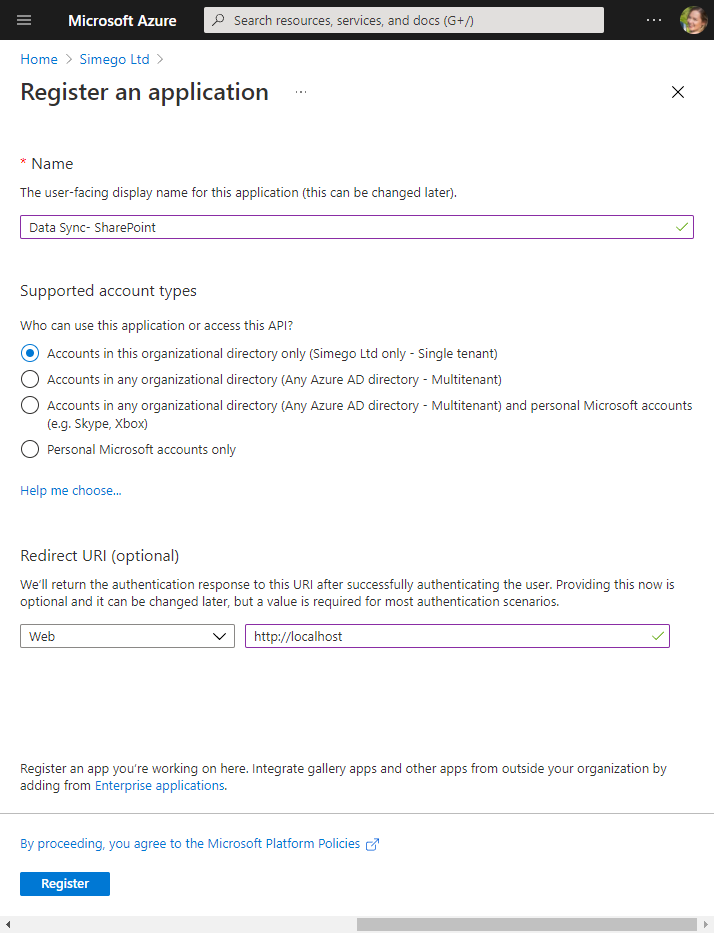
Now enter in a name for your application and choose the supported account types, as we want to keep this private and only need access to those within our organization so we have selected Accounts in this organizational directory only.
Once you're done click onto Register to create the app.
You'll now be given an overview of your app credentials (Client ID and Tenant ID).
Set Permissions
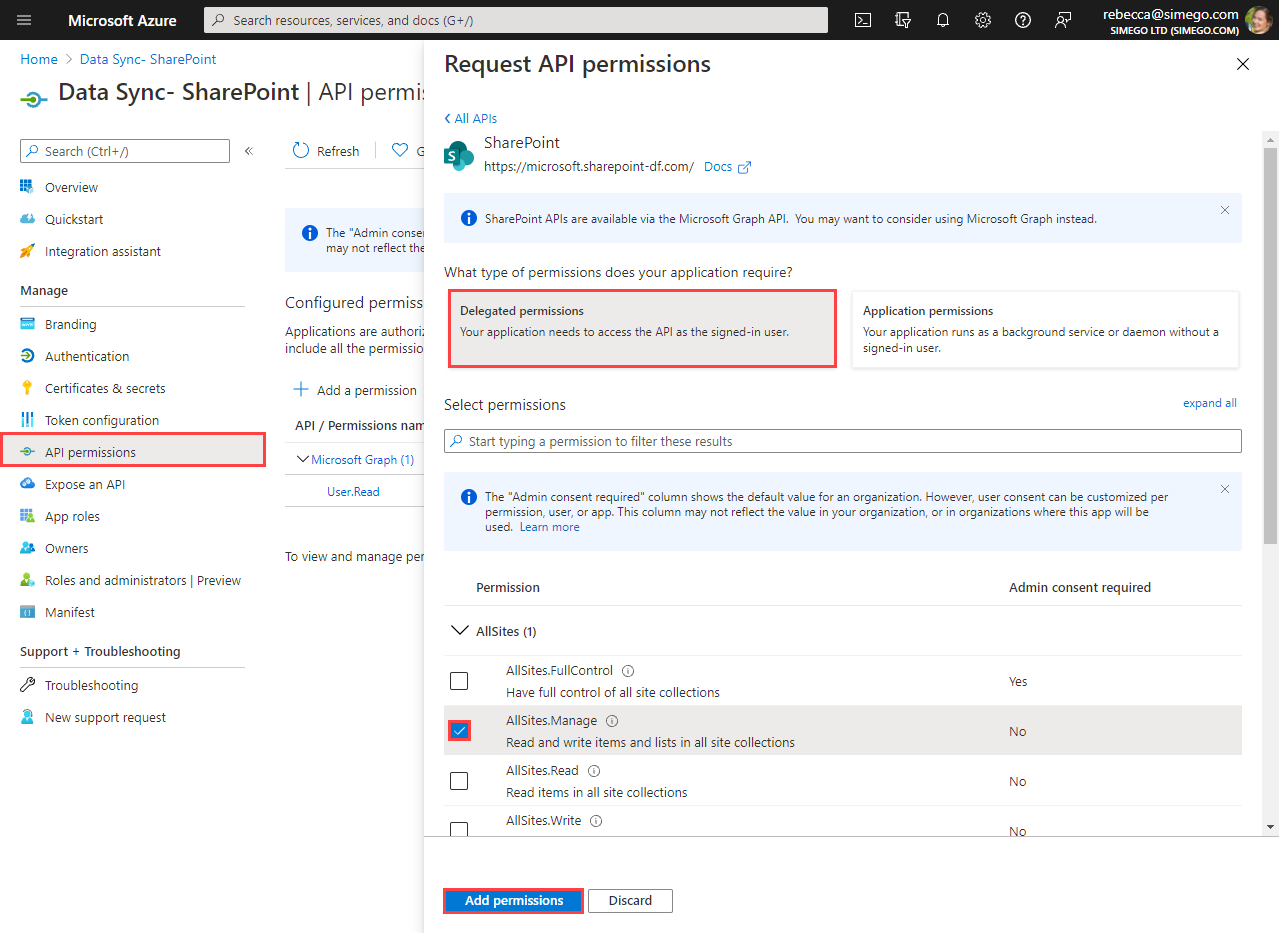
We now need to set the permissions for the app. To do this go to API permissions > Add a permission > SharePoint > Delegated permissions and then select AllSites.Manage.
This allows you to read and write to your SharePoint items. Click Add Permission to add it to the list.
If you need to update or write to the Modified column in SharePoint you will need to add the
AllSites.FullControlpermission. This will need to be granted approval by an admin in your Azure portal.
Add a Client Secret
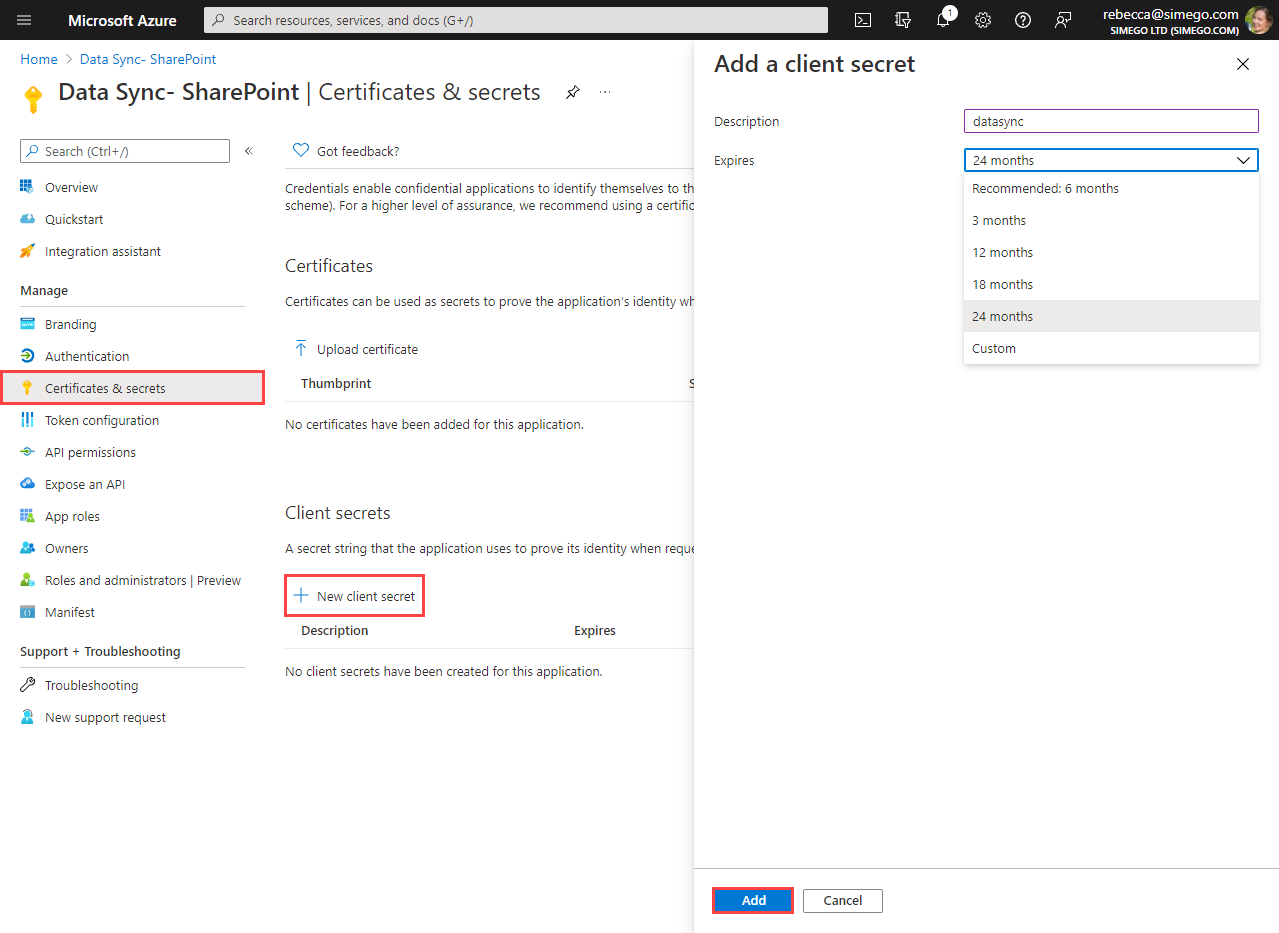
Now you need to create a client secret. To do this go to Certificates & Secrets and click onto New client secret. Type in a description and set an expiry for the secret. Once you are done click Add.
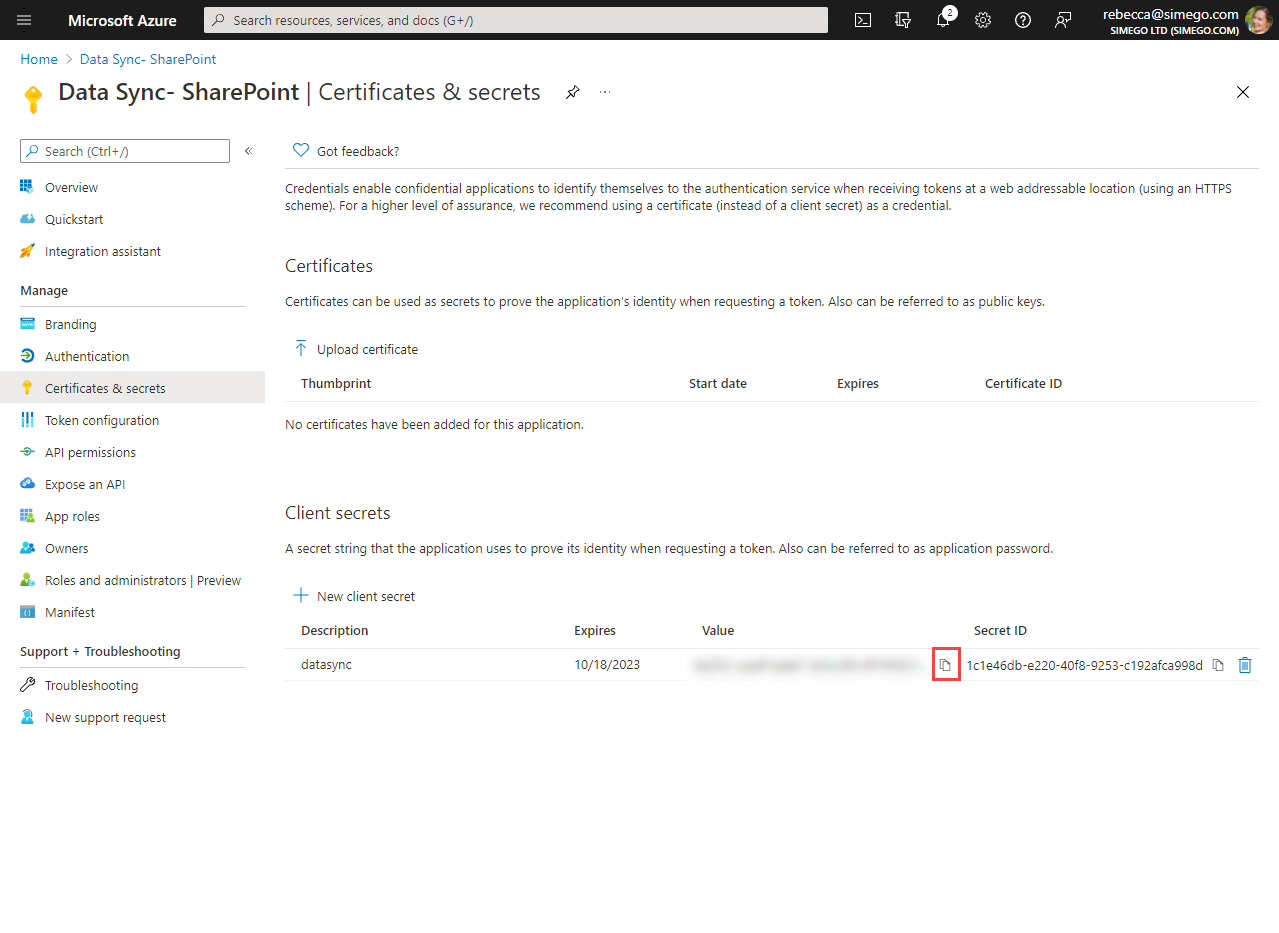
You now need to copy the client secret value to use in Data Sync later on. Please make a note of this value as you will not be able to view it again. If you loose it you will need to create a new client secret.
Get the Endpoint URLs
You need to gather the endpoint URLs so then you can connect in Data Sync. To do this click onto Overview > EndPoints and then copy the OAuth 2.0 authorization endpoint (v2) and OAuth 2.0 token endpoint (v2).
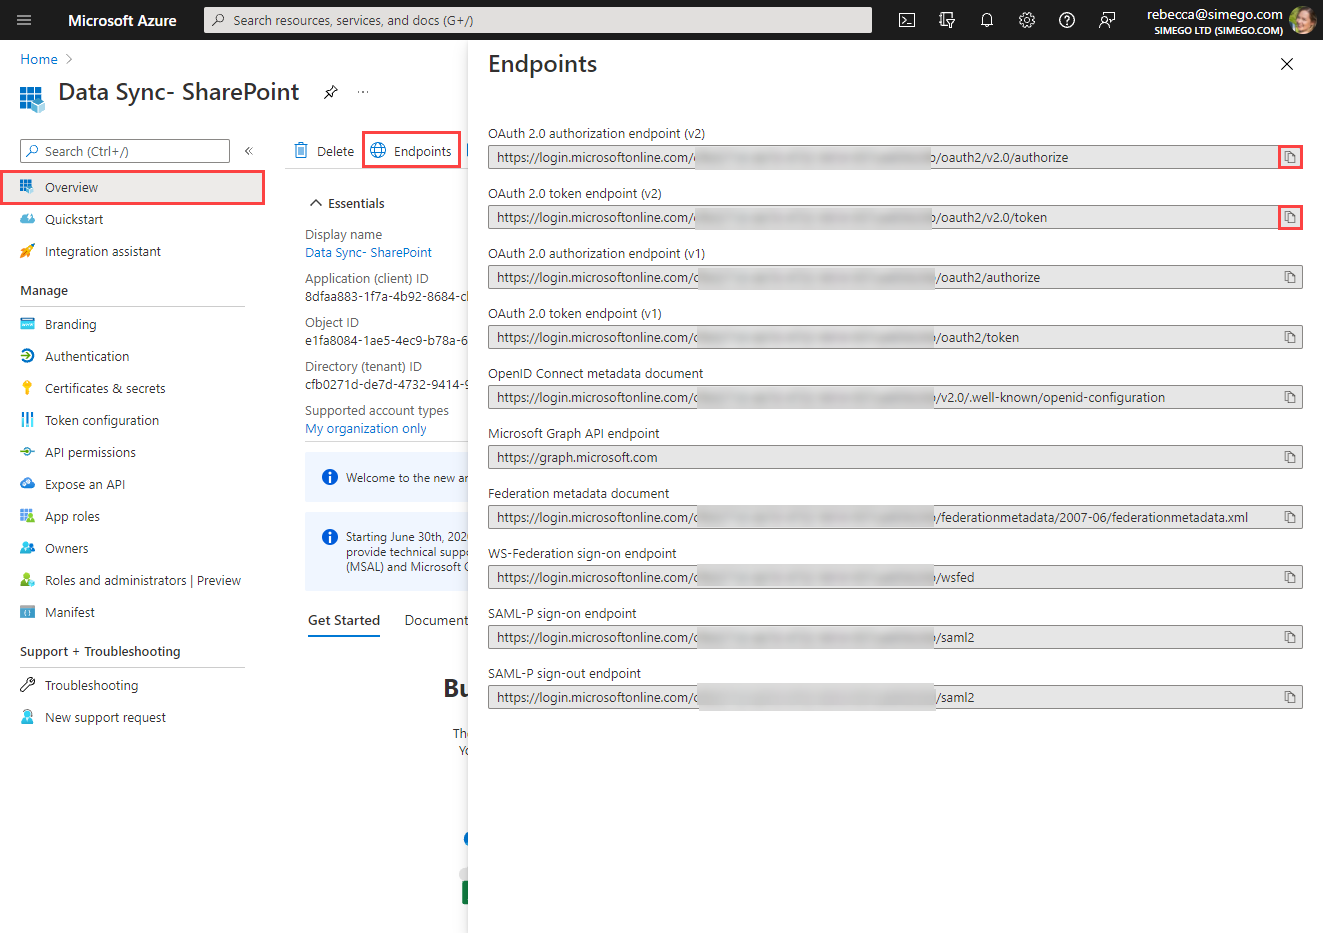
Now open Data Sync to connect.
Connect in Data Sync
To connect in Data Sync open the connection window and go to SharePoint Online provider.
Enter in the URL to your base url of your SharePoint site i.e. http://<sharepointurl>/<site1>/<site2> and select Custom OAuth Application from the drop down list.
Make sure to enter your Client ID, Client Secret, the Authorise URL and the Token URL you gathered earlier and click Authorize Connection to validate the credentials.
If you added permissions that required admin approval and you are not an admin user, you may receive an error stating admin approval is needed when trying to authorise the connection. To get around this remove consent from the
Promptfield in the connection properties and leave it blank.
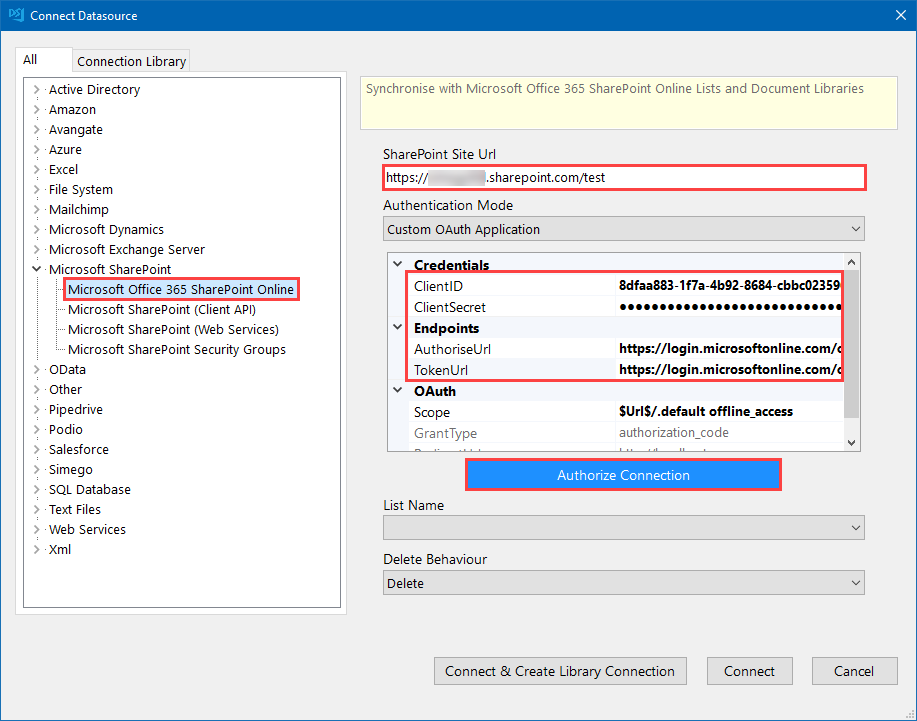
This will open up a window stating Waiting for OAuth Authorization Code and your default browser to enable you to authorise the request.

Sign in to your Microsoft account and then click Accept.
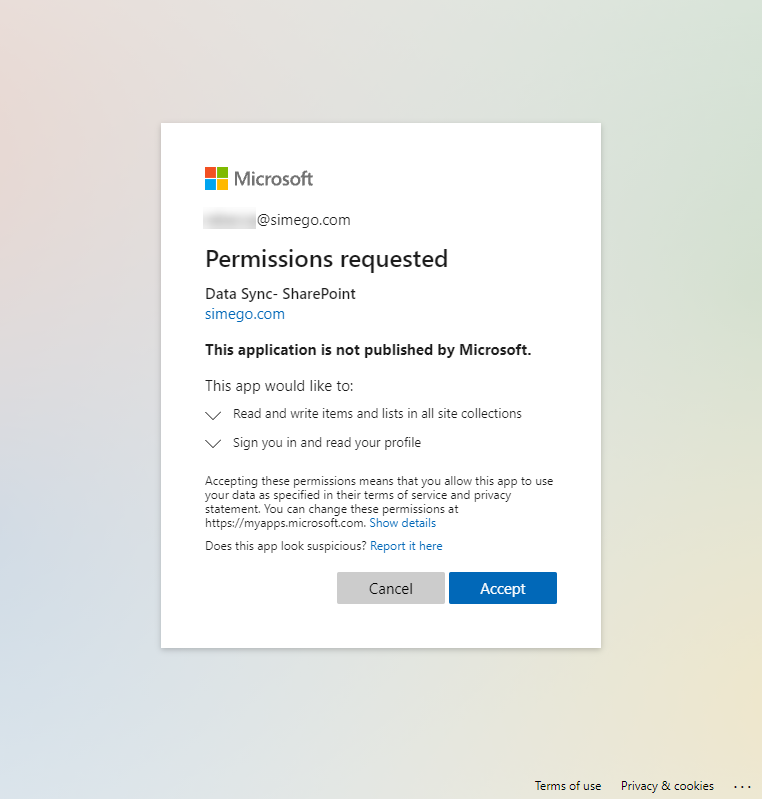
You can now go back to Data Sync and select the list you want to connect to from the dropdown and set the default delete behaviour. Choose between Delete or Recycle.
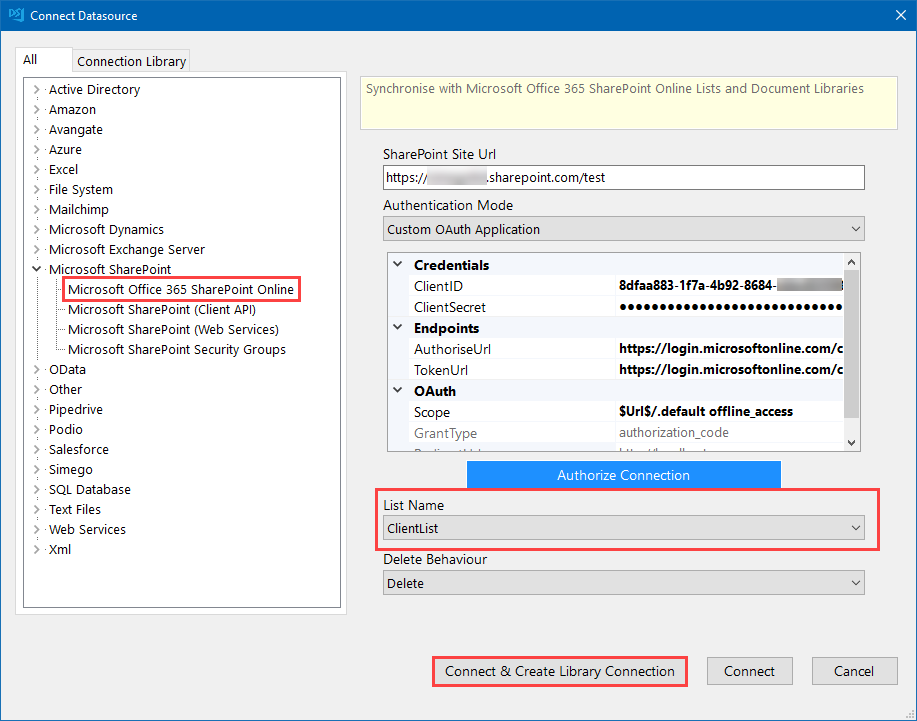
Click on to Connect & Create Library Connection to save the connection to your local connection library. You can then re-use the connection to your SharePoint site from the Connection Tree whenever you are creating projects or adding lookups. You can also preview the data before selecting it as your source or target.
Please note that you only need to save the connection to your site once, you will be able to access all of your lists and libraries within that site from the connection library.
You're now connected to your SharePoint site and can configure your Data Sync project as you need to.
Troubleshooting
My Client Secret has Expired or I have forgotten my Client Secret
If your client secret has expired or you have lost it then you can fix this by creating a new one. Log into your Azure Portal, open Azure AD, click onto App Registrations and then open your SharePoint App. Now go to Certificates & Secrets and click onto New Client Secret. Type in a name, set the expiry length and then click Save. You need to copy the value that has been generated and update your client secret in Data Sync.
It is worth saving the client secret value as you will not be able to access it later.
You can then delete the old client secret.

