Connect to Dynamics 365 using OAuth
To connect to Dynamics 365 in Ouvvi using your OAuth credentials you will fist need to configure an App within Azure AD.
Configure Azure App
Go to portal.azure.com and browse to your Active Directory.
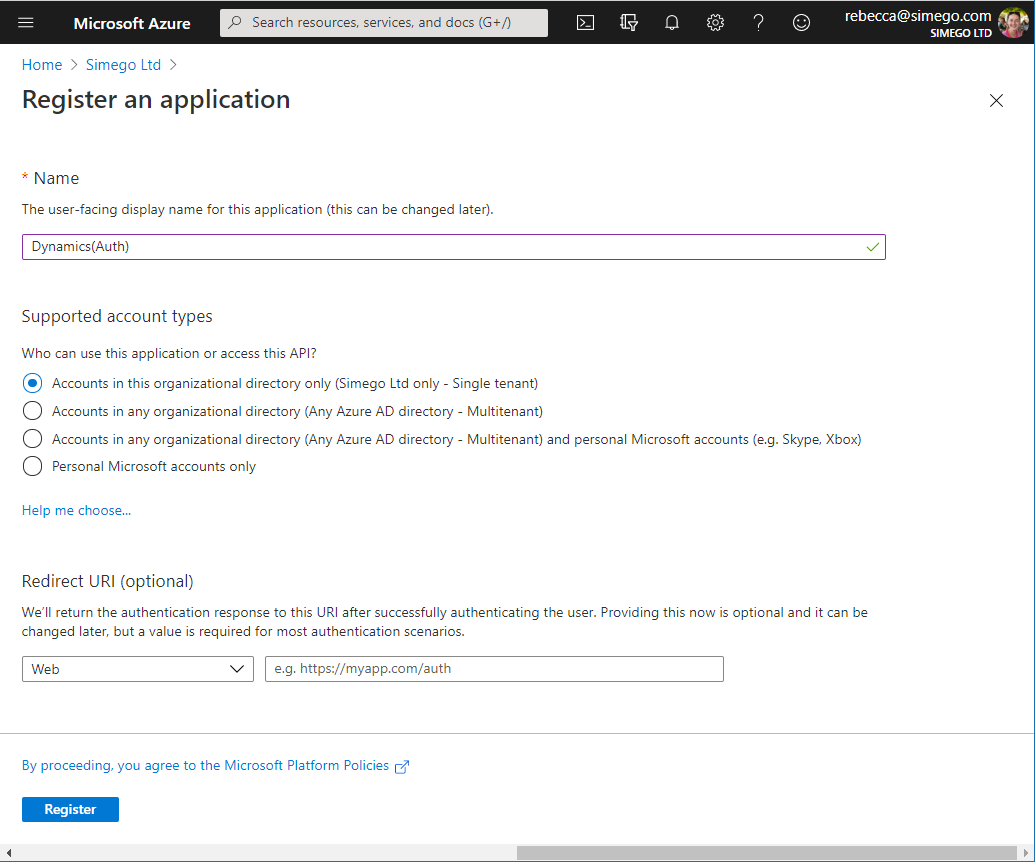
Then go to App Registrations > New Registration and enter in a name for the app. Choose the supported account type you want and then click Register.
Create a Client Secret
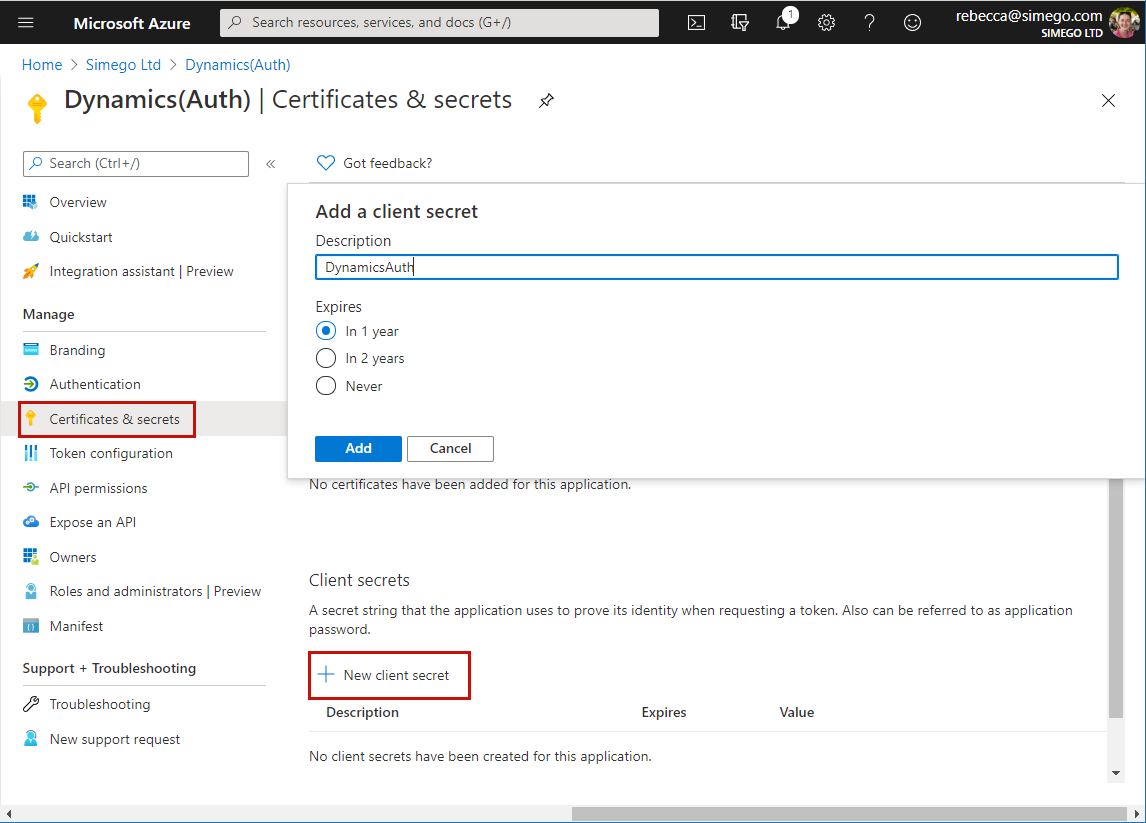
To create a client secret go to Certificates & secrets > New client secret, enter in a description and set the expiry time period. Click Add to create the secret.
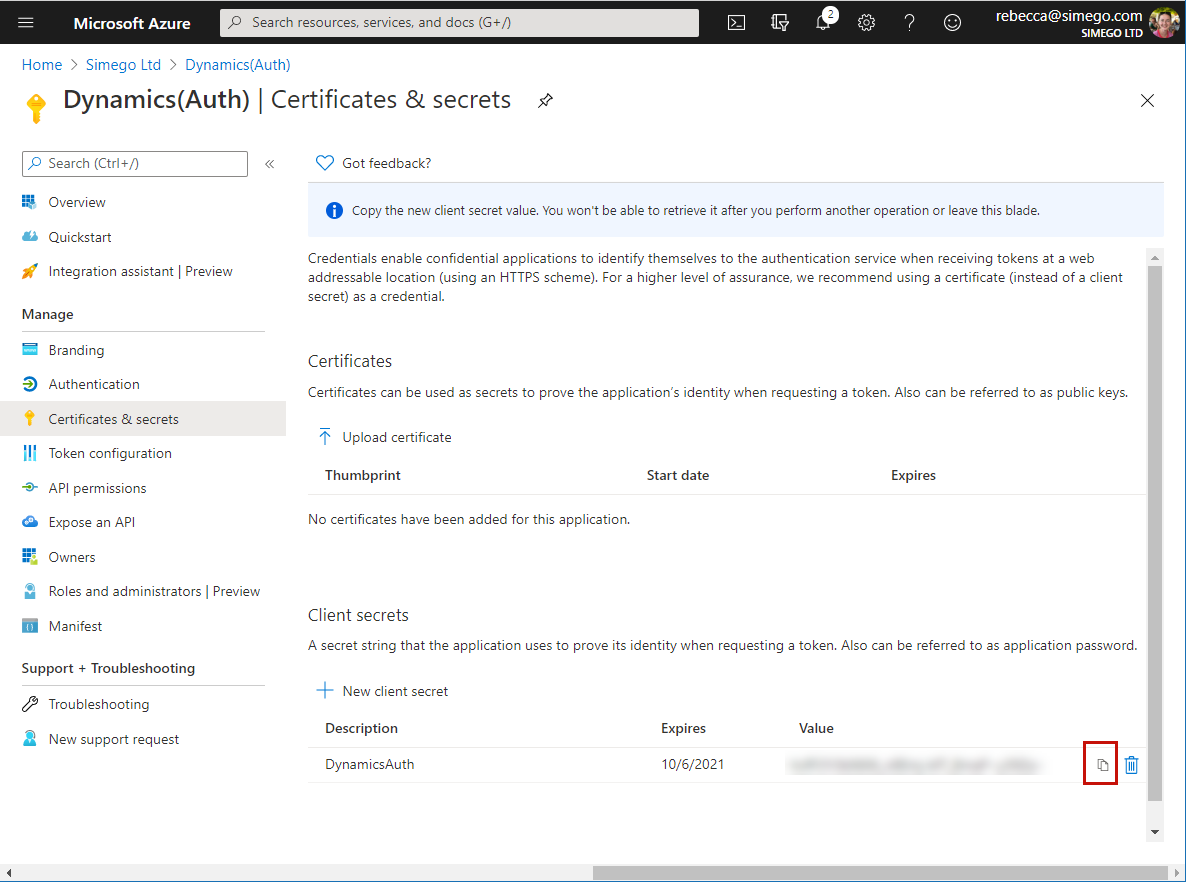
Now copy the client secret and store this somewhere as you will need this for Data Sync.
Once you navigate away from the page you will not be able to view the Client Secret so please make sure to make a copy of this.
Dynamics Authorisation
You now need to add the application as an application user to your Dynamics site.
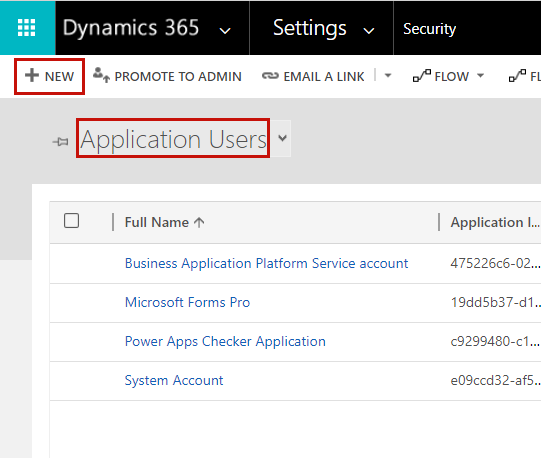
To do this navigate to your Dynamics site and go to Settings > Security > Users, change the filter to Application Users and then click New to add a new user.
Enter in the Application ID (Client ID), enter in a full name (this can be the name of the App) and enter in an email that uses your organisation domain into the primary email field. The username will be auto populated to the primary email address once it is entered. Click Save and the Object ID will be populated for you.
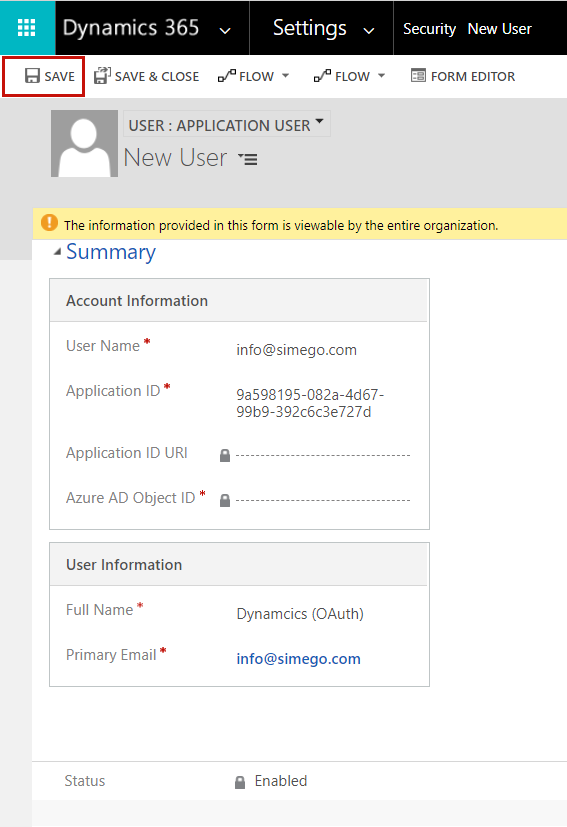
Now you need to set the role for the user.
Add Role
Click Manage Roles and select the role from the list. For ease we have used system admin however for best practice you should create a custom role so that the app can only read and write the data you want it to be able to access rather than your whole system.
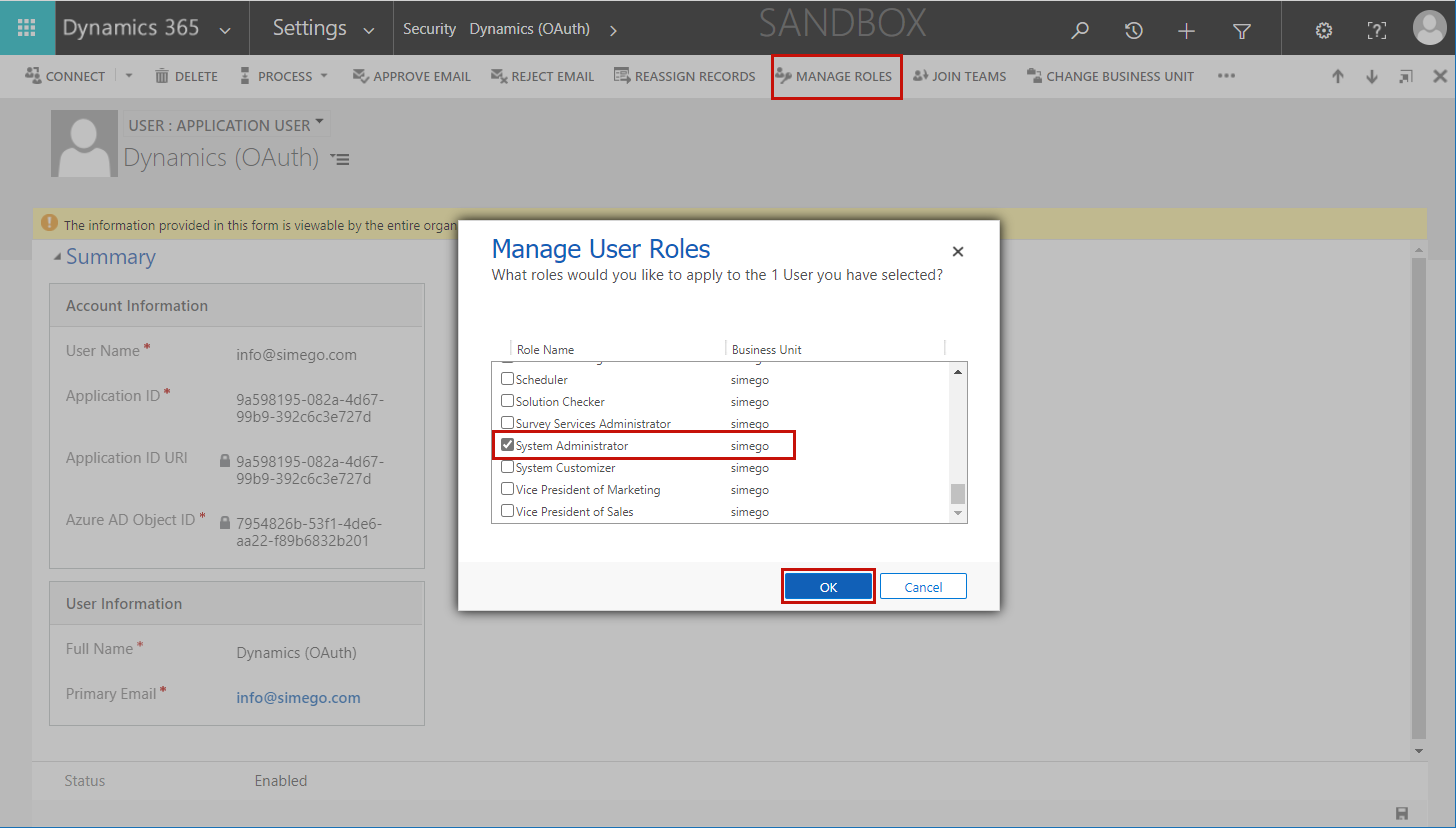
You are now ready to connect in Ouvvi.
Connection Details
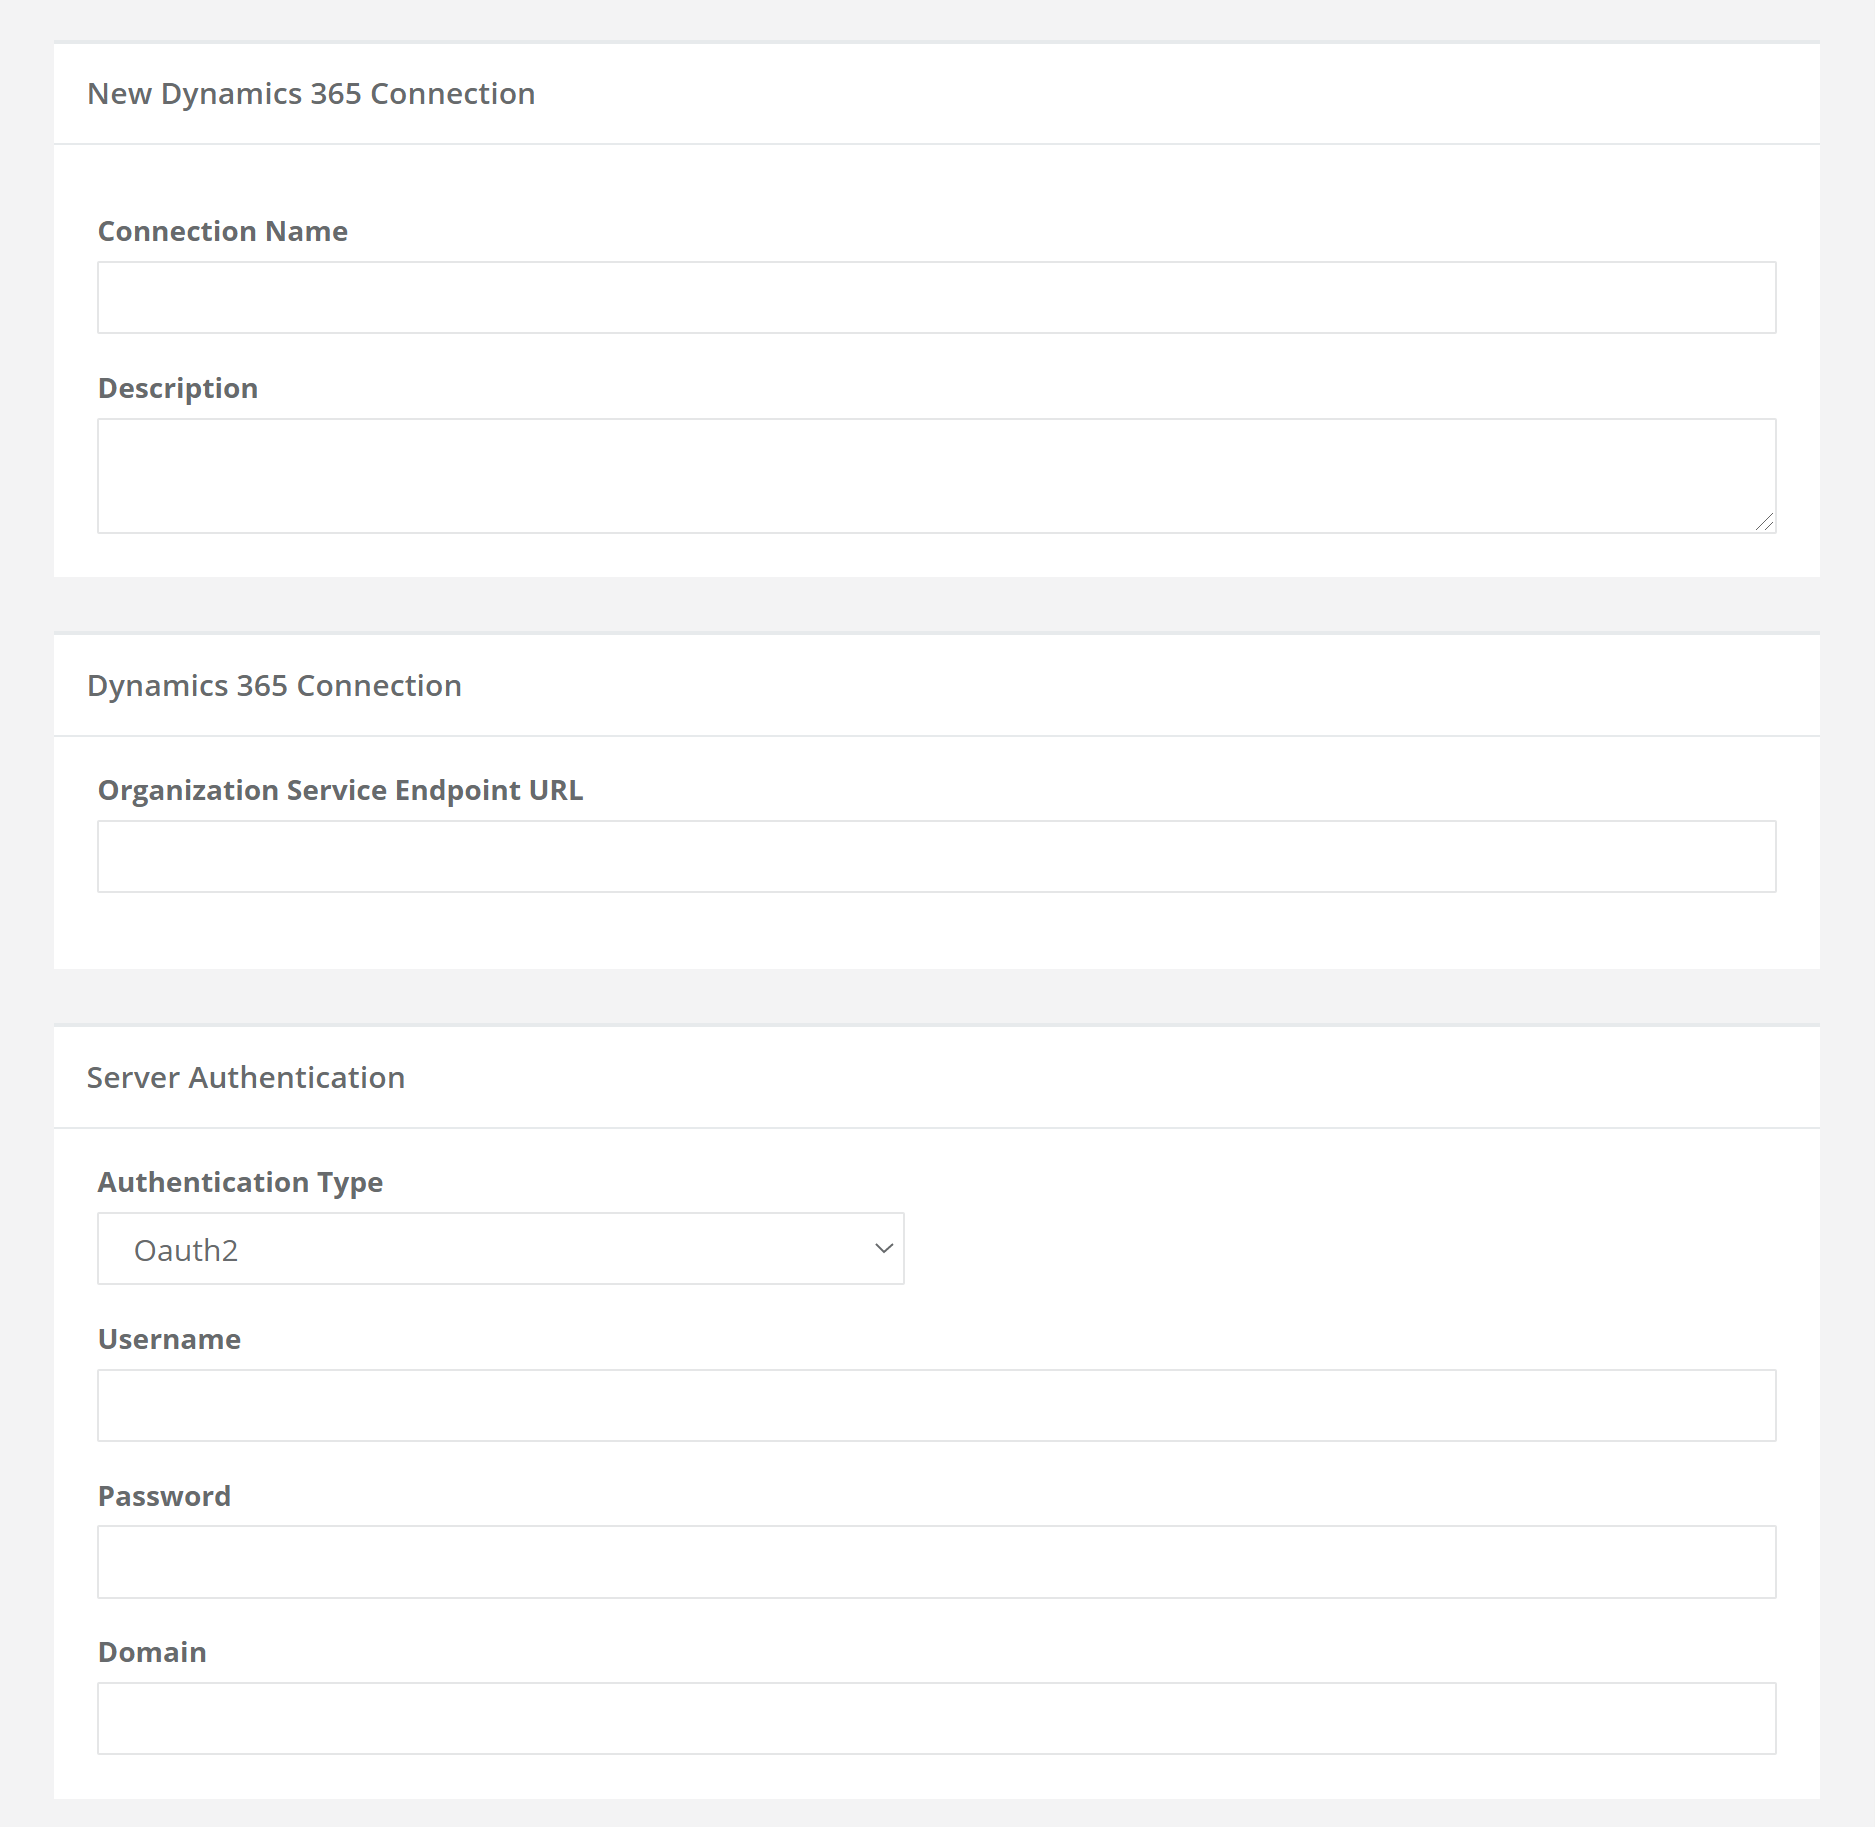
In Ouvvi go to Settings > Connection Library > Add Connection, choose Dynamics 365 from the dropdown menu and then change the Authentication Type to OAuth2 under Server Authentication.
You need to enter in the following connection parameters that are required to connect to Dynamics 365 via OAuth :
| Parameter | Value |
|---|---|
| Connection Name | Name for the connection. |
| Description | Description of the connection. |
| Organisation Service Endpoint URL | This is the URL to your Dynamics 365 Organisation Service SOAP\WCF service. Will be similar to: https://orgname.api.crm4.dynamics.com/XRMServices/2011/Organization.svc . To get your organisation URL go to Settings->Customizations->Developer Info in Dynamics 365. |
| Authentication Type | The type of Authentication to use. Set this to OAuth to use your OAuth credentials. |
| Username | Enter in your Client ID. |
| Password | Enter in your Client Secret. |
| Domain | The domain of your Azure AD. |
