Connecting to Dynamics 365
Using the OData V4 connector you can also connect to Dynamics 365 Sales Web API. Please see below for guidance on how to connect:
Create the Application in Azure
Log in to your Azure account and go to Azure Active Directory > App Registrations > New Application Registration.
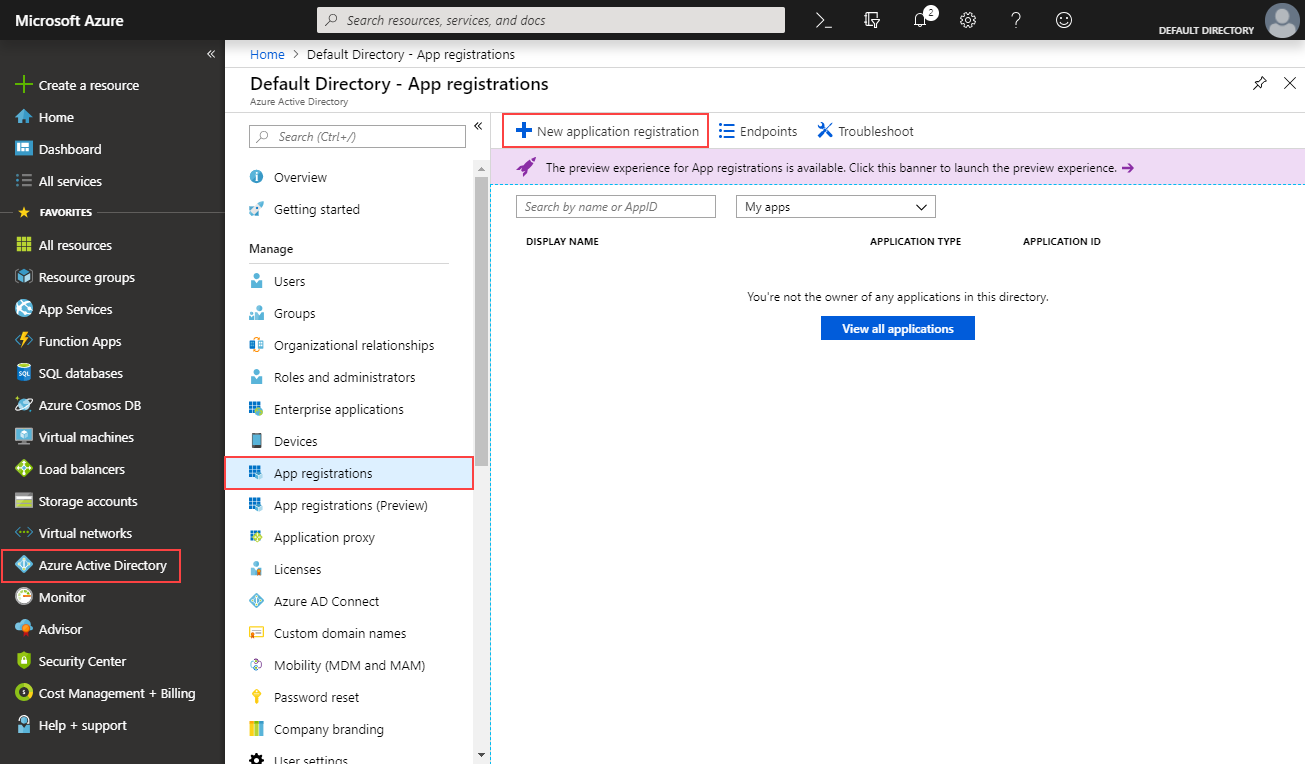
Now type in a unique name for the application and a sign on URL (this can be anything you like as it is not important for what we want our application to do) and leave the application type as Web app / API. Click Create once you are done.
The Sign-on URL here
https://www.simego.com/oauth/codeis defined to allow us to extract the authorisation code from the OAuth handshake. This is used when the OAuth authorisation flow is configured asauthorization_code.
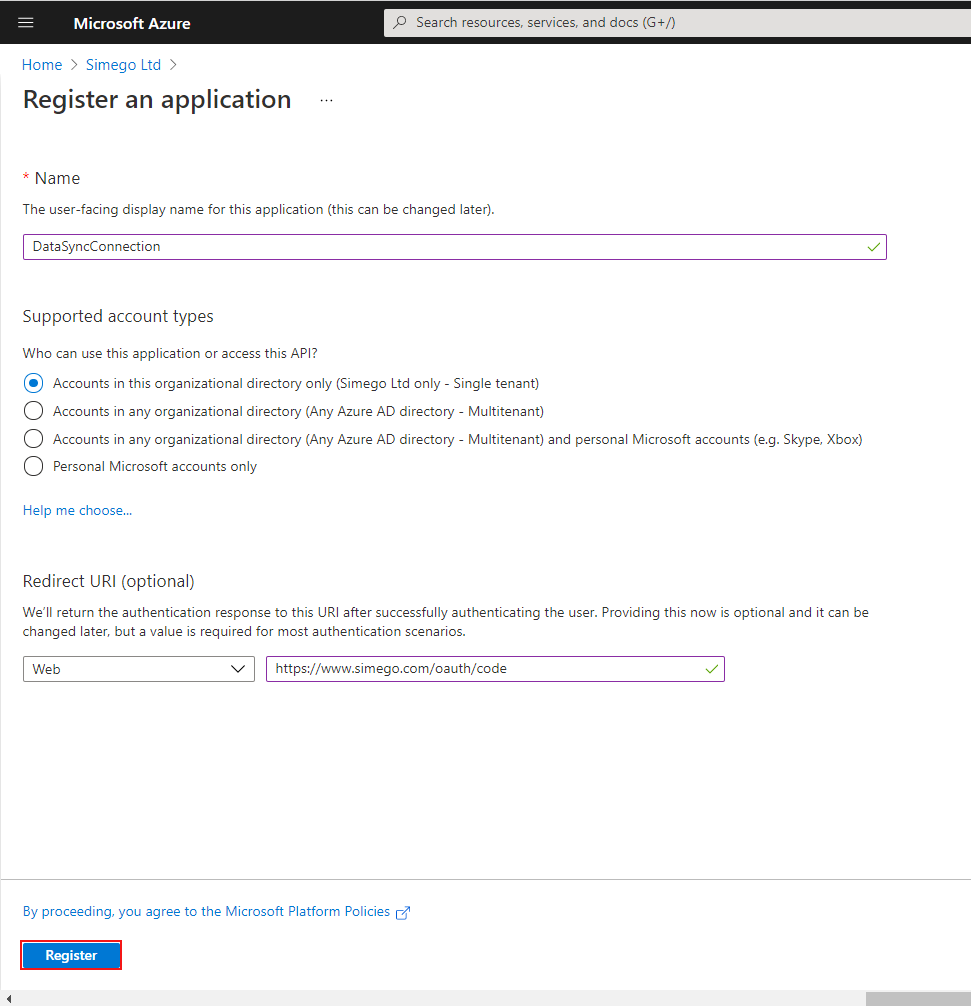
Set the Permissions
Now we need to set the permission levels we want our application to have, in the app details click Settings.
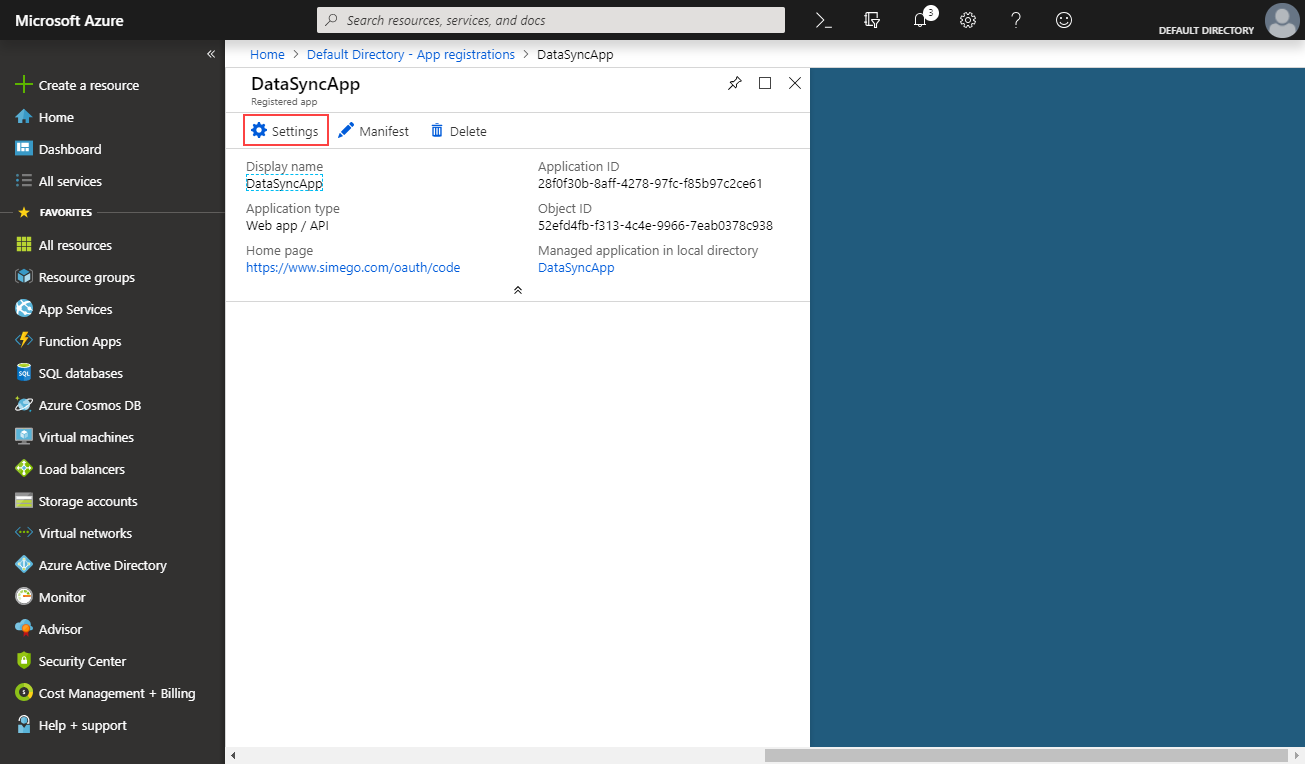
Then go to Required Permissions > Add > Select an API.
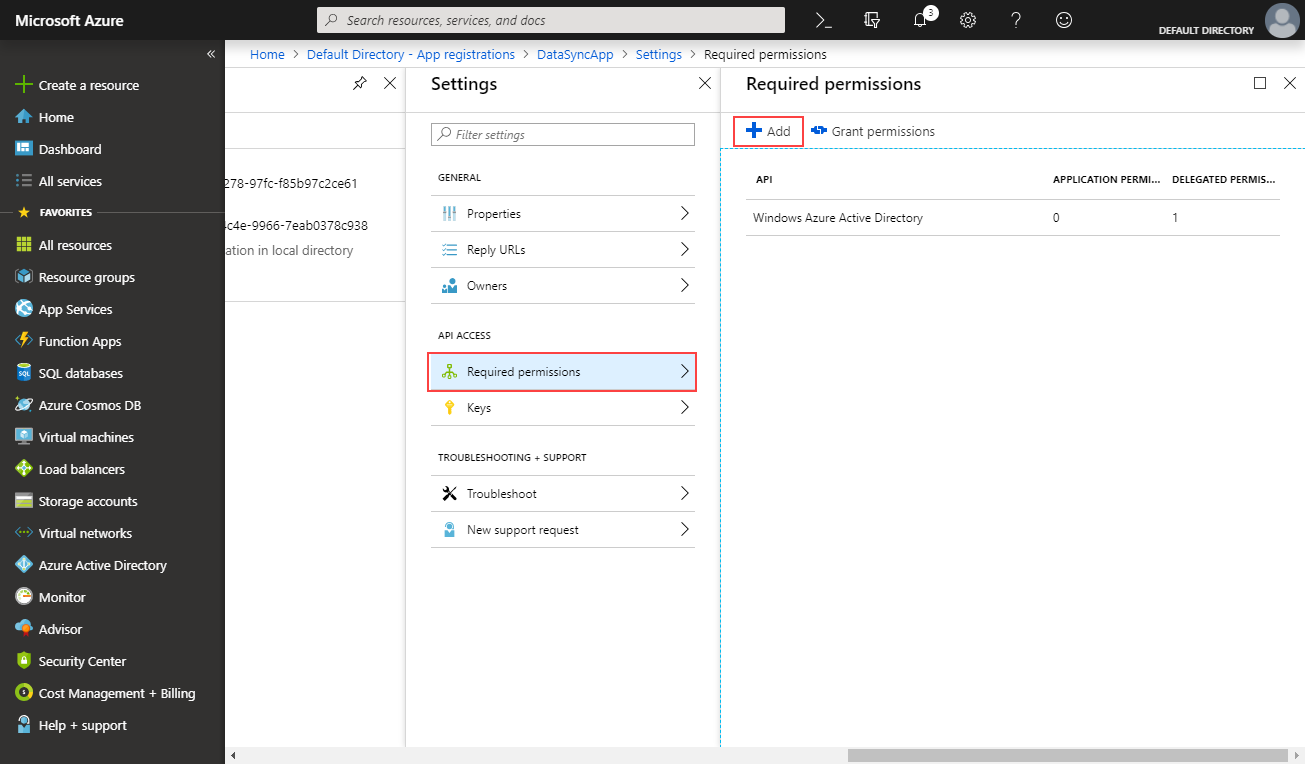
Choose Dynamics CRM Online and then click Select. Now go to Select Permissions and choose the permissions for your application. You will need to enable Access Dynamics 365 as Organization Users.

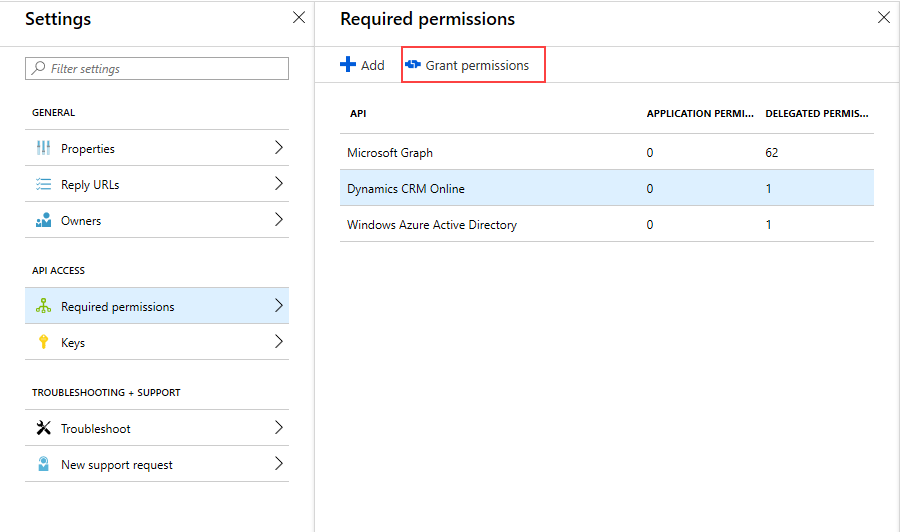
Once you have set the permissions click Select and then Done in the Add API blade. To finish off registering the new app you will need to click Grant Permissions to apply the permissions you have just set.
Get the App Key (Client Secret)
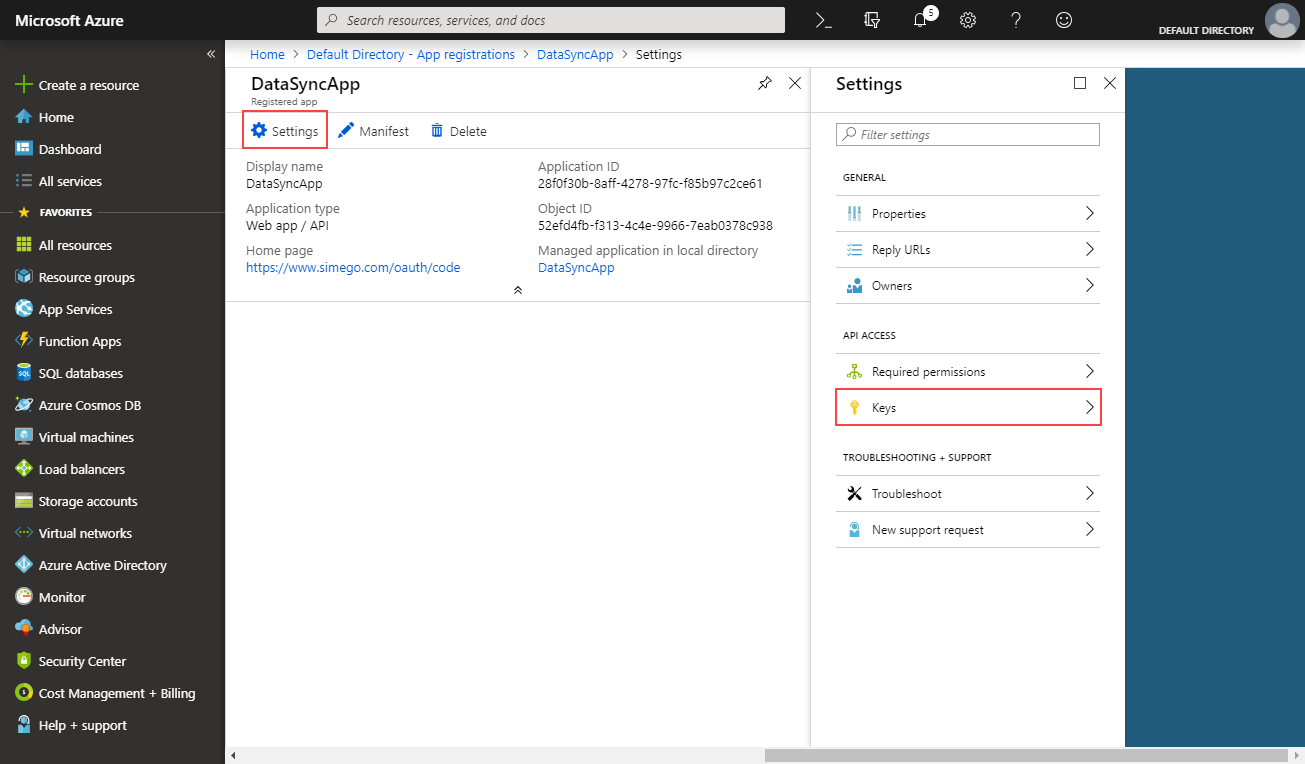
Now we need to get the application key that will be the client secret. Go to Settings in the app details and then go to Keys.
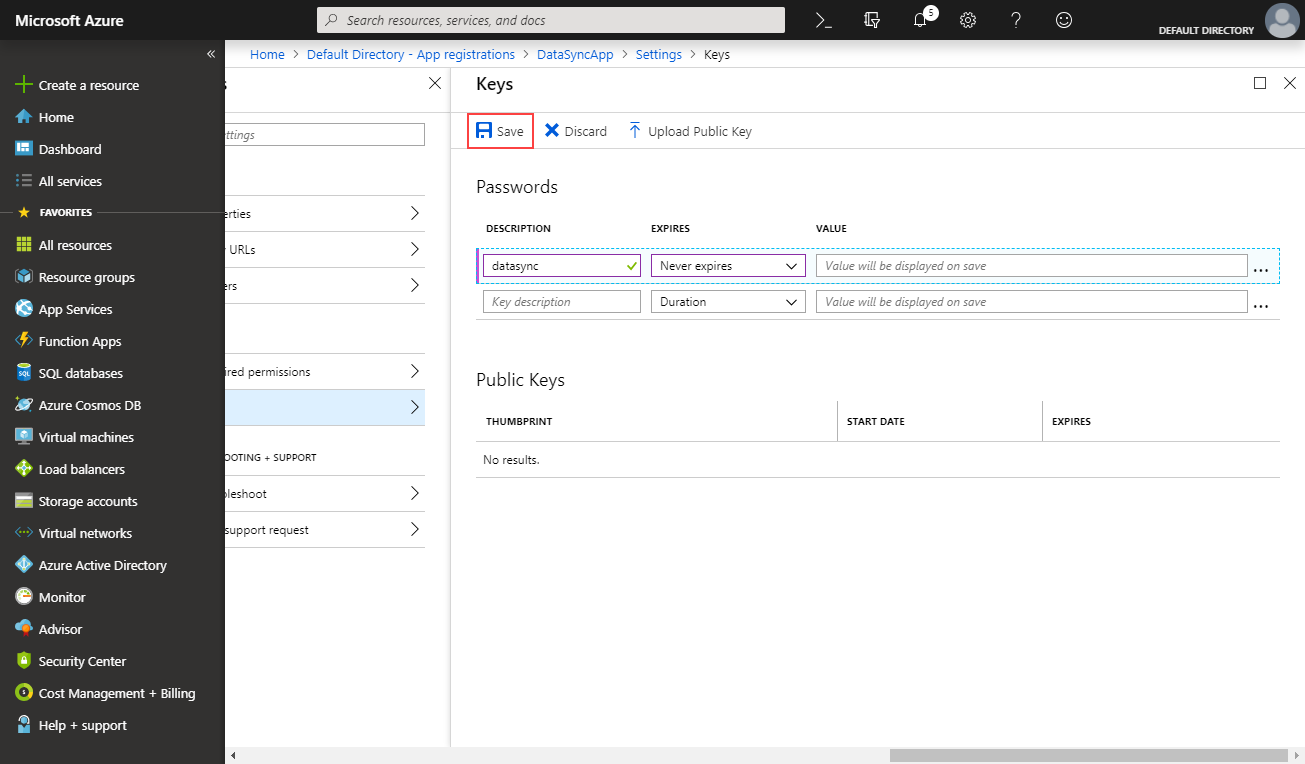
Type in a description for the key, in this example we have used datasync. Then set the expiry date as required, we have chosen never expires.
Click Save and a new client secret will be generated.
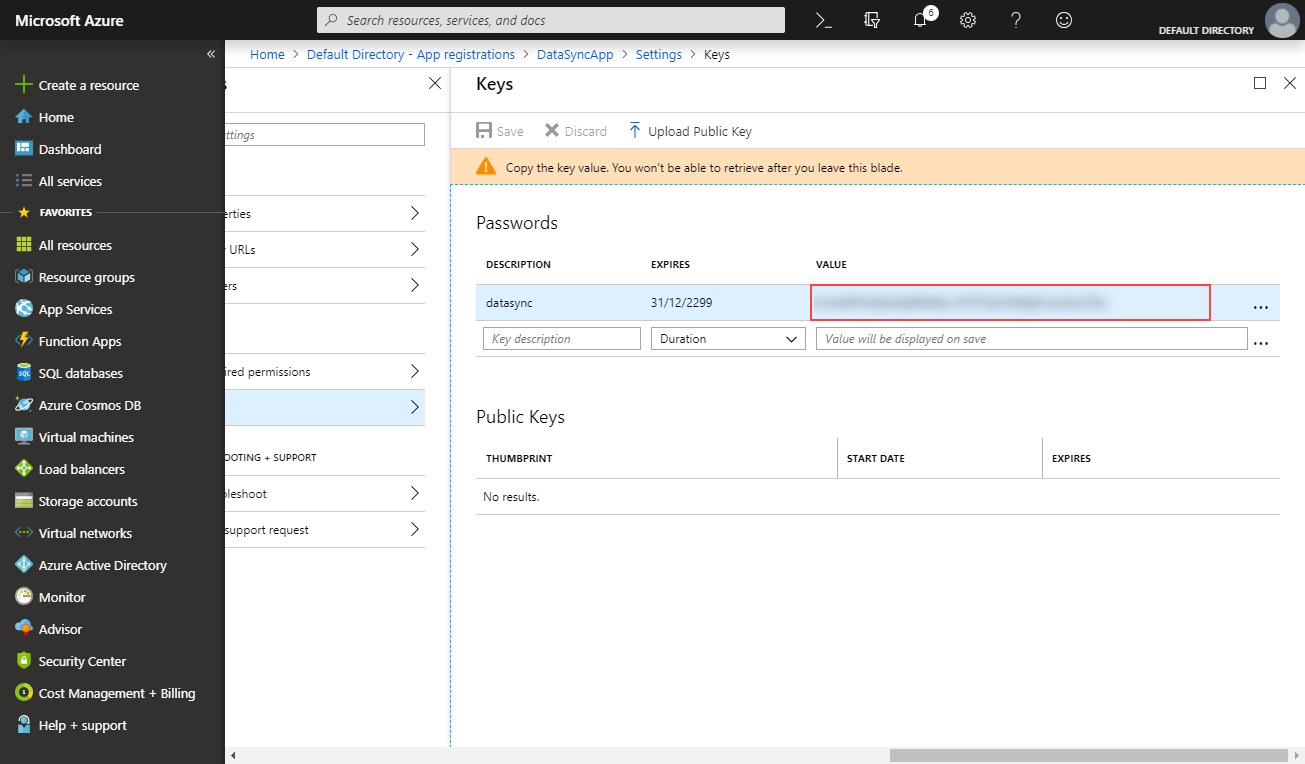
NB: Make sure to make a note of the key once it has been generated as it will not be shown again. If you loose the key you will need to create a new key.
Gather the Data for the Connection
Now lets collect a few details that we will need for the connection:
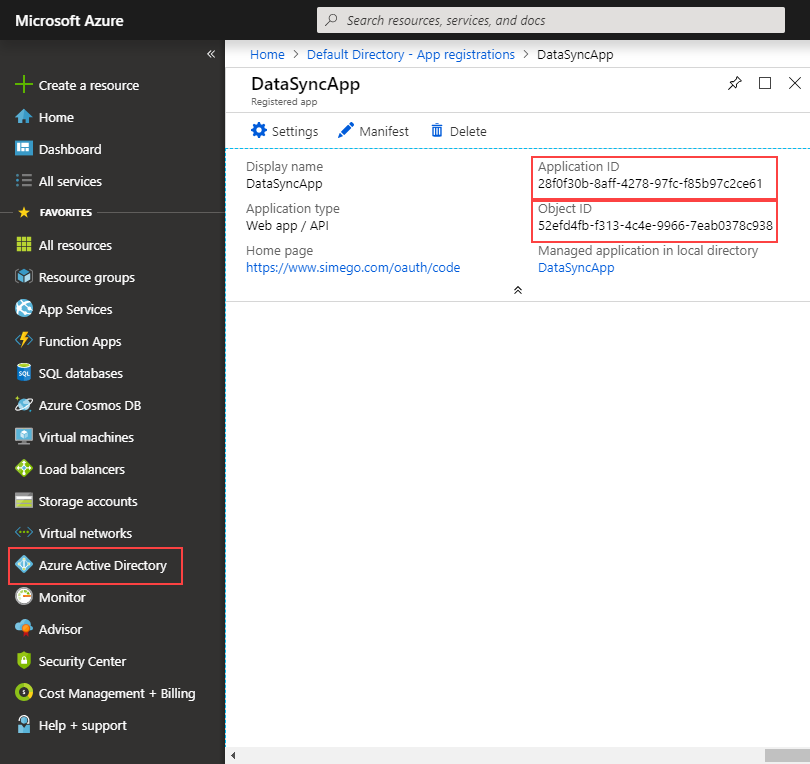
App ID & Object ID - These can be found by going to your app details.
Client Secret - This is the app key you made a note of earlier.
Resource - This will be the URL to your dynamics environment.
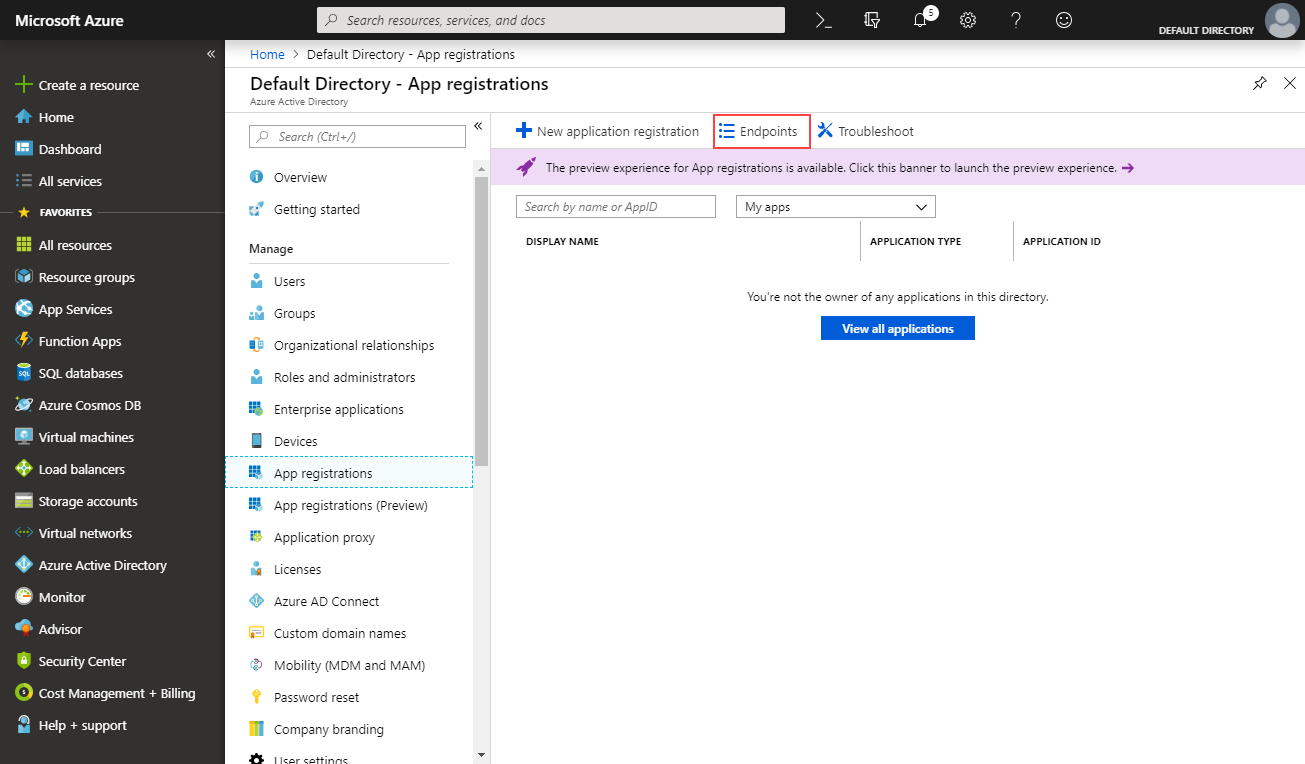
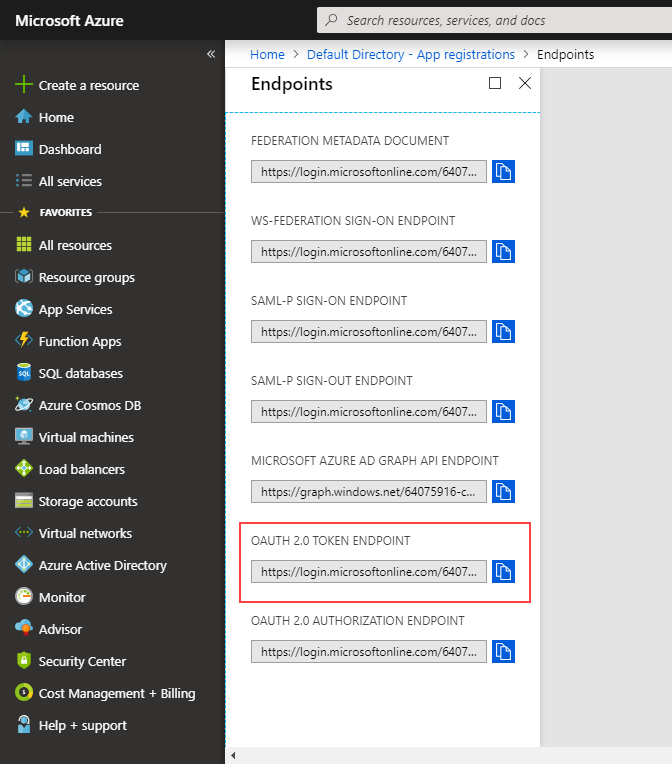
Token Endpoint - This can be found by going to app registrations, choosing Endpoints, and then copying the OAuth 2.0 Token Endpoint.
Add the Application to Dynamics
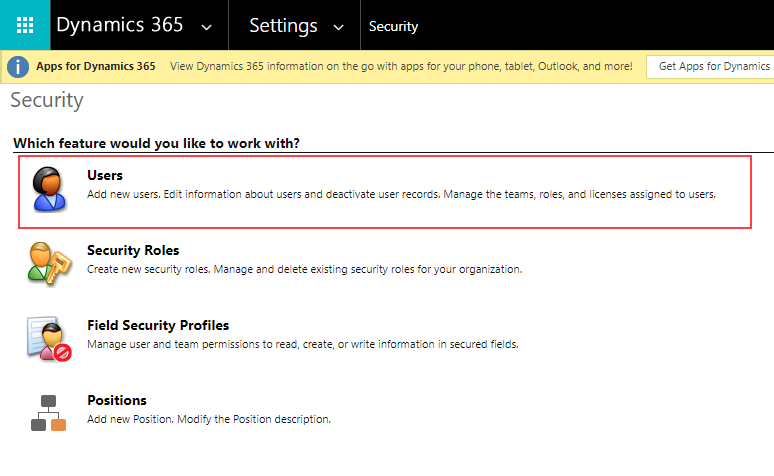
You need to add the application as an application user to Dynamics. To do this go to Settings > Security > Users.
Create a new user and using the drop down change the user from User to Application User.
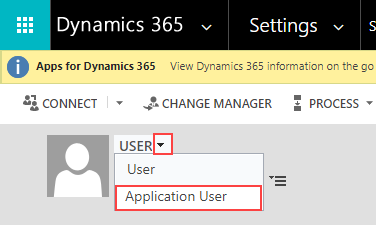
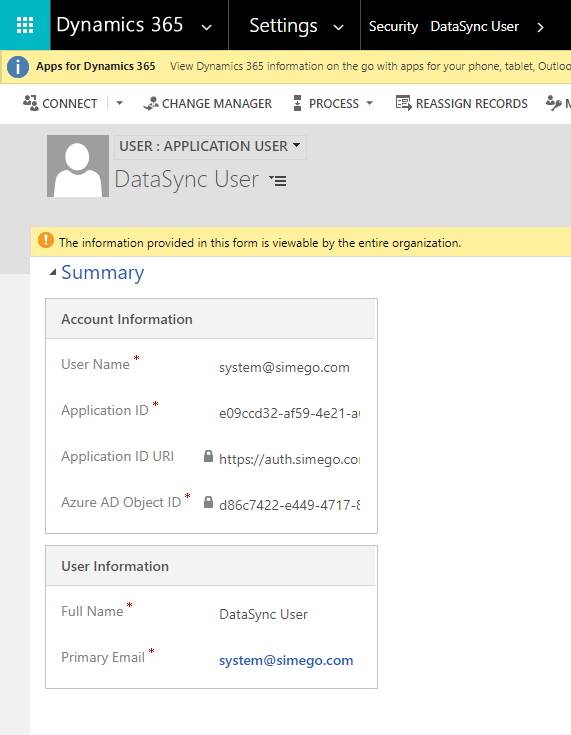
Then complete the following fields:
| Setting | Function |
|---|---|
| User Name | The Primary Email |
| Application ID | This is the Application ID gathered from the app details in Azure. |
| Application ID URI | We have used https://auth.simego.com/datasync but you can set this to whatever is correct for your organisation. |
| Azure AD Object ID | This is the ObjectID gathered from the app details in Azure. |
| Full Name | Name for the Application User. |
| Primary Email | An email to be used for logging in. |
Connecting in Data Sync
To connect to Dynamics OData Web API with Data Sync choose the OData 4.0 Connector and enter in the following details:
1 - ServiceURL
The service URL for dynamics OData Web API endpoint will be something like https://orgname.api.crm4.dynamics.com/api/data/v9.1/
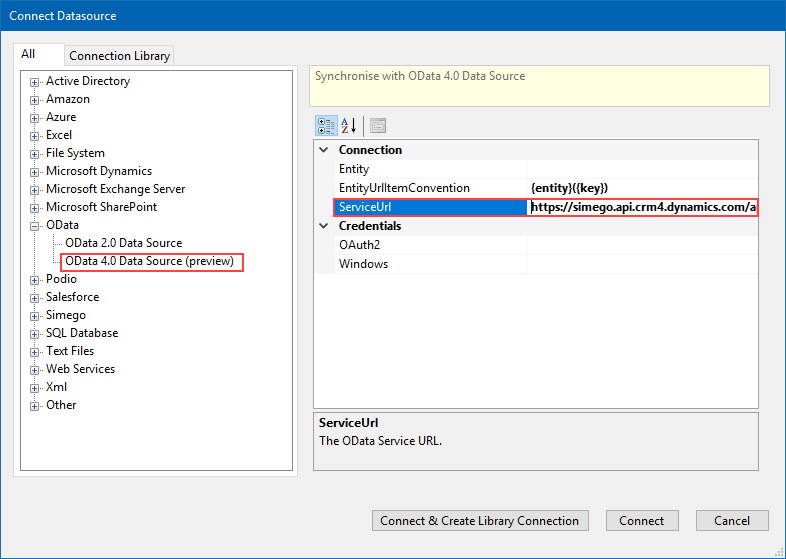
2 - OAuth2
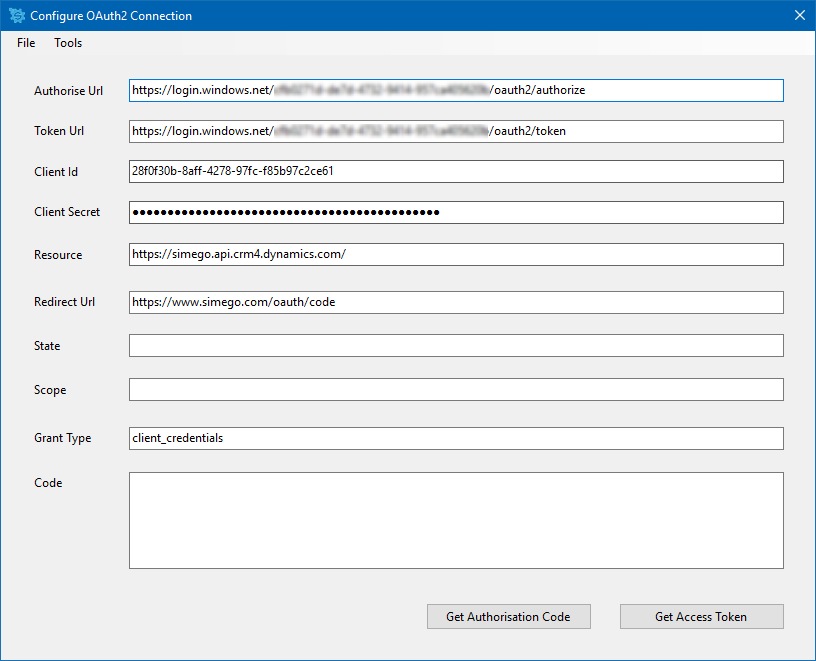
Click on the three dots to open the connection window, and complete the required fields. Once you are done click Get Access Token to go back to the connection window.
| Field | Value |
|---|---|
| Authorise URL | Set an OAuth Authorization URL, for example https://login.windows.net/{AzureDirectoryID}/oauth2/authorize |
| Token URL | Token Endpoint URL. |
| Client ID | App ID |
| Client Secret | App Key/Client Secret |
| Resource | Set this to your Dynamics URL. |
| Redirect URL | If you do not use the Simego OAuth helper URL and use Grant Type of authorization_code you will need to manually provide the authorization code. |
| State | To be left blank |
| Scope | to be left blank |
| Grant Type | client_credentials |
3 - EntityURLItemConvention
Leave this as {entity}({key}) for Dynamics.
4 - Windows
Not used with OAuth authentication.
5 - Entity
Finally choose your entity from the drop down.
Click Connect & Create Library Connection to save your connection. You are now connected to Dynamics OData Web API.
Troubleshooting
If you find that your project is not showing all of the entities that you expected then please note that the meta data for the environment is cached. So, for example, if you have created a new entity in your Dynamics environment since creating the connection this will not show up in your Data Sync project until you clear the cache file.
To clear the cache file go to Tools>Open Schema Cache Folder and delete the meta data folder. Now when the project connects it will write a new cache file with all the new entities of your environment.
