2Checkout / Avangate / Verifone
From version 3.0.2150 the Avangate/2Checkout/Verifone connector is available to download from the Simego GitHub page. For versions released before this and after 3.0.1234 it is available in the pre-installed connector list.
Installing the Connector
To install the 2Checkout connector stored in GitHub we have a Data Connector Installer built into Data Sync. To use this you need to have the URL to the zip file containing the connector code.
To get the url navigate to the release page in GitHub for the connector and then right click onto the Simego.DataSync.Providers.Avangate.zip file and copy the link.

Now open Data Sync and go to File > Install Data Connector. Then paste the link into the Data Connector URL field and click OK to install the connector.

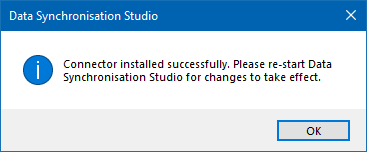
If the installation was successful you should get a confirmation popup and you now need to close all instances of Data Sync and then re-start the program.

If you get an error saying it could not install the connector because it is "Unable to access folder", then this is because the folder is locked by Ouvvi. Please stop your Ouvvi services and try again.
You can now access your connector from the connection window under Avangate.

Using the connector
This connector is read only, however by using project automation events you can write back to 2Checkout. You need to provide the vendor code, vendor secret and a list to connect to in the connection window. The documentation below will guide you on collecting the information you need.
VendorCode
To get your vendor code you will need to log in to your 2Checkout Dashboard and go to Integrations > Webhooks & API > API.
Copy the Merchant Code and enter this into Data Sync under VendorCode in the connection window.

For more information on the 2Checkout API, visit their documentation pages here.
VendorSecret
To get your vendor secret you will need to log in to your 2Checkout Dashboard and go to Integrations > Webhooks & API > API.
Copy the Secret Key and enter this into Data Sync under VendorSecret in the connection window.

For more information on the 2Checkout API, visit their documentation pages here.
List
Once you have added your VendorCode and VendorSecret, choose the list you wish to connect to in 2Checkout.
You can connect to the following:
| List | Description |
|---|---|
| Subscriptions | Return the information on the subscriptions held in your account |
| Promotions | Return the information on the promotions/discounts you have set up in your account |
Project Automation Events
Below you will find an example of how project automation events can be used to write back to 2Checkout.
In this example we are updating the description and discount value for a promotion.
public override void BeforeUpdateItem(object sender, DataCompareItemInvariant item, object identity)
    {
        var mapping = new DataSchemaMapping(SchemaMap, DataSchemaSide.DataSourceB);
        var toUpdate = item.ToUpdateItemDictionary(mapping);

        if(toUpdate.ContainsKey("DiscountValue"))
        {
            Trace.TraceInformation("Update Discount: {0}->{1}", toUpdate["Name"], toUpdate["DiscountValue"]);

            var helper = DataSourceB.GetWebRequestHelper();
            var info = DataSourceB.GetDatasourceInfo();
            var url = info.GetAvangateItemEndpointUrl((string)identity);
            // Get the Existing Promotion Details
            var promotion = helper.GetRequestAsJson(url);
            // Update the Discount
            promotion["Description"] = string.Format("{0}% partner discount", toUpdate["DiscountValue"]);
            promotion["Discount"]["Value"] = toUpdate["DiscountValue"].ToString();
            // Send it back
            helper.PutRequestAsJson(promotion, url);
        }
    }
